Performance Module#
The Performance Module allows users to manage employee performance evaluations, set objectives, track key results, and conduct feedback sessions. Below is a breakdown of each menu item and its functionality:
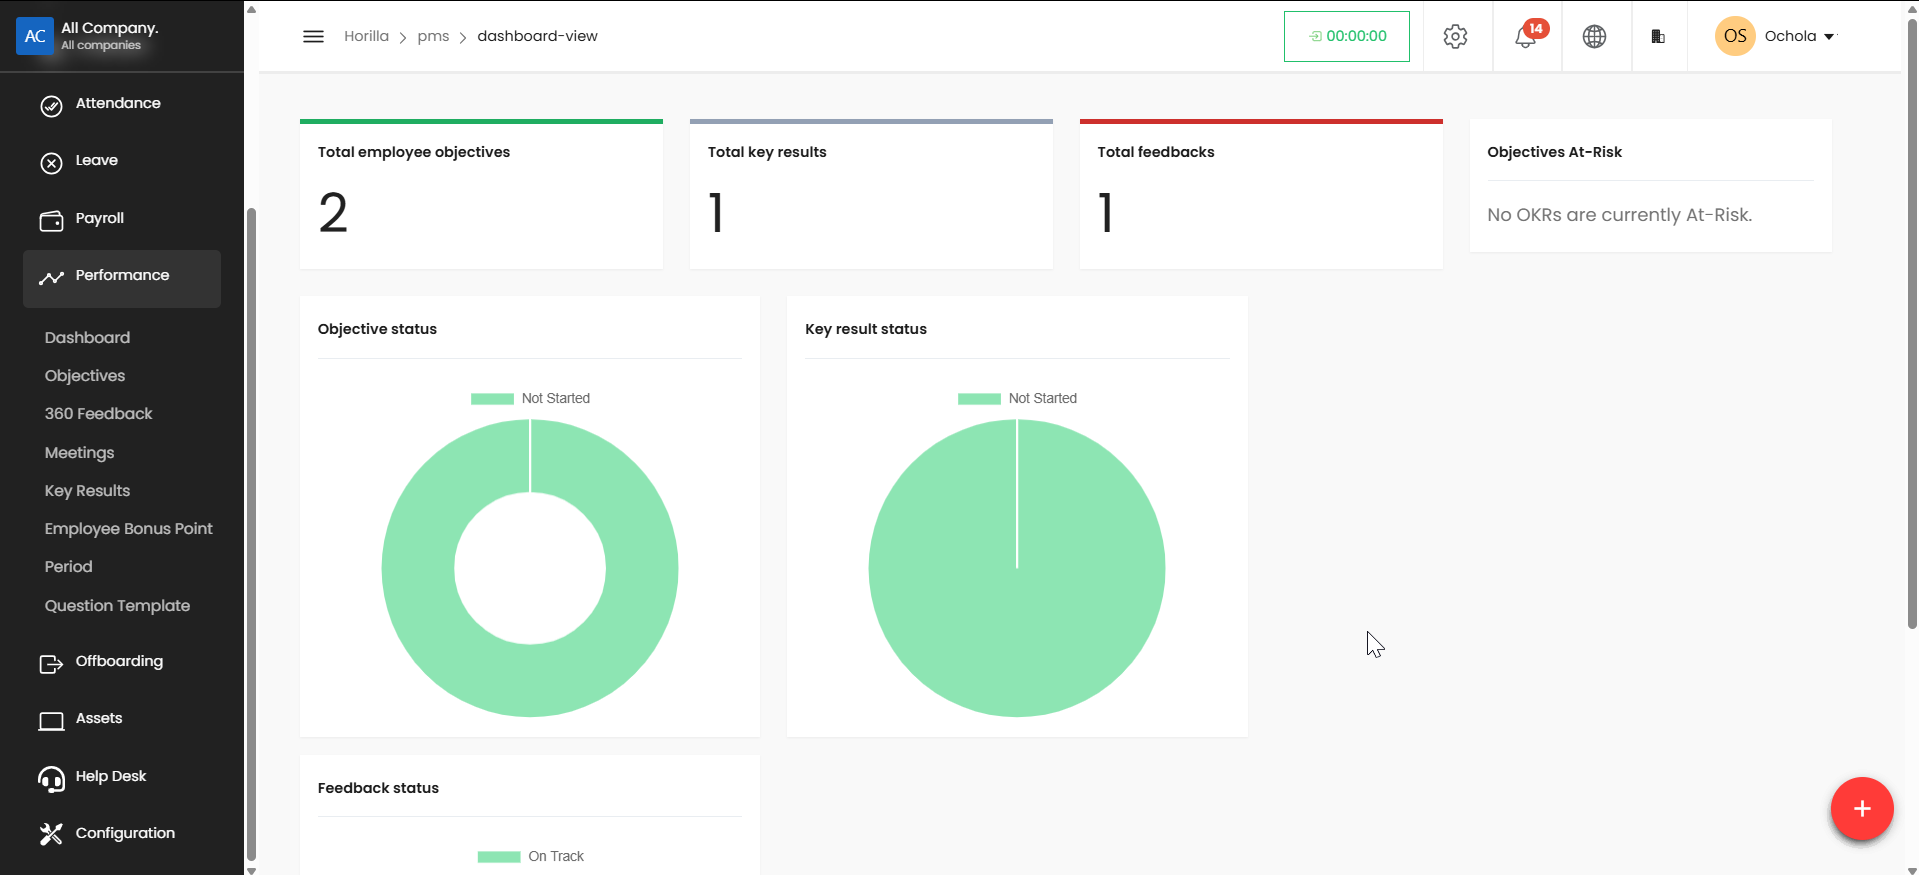
1. Dashboard#
Provides an overview of performance-related metrics.
Displays key performance indicators (KPIs), recent activity, and summaries.
2. Objectives#
Allows users to define performance goals.
Objectives can be assigned to employees or teams for tracking.
Viewing Available Objectives#
Navigate to the Objectives section by clicking "Objectives" in the left sidebar menu.
The system displays two tabs: "Self Objective" and "All Objective" (both showing 1 objective).
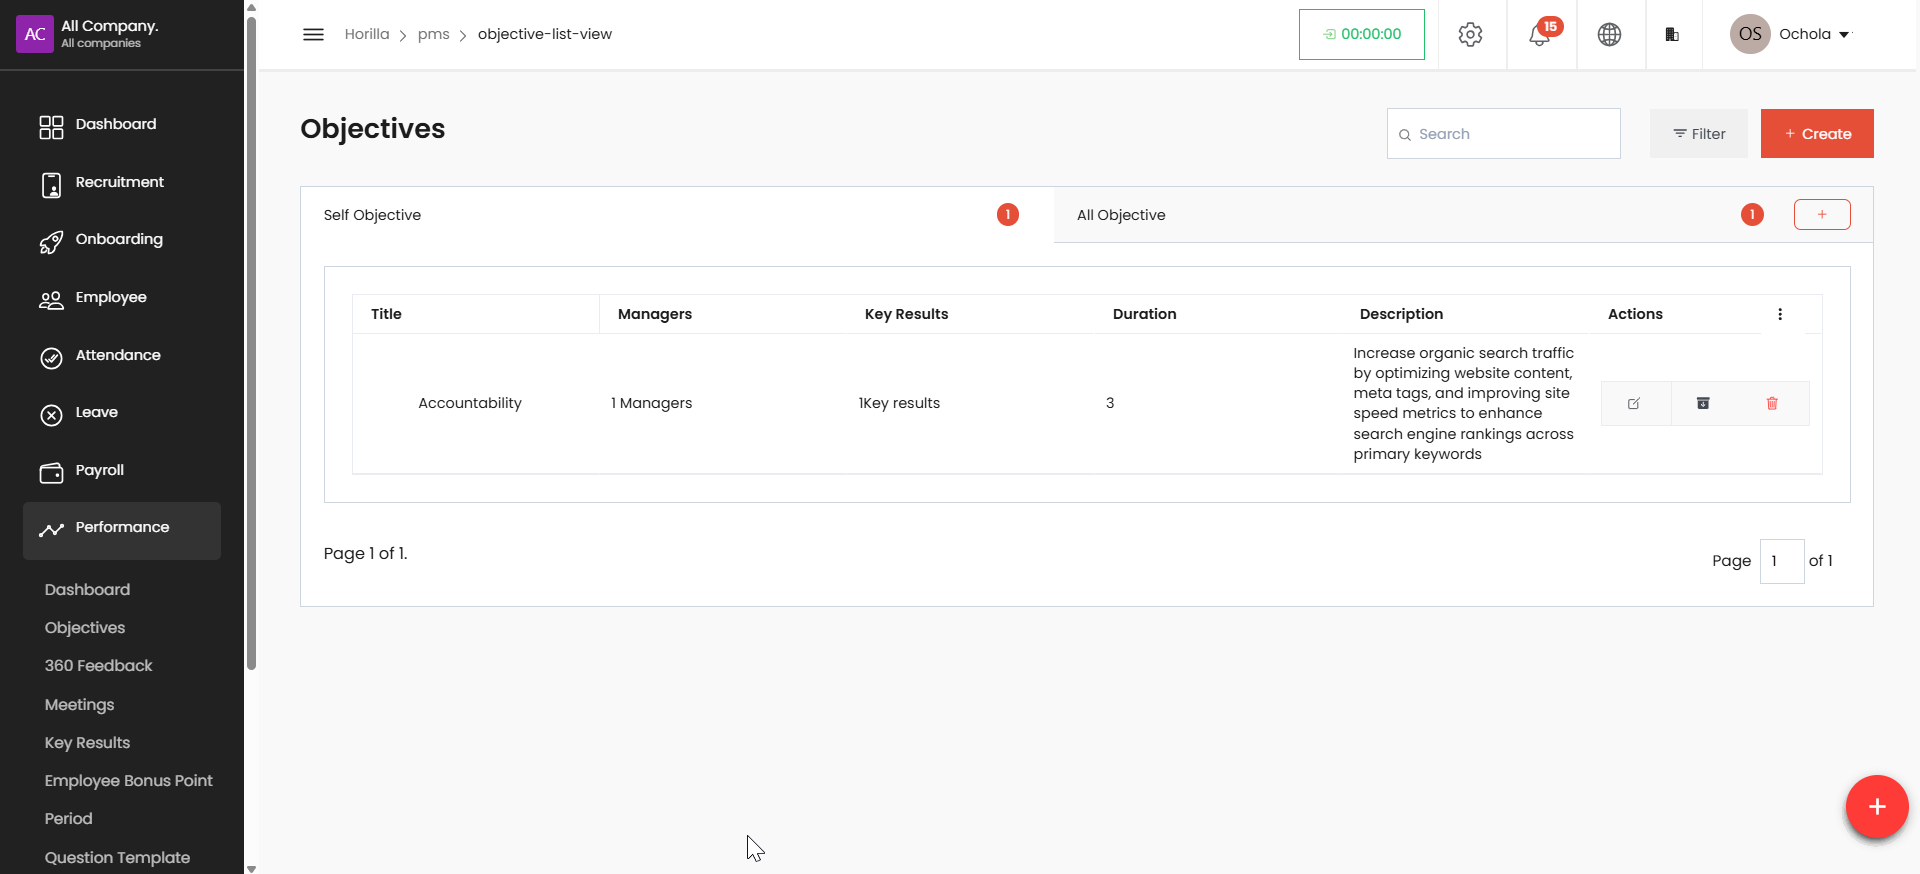
Use the search box in the top right to find specific objectives.
Apply filters using the "Filter" button if needed.
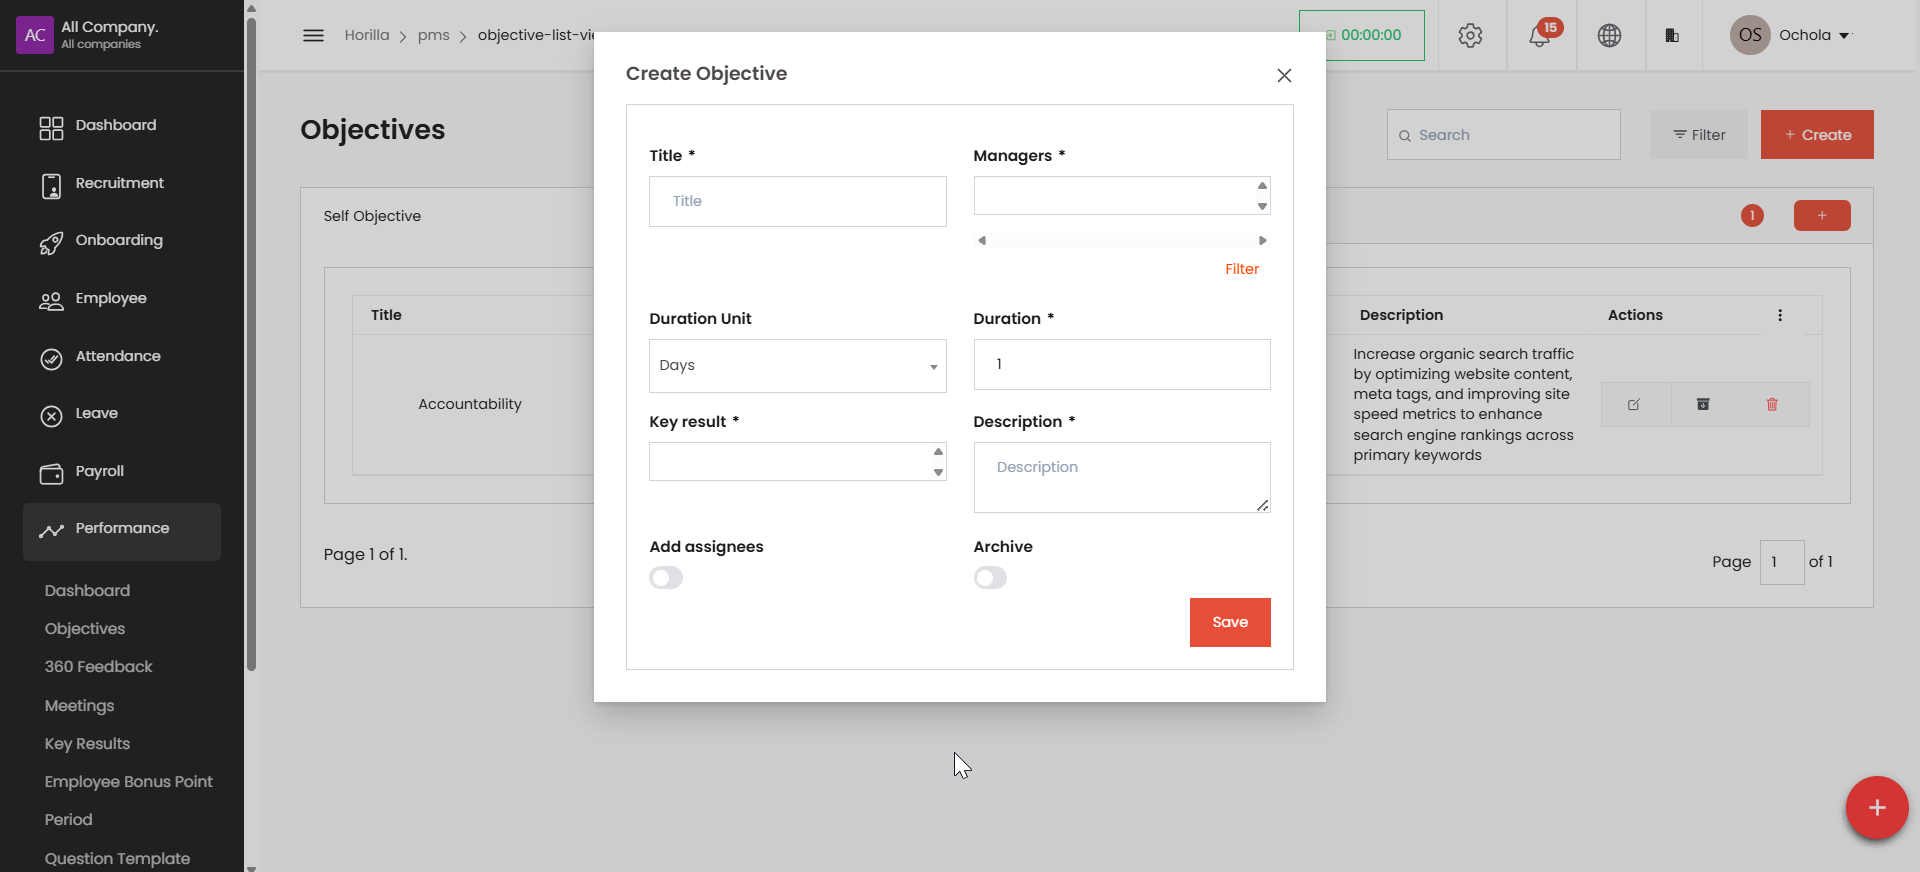
Creating a New Objective#
Click the red + Create button in the top right corner.
A "Create Employee Objective" modal window will appear with these fields:
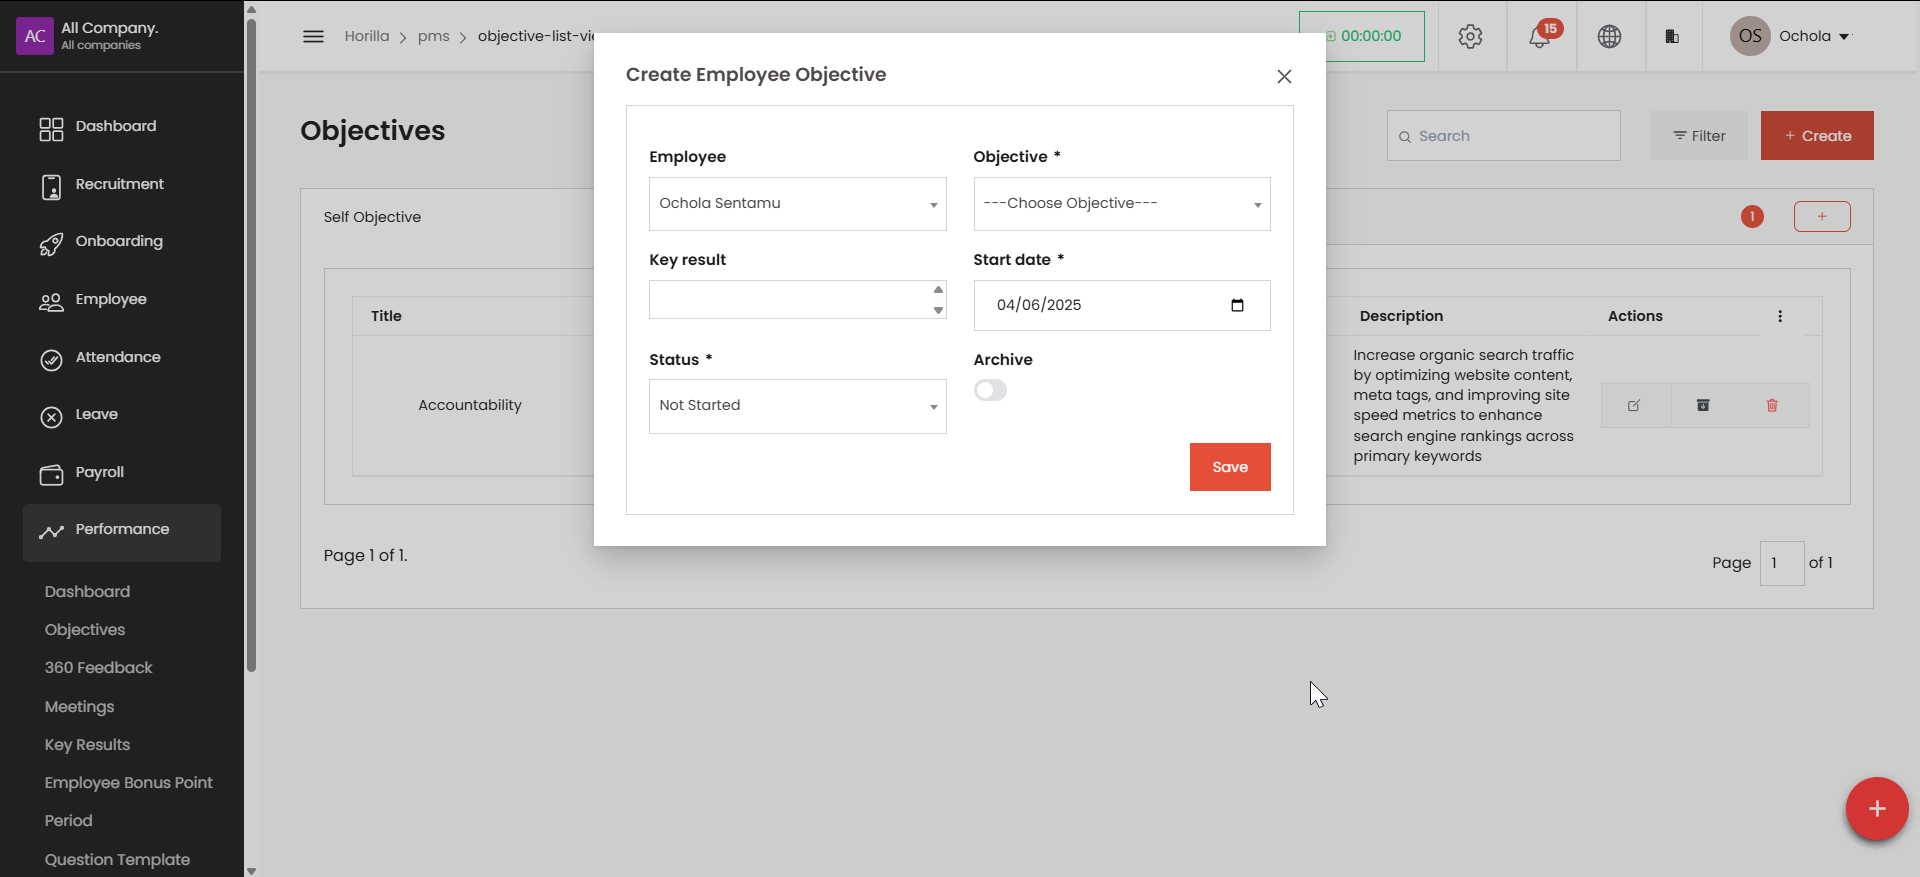
Employee: Select from dropdown (e.g., "Ochola Sentamu")
Objective: Choose from predefined objectives
Key result: Select associated key result
Start date: Set the beginning date (e.g., 04/04/2025)
Status: Select status (default is Not Started)
Archive: Toggle on/off to archive the objective
Fill in all required fields (marked with asterisks).
Click the red Save button at the bottom right of the modal.
Your new objective will appear in the objectives list.
Additional Options#
Use the + button in the Self Objective or All Objective tabs to add specific types of objectives.
Manage existing objectives using the action buttons in the Actions column.
Navigate between pages of objectives using the pagination controls at the bottom.
Use the floating + button in the bottom right for quick access to creation options.
Creating a New Objective#
From the left sidebar, select Performance.
Click on Objectives in the submenu.
Use the + button to create a new objective.
Fill in the required information for your objective.
Set appropriate timelines and metrics.
Save your new objective.
3. 360 Feedback#
Enables peer-to-peer, manager, and subordinate feedback.
Collects structured feedback from multiple sources.
Creating New Feedback#
Navigate to the Horilla Management System by clicking Performance in the left sidebar menu.
Select "Feedback" from the submenu or navigate to the feedback section.
Click the red + button in the bottom right corner or the Create button in the top right of the feedback list page.
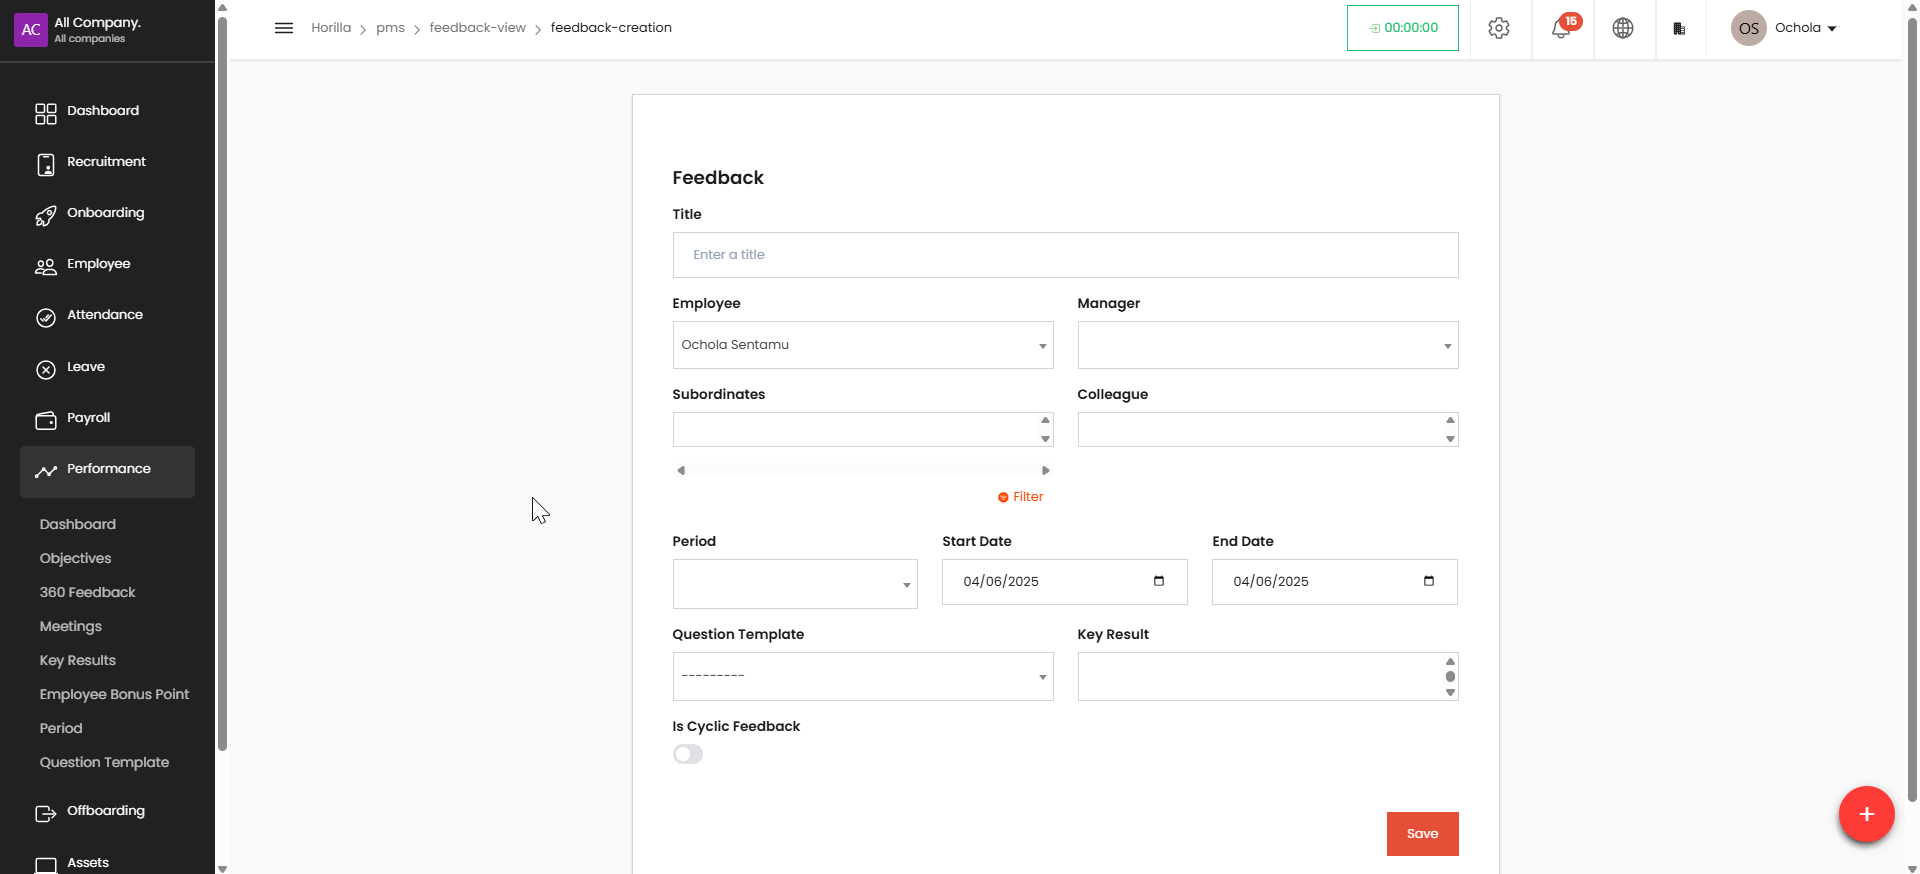
Fill out the feedback creation form with these details:
Enter a title for the feedback
Select the employee receiving feedback (dropdown shows "Ochola Sentamu" in the example)
Choose a manager from the dropdown
Add subordinates and colleagues if applicable
Set the feedback period
Enter start and end dates (currently showing 04/06/2025)
Select a question template
Add key results
Toggle Is Cyclic Feedback if this is recurring feedback
Click the Save button to create the feedback entry.
Viewing Available Feedback#
Access the Feedback view section by clicking Performance in the left sidebar.
Choose 360 Feedback from the submenu.
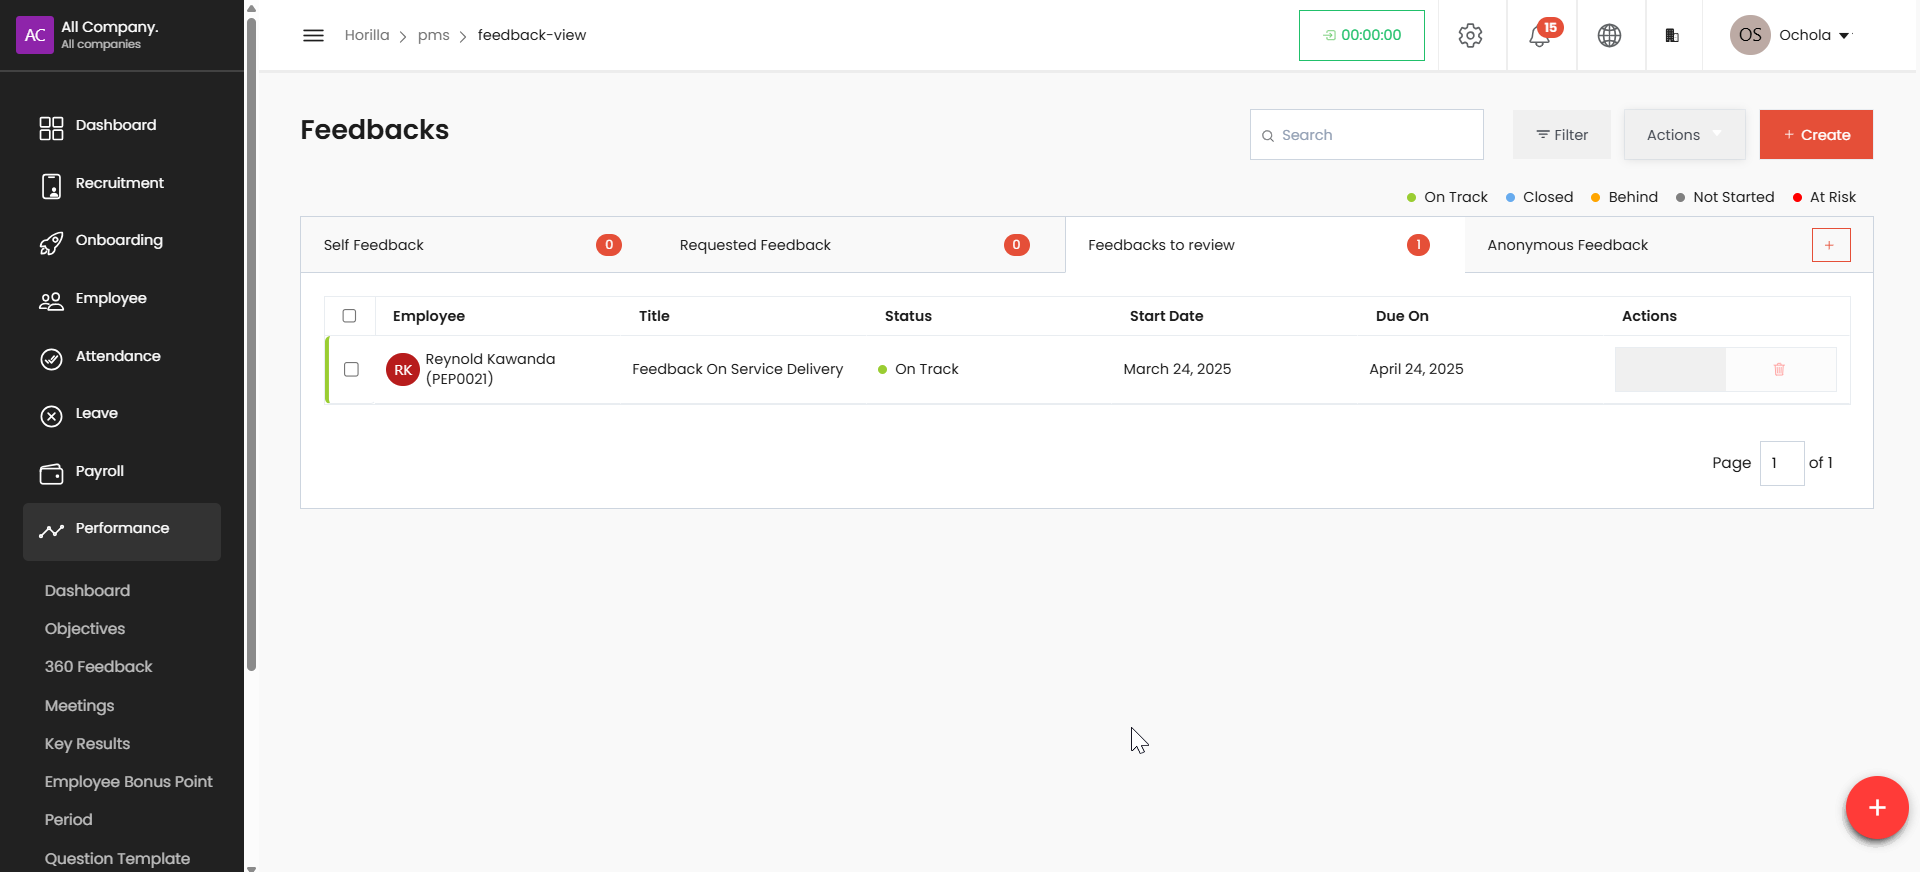
The feedback overview page displays several tabs:
Self Feedback (0), Requested Feedback (0), Feedbacks to review (1), Anonymous Feedback
The main table shows all feedback with details including:
Employee name and ID, Feedback title, Status (e.g., "On Track"), Start date, Due date, Available actions
Use the search bar to filter feedback by keywords.
Use the status filter options to view feedback by status:
On Track (green), Closed (blue), Behind (yellow), Not Started (gray), At Risk (red)
4. Meetings#
Facilitates scheduling and managing performance-related meetings.
Users can log meeting discussions and action points.
Viewing Meetings#
Navigate to the System by clicking "Performance" in the left sidebar menu.
Select "Meetings" from the submenu.
The meetings overview page displays a table with all scheduled meetings including:
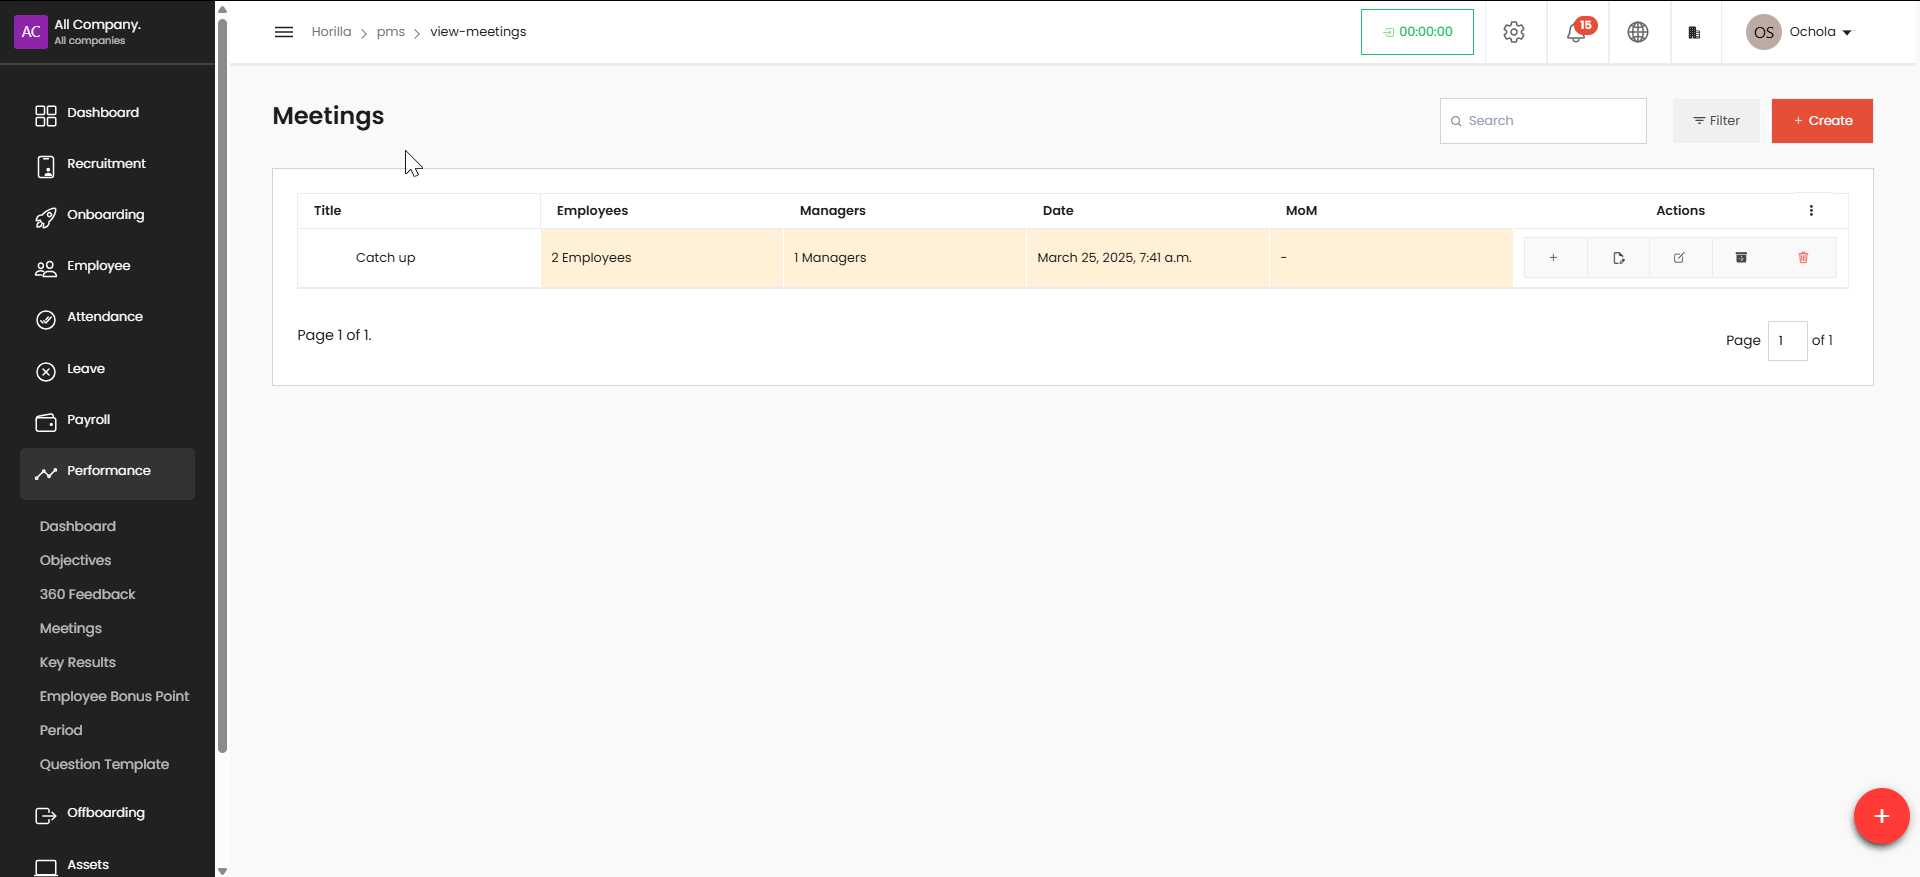
Title of the meeting
Number of employees attending
Number of managers attending
Date and time of the meeting
MoM (Minutes of Meeting) status
Available actions#
Use the search bar to filter meetings by keywords.
Use the filter option to narrow down the meeting list by specific criteria.
Creating a New Meeting#
From the meetings overview page, click the red Create button in the top right corner.
In the meeting creation form, fill in the required fields (marked with asterisks):
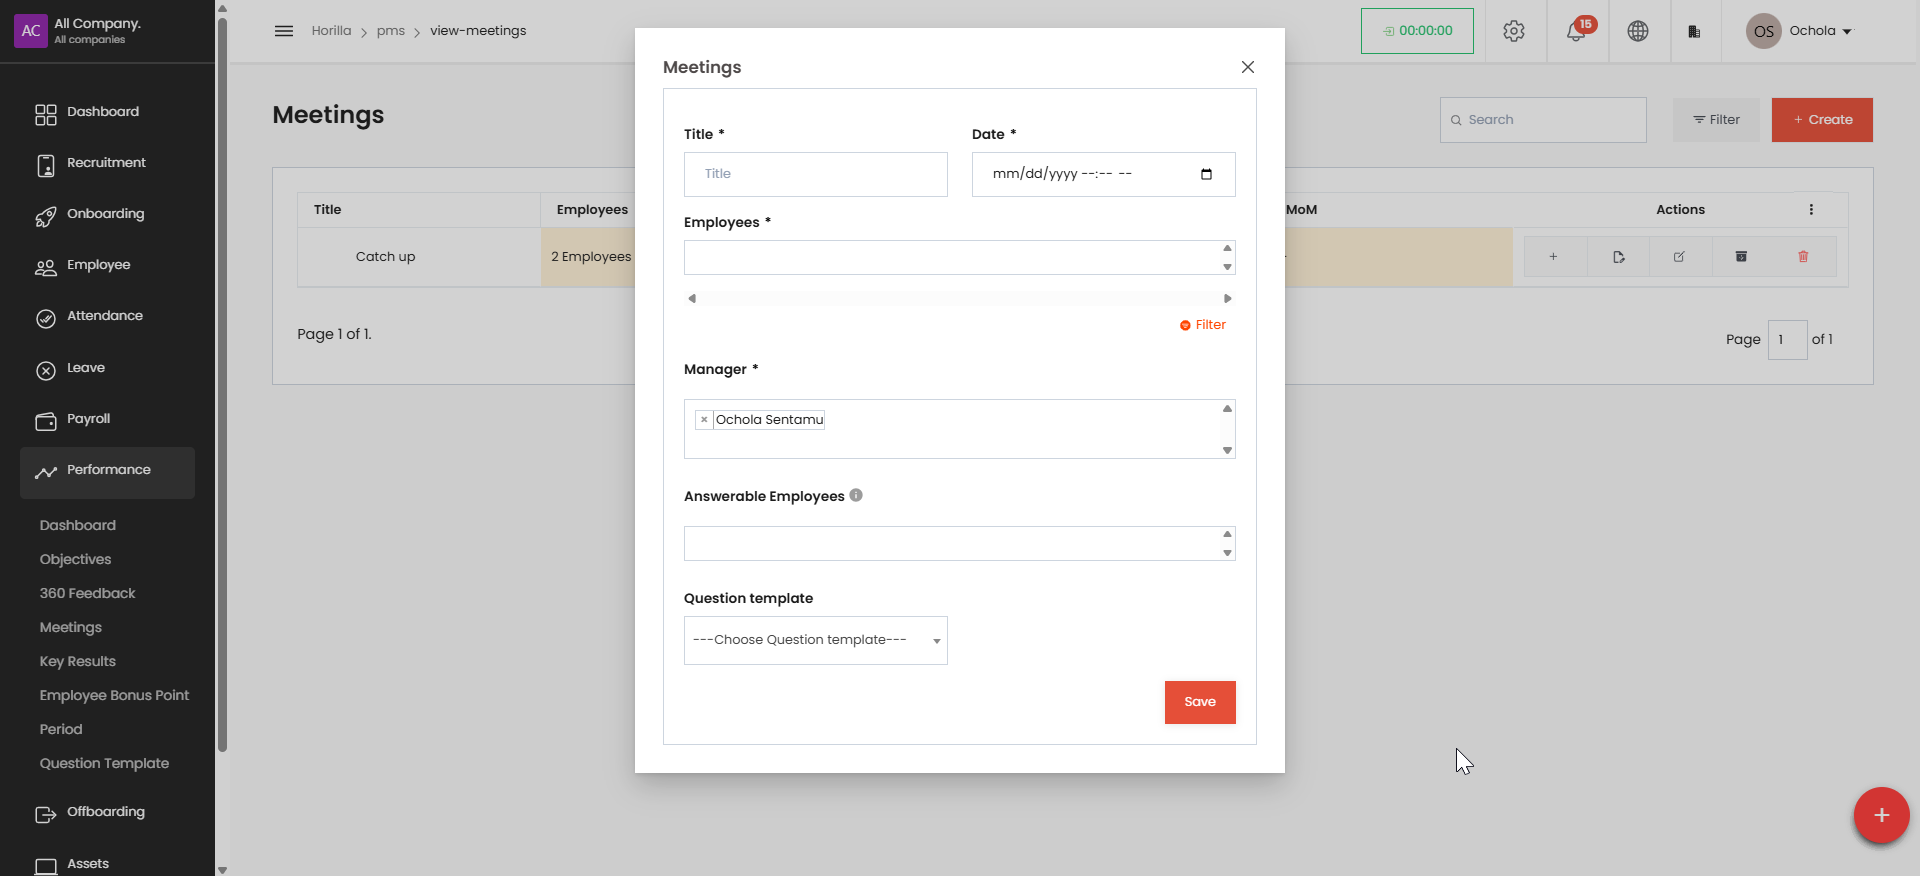
Title: Enter a descriptive name for the meeting
Date: Select the meeting date and time using the date picker
Employees: Select the employees who should attend the meeting
Manager: Choose the manager for the meeting (currently showing "Ochola Sentamu" as an option)
Optional fields include:#
Answerable Employees: Specify employees who will be responsible for action items
Question template: Select a predefined question template if applicable
Click the "Filter" button if you need to filter the employee selection list. Once all information is entered, click the "Save" button to create the meeting.
Managing Existing Meetings#
From the meetings overview page, use the action buttons in the Actions column to:
Add additional items/participants (+ button)
View meeting details (document icon)
Edit meeting information (pencil icon)
Delete the meeting (trash icon)
Access additional options (red document icon)
The MoM column indicates whether minutes of meeting have been created (currently showing "-" for the Catch up meeting).
5. Key Results#
Tracks measurable outcomes linked to objectives.
Helps assess progress and goal completion.
Viewing Key Results#
To navigate to the Key Results
Access via Performance > Key Results in left sidebar
View options include list view and grid view
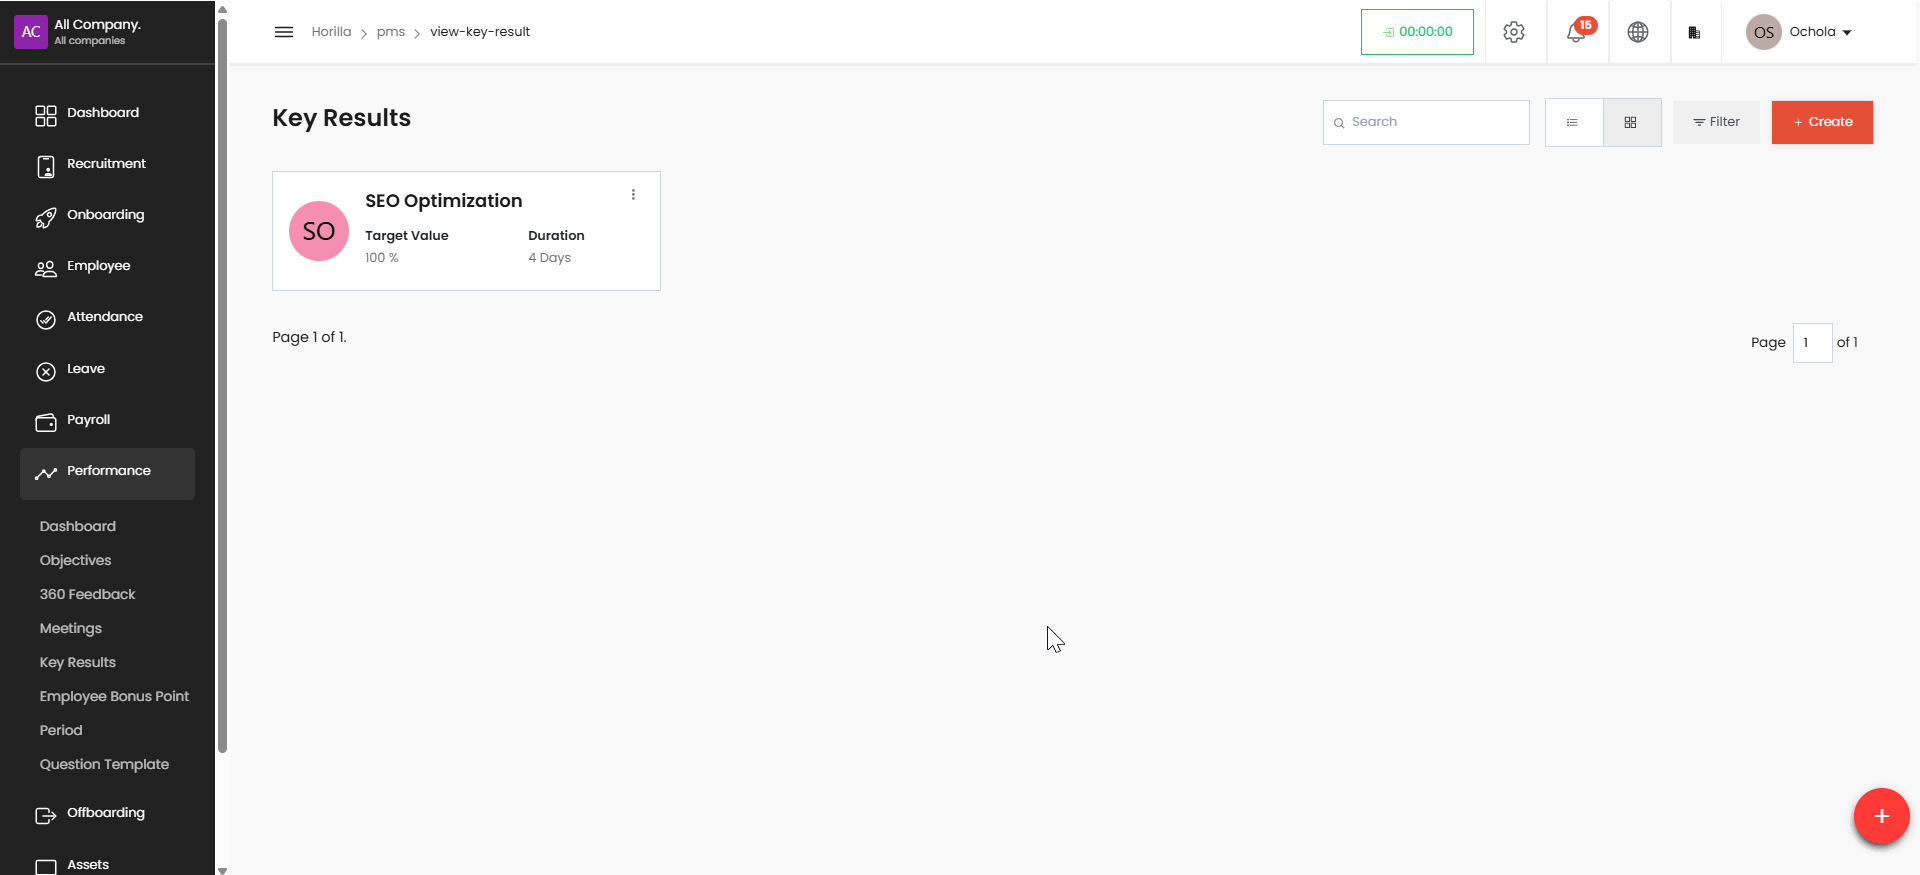
Search and filter functions available
Creating a Key Result#
Click the red "Create" button in top right
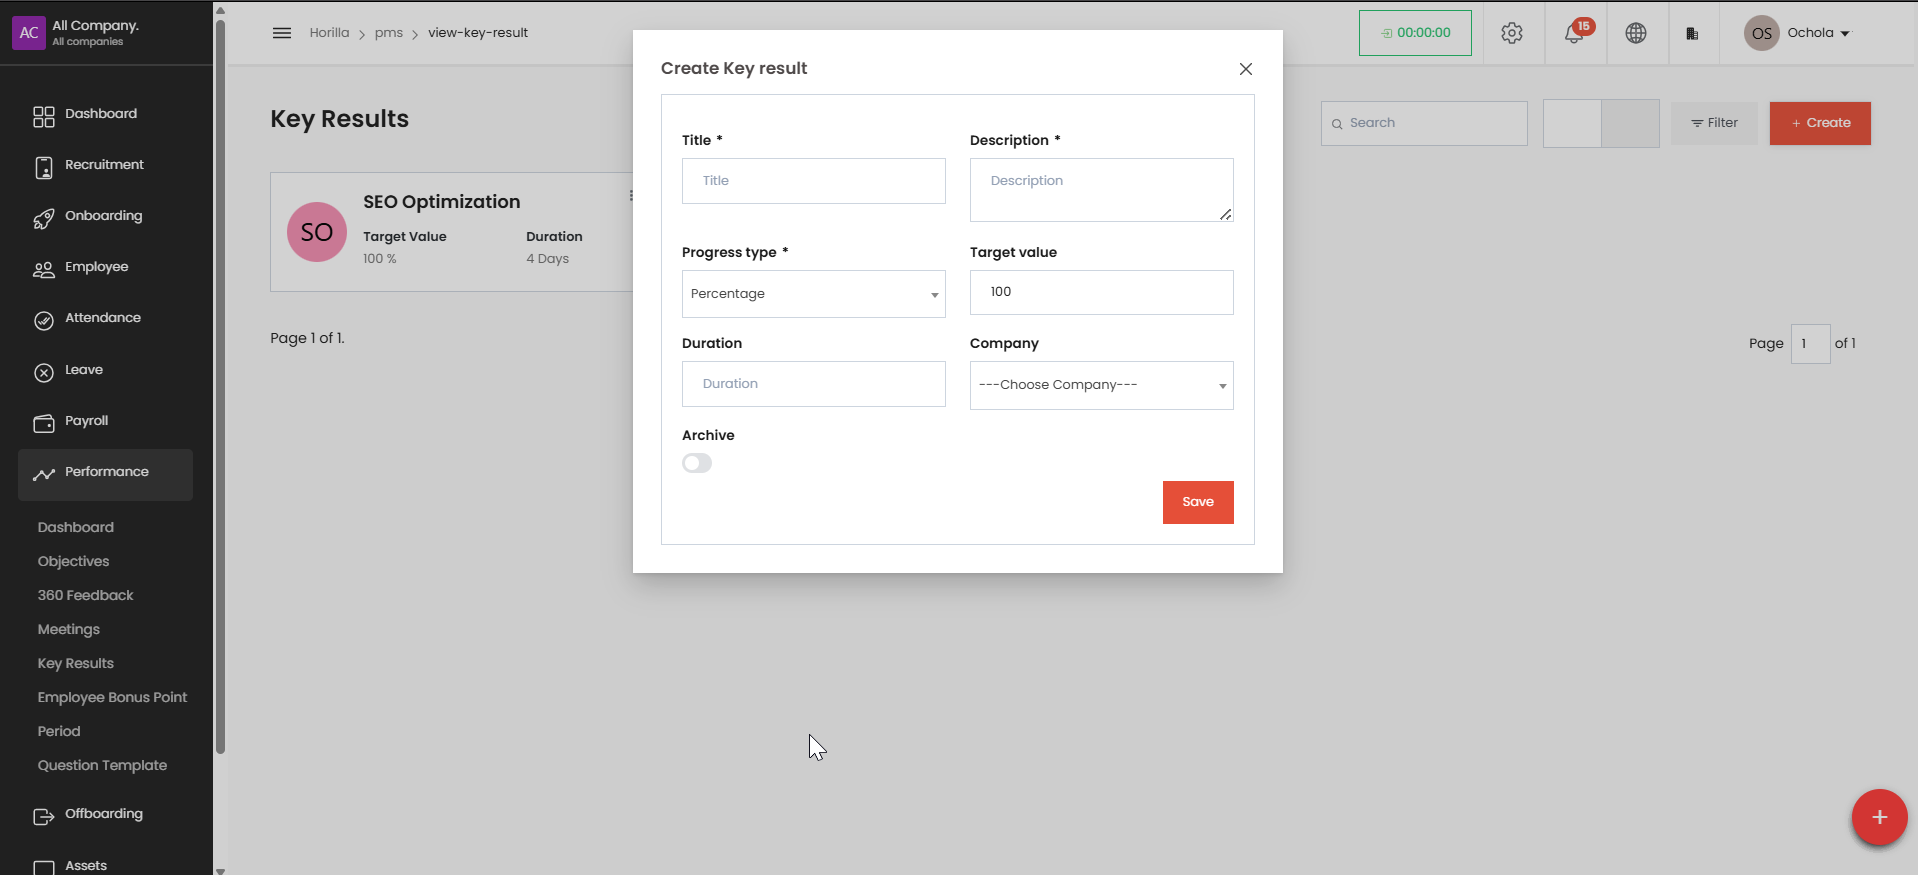
Complete required fields (marked with asterisks):
Title: Name your key result
Description: Explain the objective
Progress type: Select "Percentage" or other measurement
Target value: Set numeric goal (example shows 100)
Optional fields:
Duration: Set timeframe
Company: Select from dropdown
Archive toggle: Turn on to archive immediately
Click "Save" when finished
6. Employee Bonus Point#
Displays employee performance points based on achievements.
Can be used for performance-based rewards.
Viewing Bonus Points#
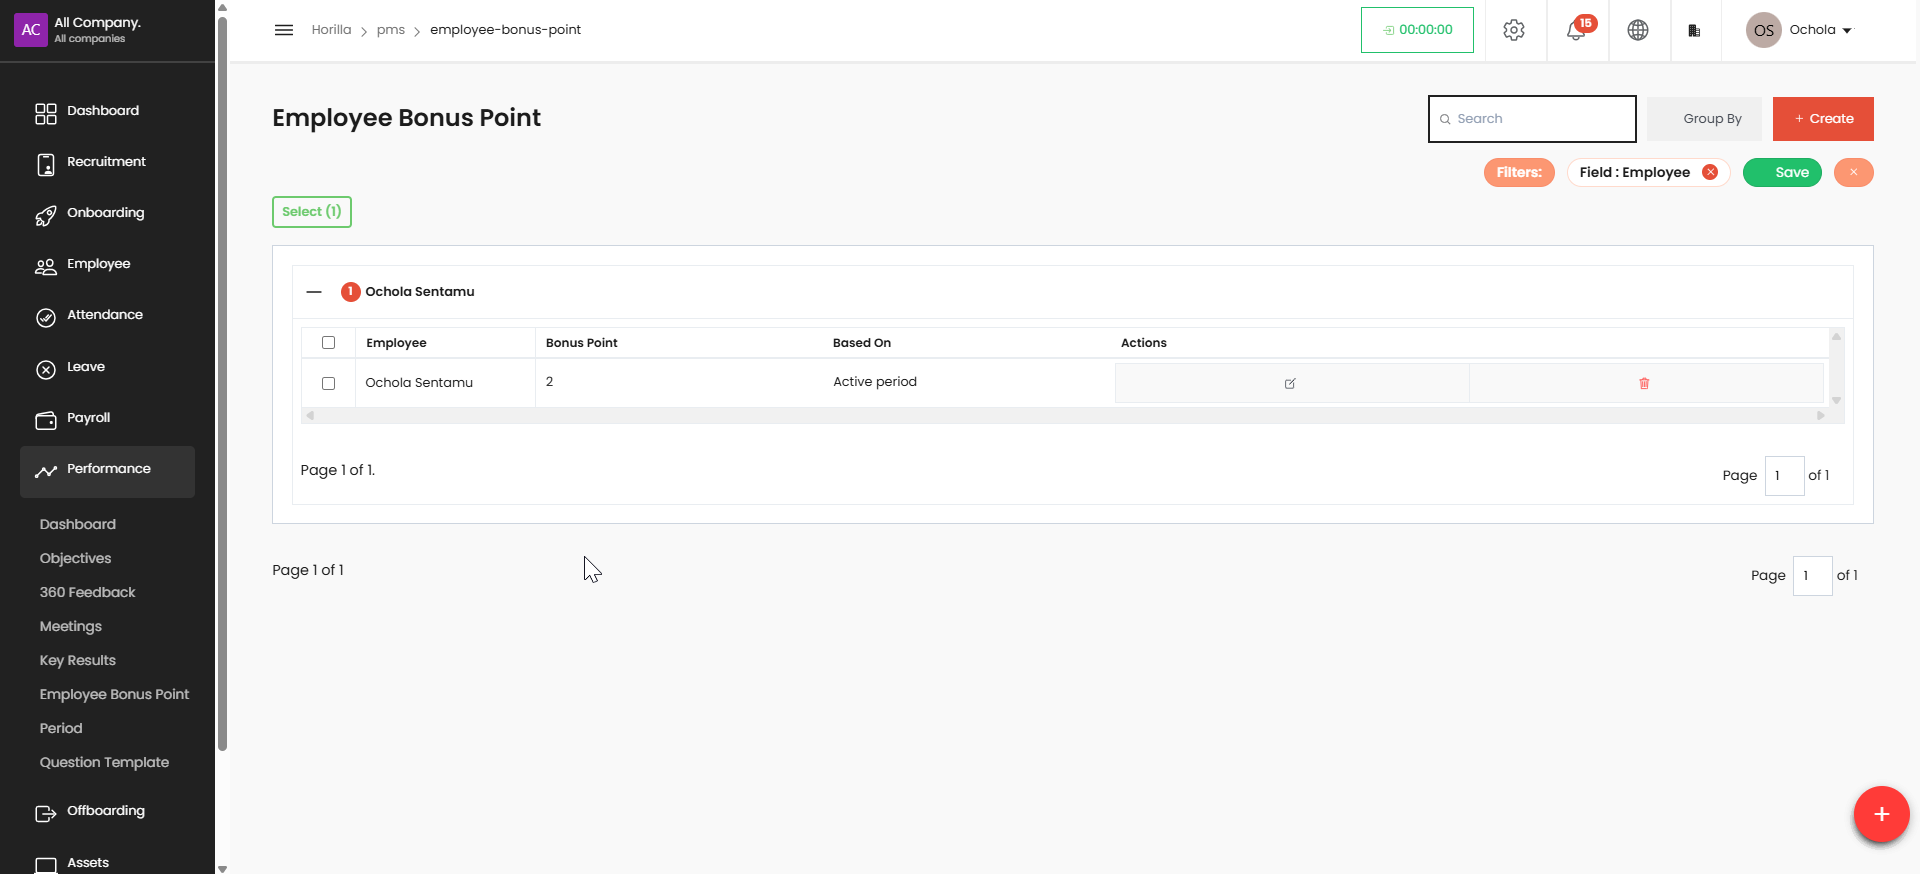
Access via Performance > Employee Bonus Point in left sidebar
Points are based on "Active period"
Search function available in top right
Group By option for organizing data when viewing
Filter currently set to "Field: Employee"
Managing Existing Bonus Points#
Select specific entries using checkboxes
"Select (1)" button allows bulk selection
Actions available include:
Edit (pencil icon), Delete (trash icon)
Save button in green preserves any changes
Creating a Bonus Point#
Click the red "Create" button in top right
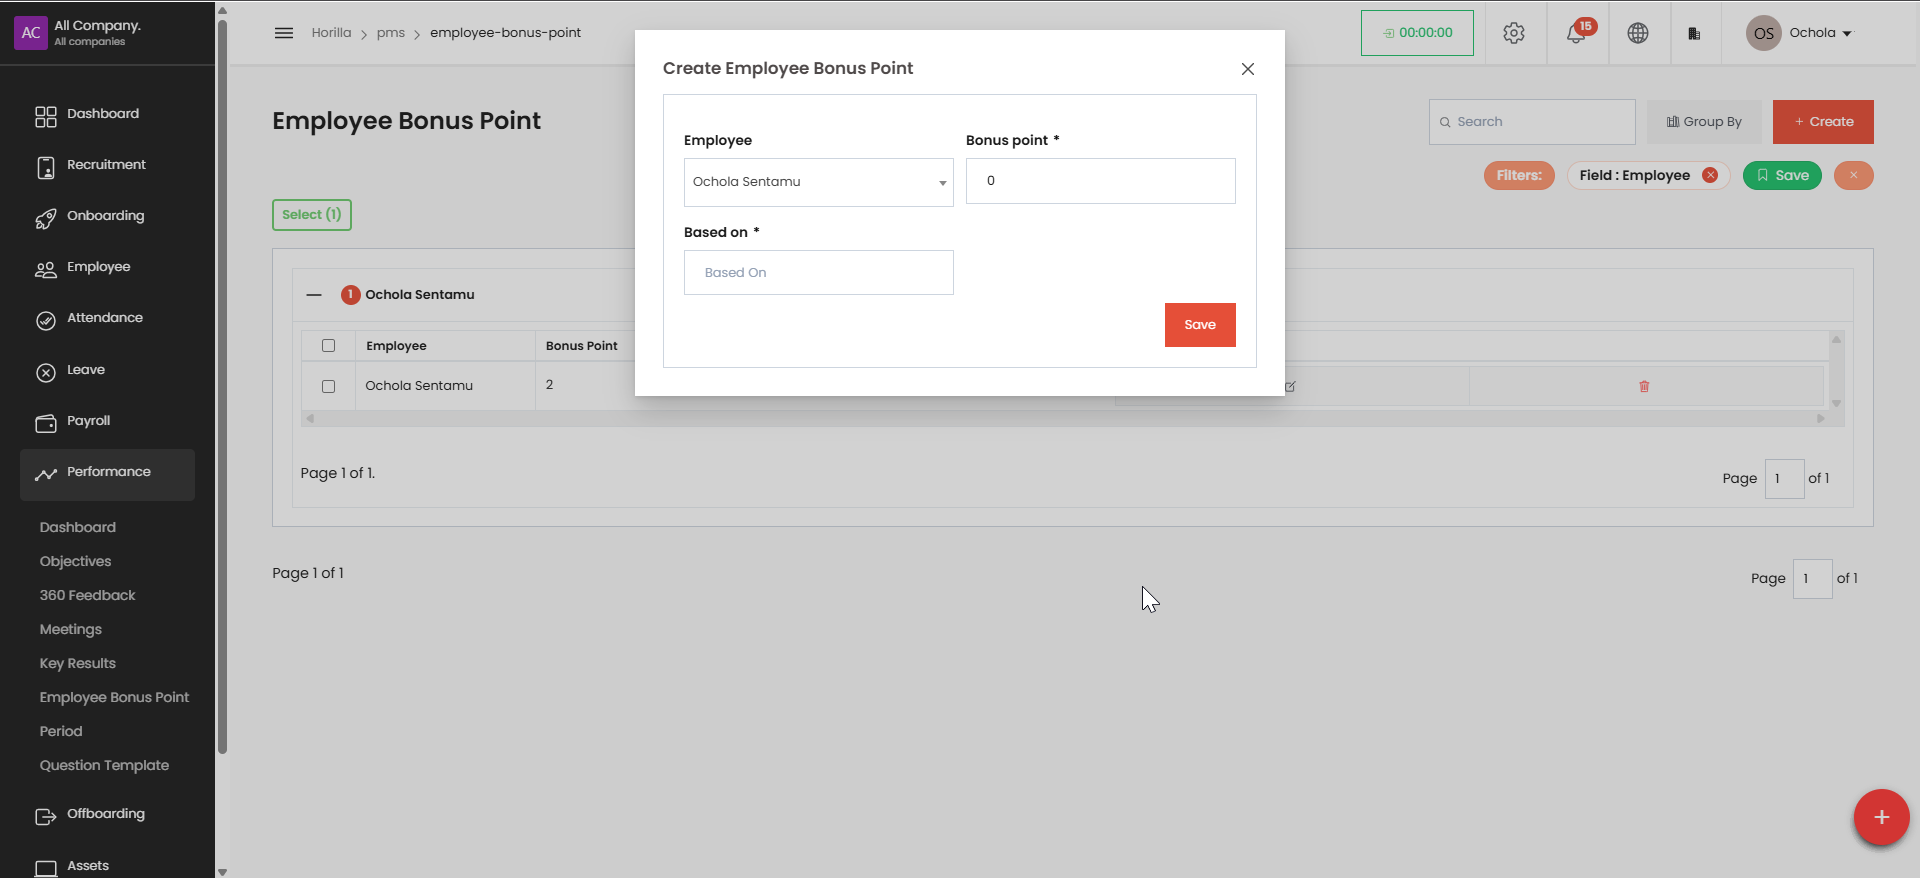
Complete required fields (marked with asterisks):
Employee: Select from dropdown (example shows "Ochola Sentamu")
Bonus point: Enter numeric value
Based on: Specify reason or criteria for bonus
Click "Save" when finished
7. Period#
Defines the evaluation cycle (e.g., quarterly, annually).
Helps in setting timelines for performance assessments.
View Period Details#
Go to the sidebar.
Click Performance > Period.
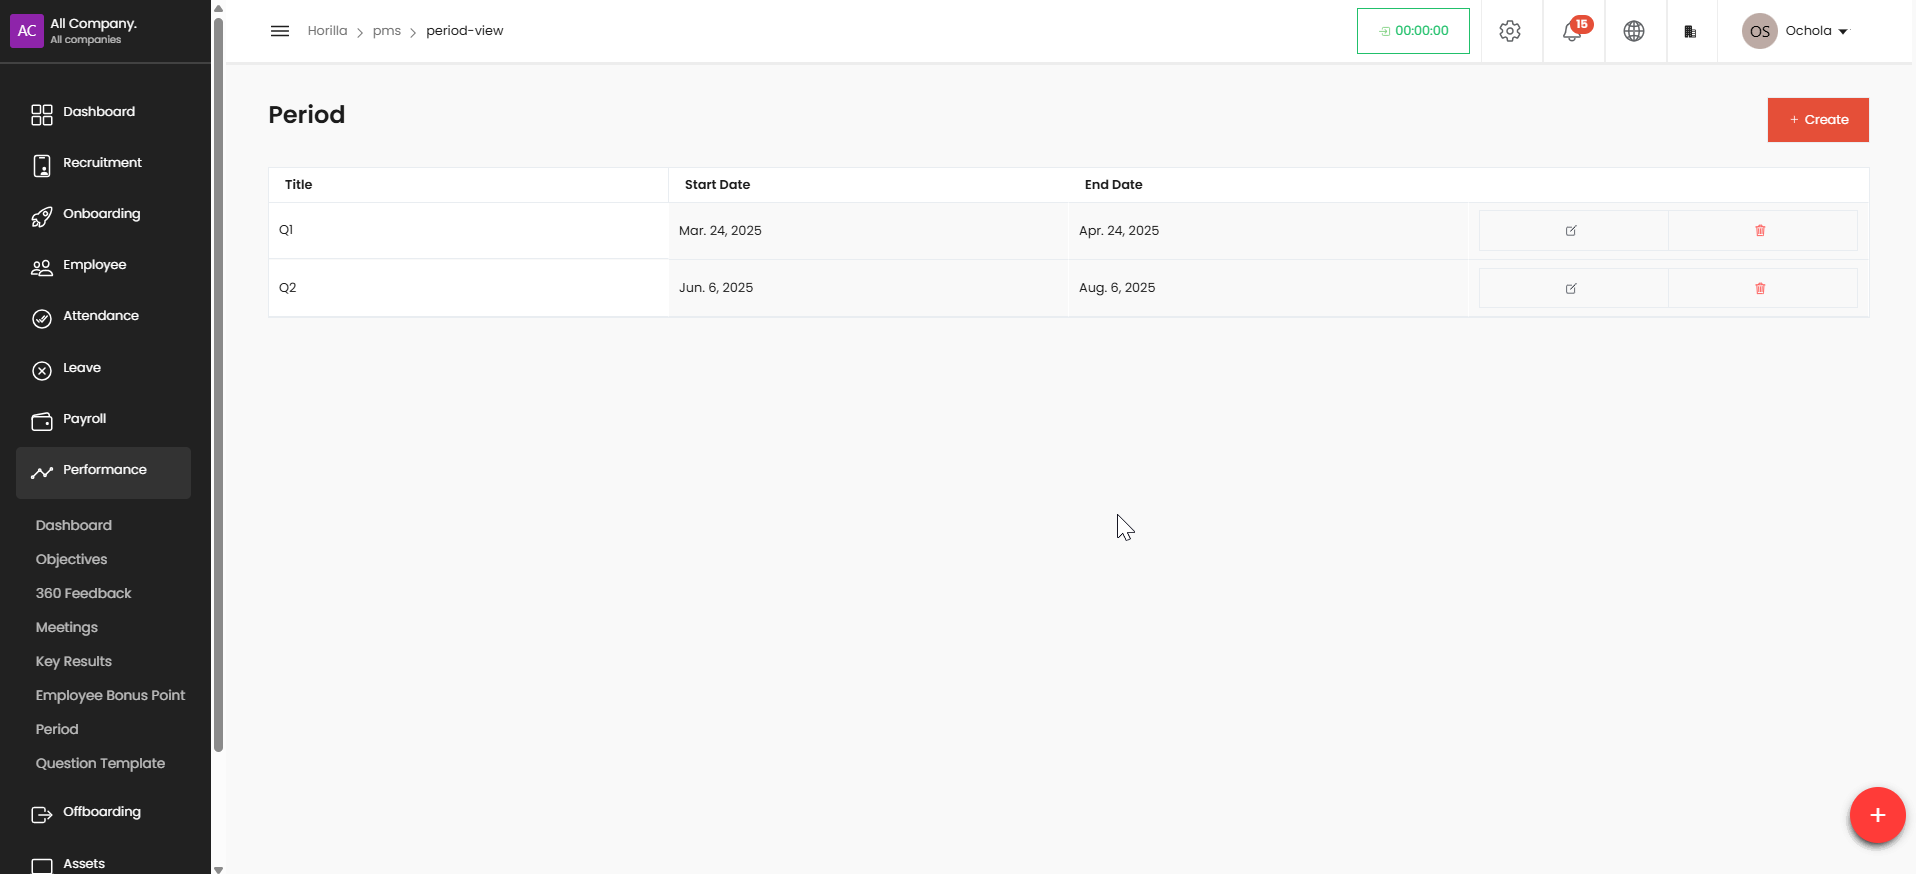
You’ll see a list of existing periods (e.g., Q1, Q2) with their start and end dates.
➕ Create a Period#
Click the red+ Create button (top right).
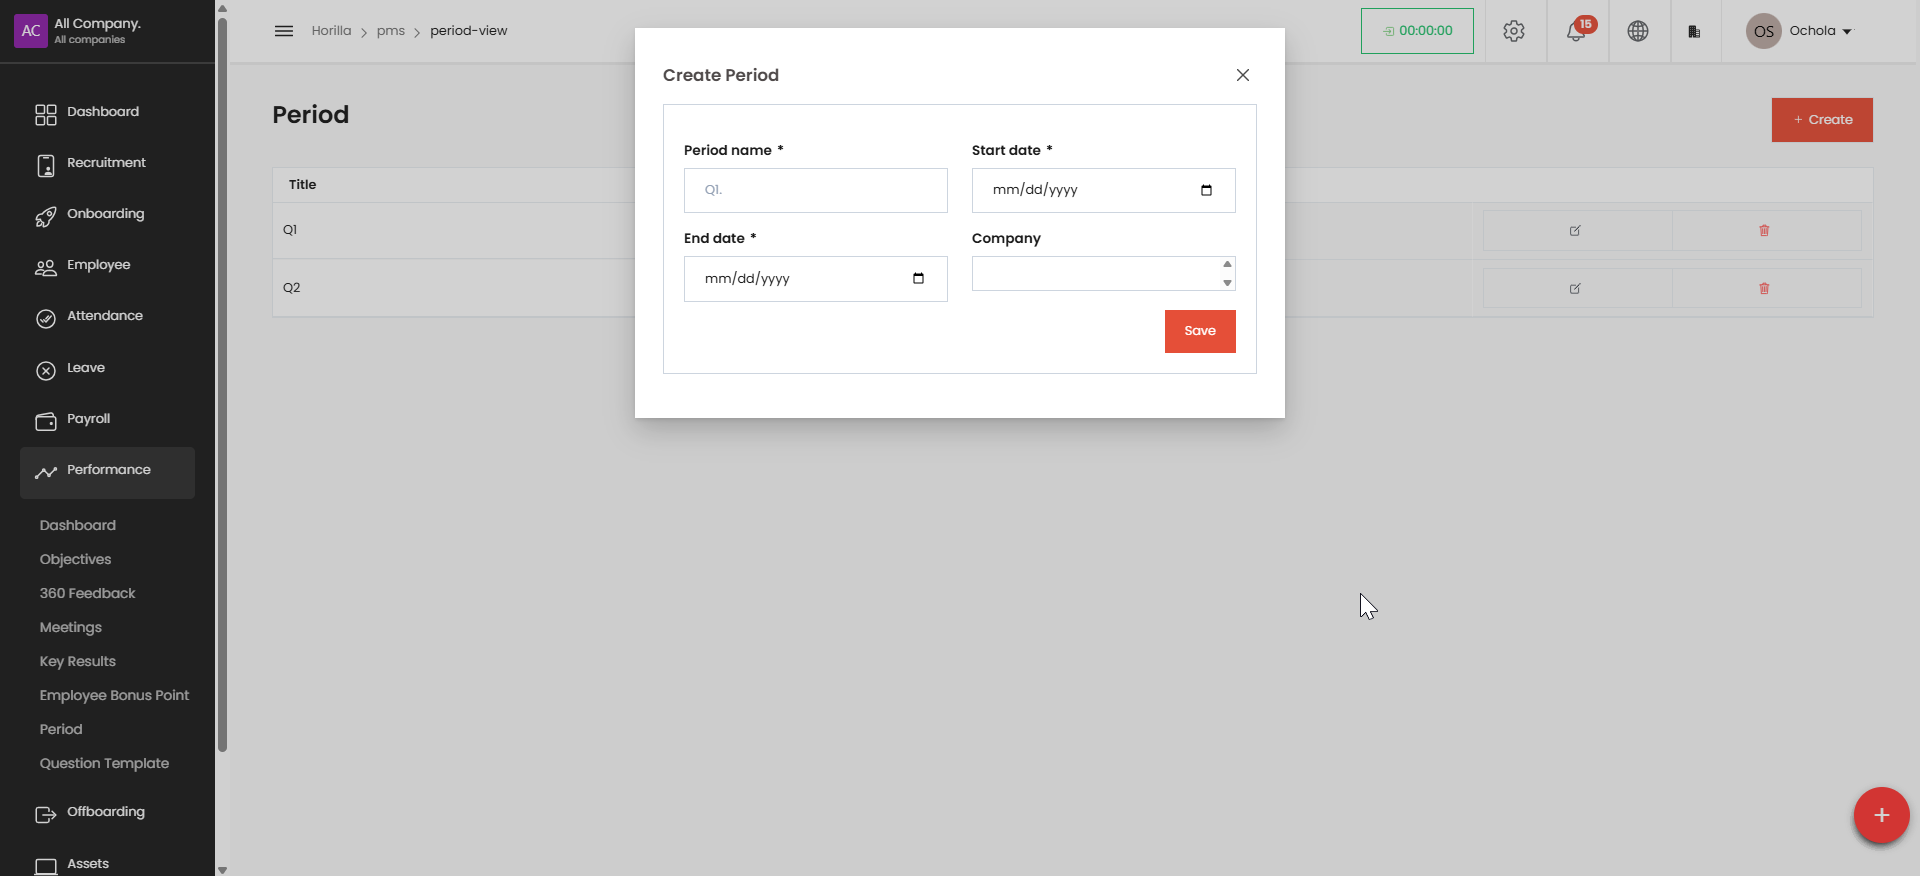
Fill in the form:
Period name (e.g., Q3)
Start date
End date
Company
Click Save to create the period.
8. Question Template#
Stores predefined templates for performance assessment.
Users can create or modify question sets for feedback forms.
Okay, here are the manual instructions based on your description:
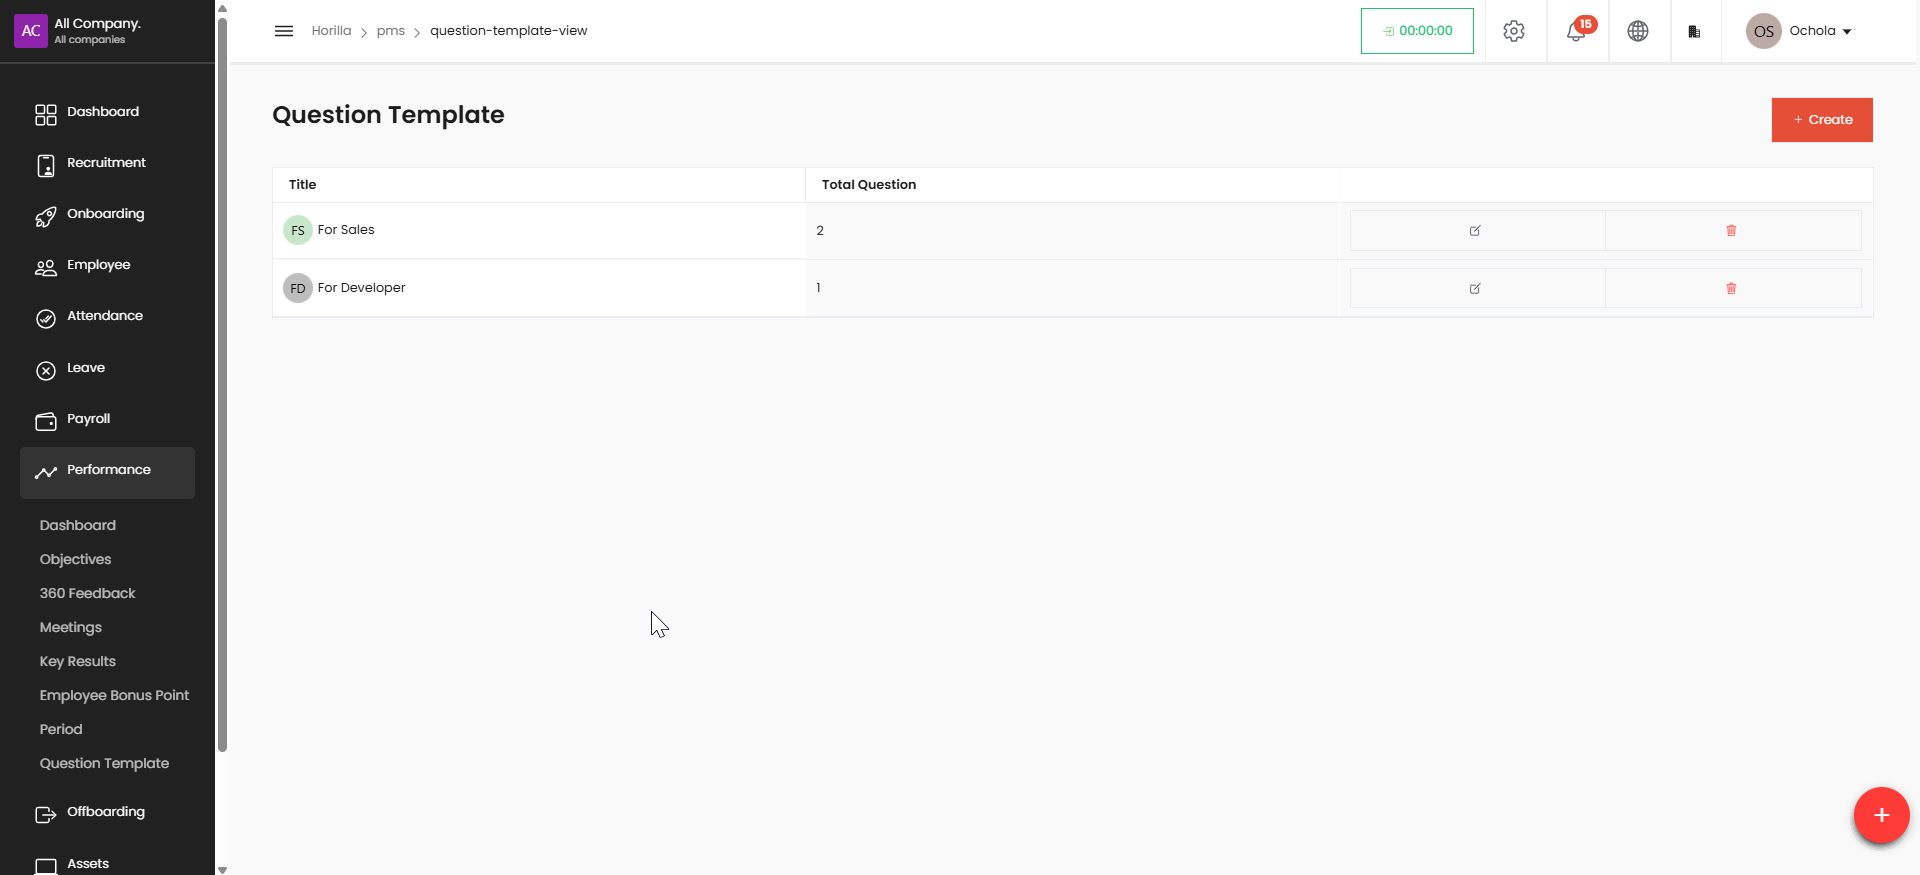
Accessing and Creating Question Templates#
Navigating to Question Templates:#
a. On the main navigation menu, locate and click on Performance.
b. Within the Performance menu, click on Question Templates.
This action will display the "Question Template" screen, which lists any existing templates categorized by the job they are designed for.
Reviewing Existing Templates (Optional):#
a. On the "Question Template" screen, you will see a list of available templates.
b. Each row represents a template and displays the following information:
-
Title: The name of the question template (e.g., "For Sales", "For Developer").
-
Total Question: The number of questions currently included in that template.
This allows you to quickly see if a suitable template already exists for your needs.
Creating a New Question Template:#
a. On the "Question Template" screen, locate and click the + Create button (located in the top right corner).
Clicking this button will open a form for creating a new question template.
Filling out the Create Template Form:#
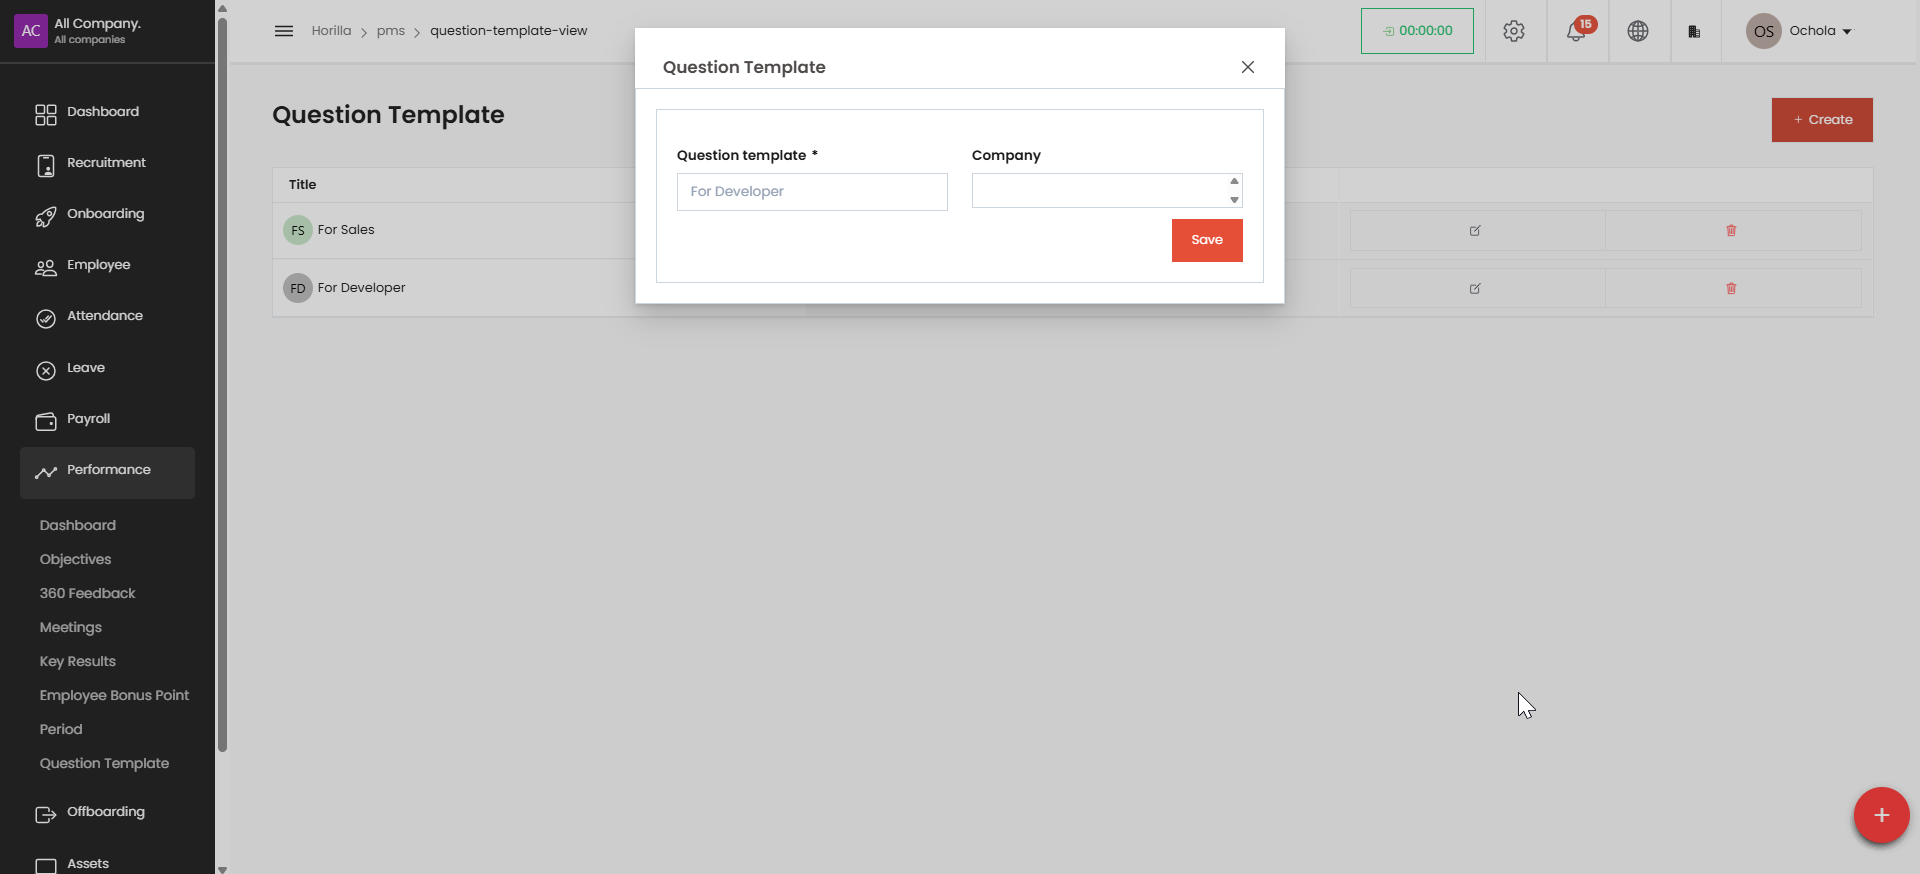
a. In the displayed form, provide the necessary information to define your new template. This will likely include:
-
Title: Enter a descriptive name for your question template (e.g., "Sales Performance Review - Q3 2025", "Developer Skills Assessment").
-
(Other relevant fields may be present depending on the system setup. Fill them out as required.)
b. Once you have filled out all the required fields, click the Save or Create button (the label may vary).
Upon successfully saving the new template, you will be redirected to a dedicated page for managing the questions within that template.
Adding Questions to the New Template:#
a. After creating the template, you will be taken to a new page specifically for the template you just created. This page will likely be empty initially or display any questions that have been pre-configured.
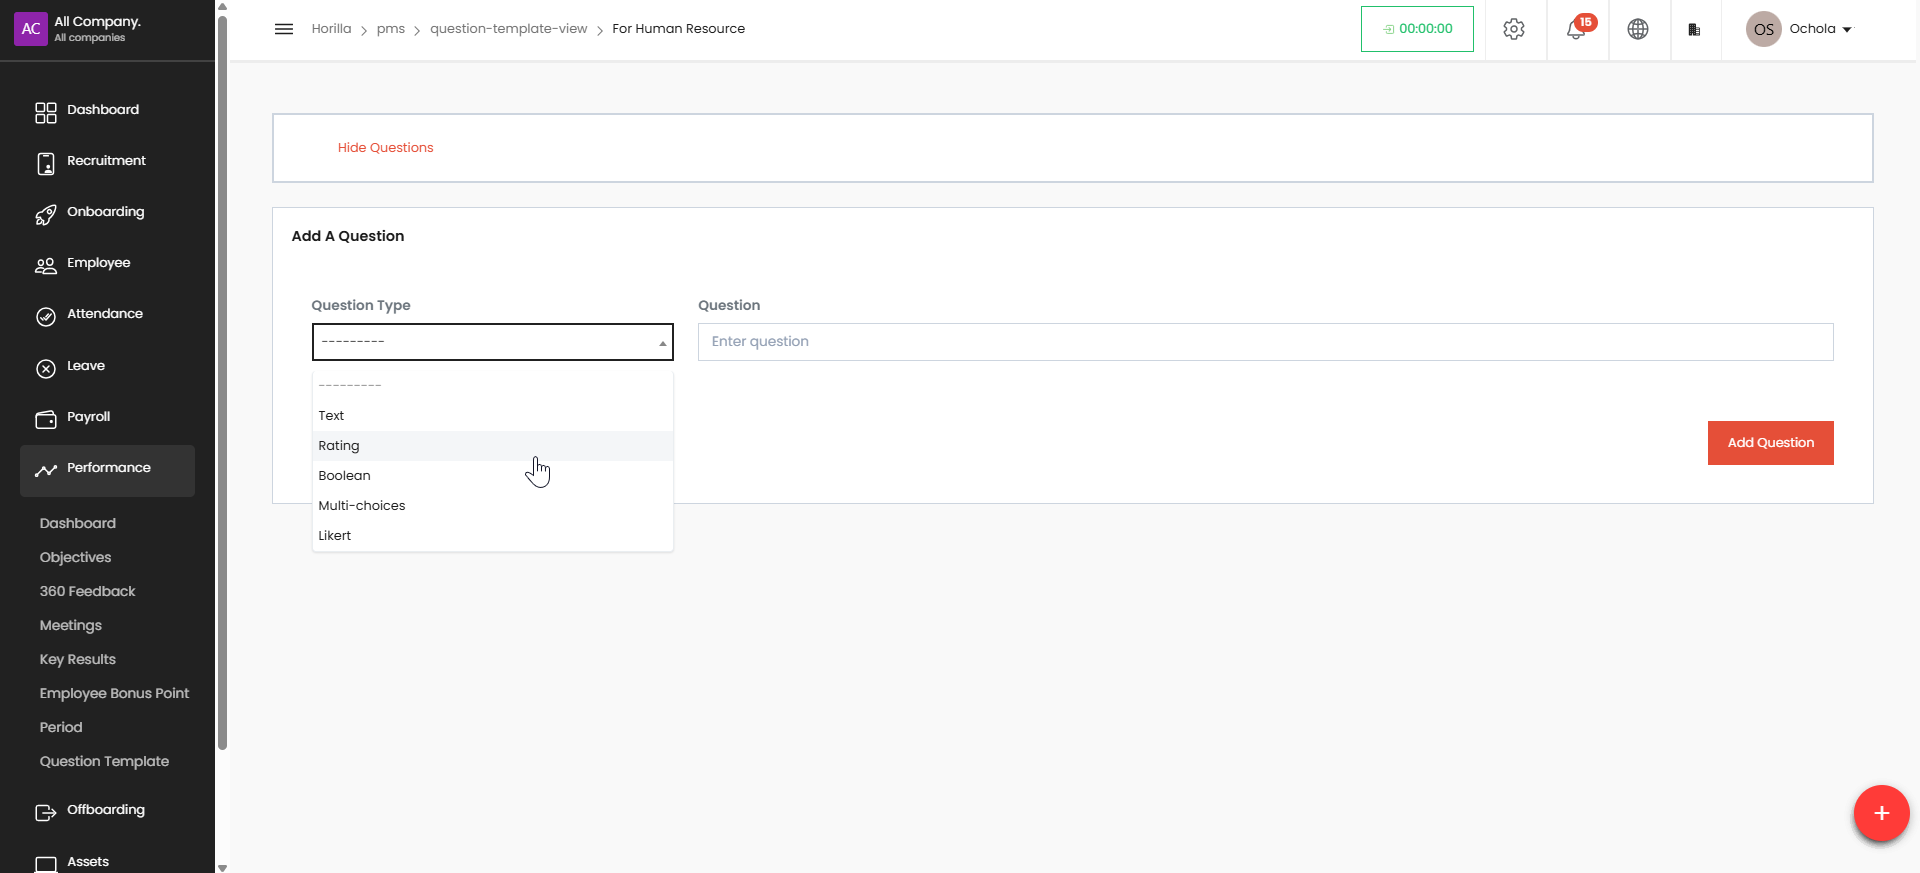
b. On this page, locate and click the button to add new questions.
This button is be labeled + Add Question
Clicking this button will typically present you with options to create different types of questions (e.g., multiple choice, open-ended, rating scale).
Continue Adding Questions:#
a. Follow the prompts to create and add each question you want to include in your template.
b. You may have options to define question types, answer choices (if applicable), and other settings for each question.
Repeat the process of adding questions until your template is complete.