How to Create a New Entry in the CRM System#
To create a new lead or opportunity in the CRM system, follow these steps:
-
Navigate to the CRM Module:
-
On the left sidebar, click on
CRMto open the Customer Relationship Management system. -
lick on the
NewButton: -
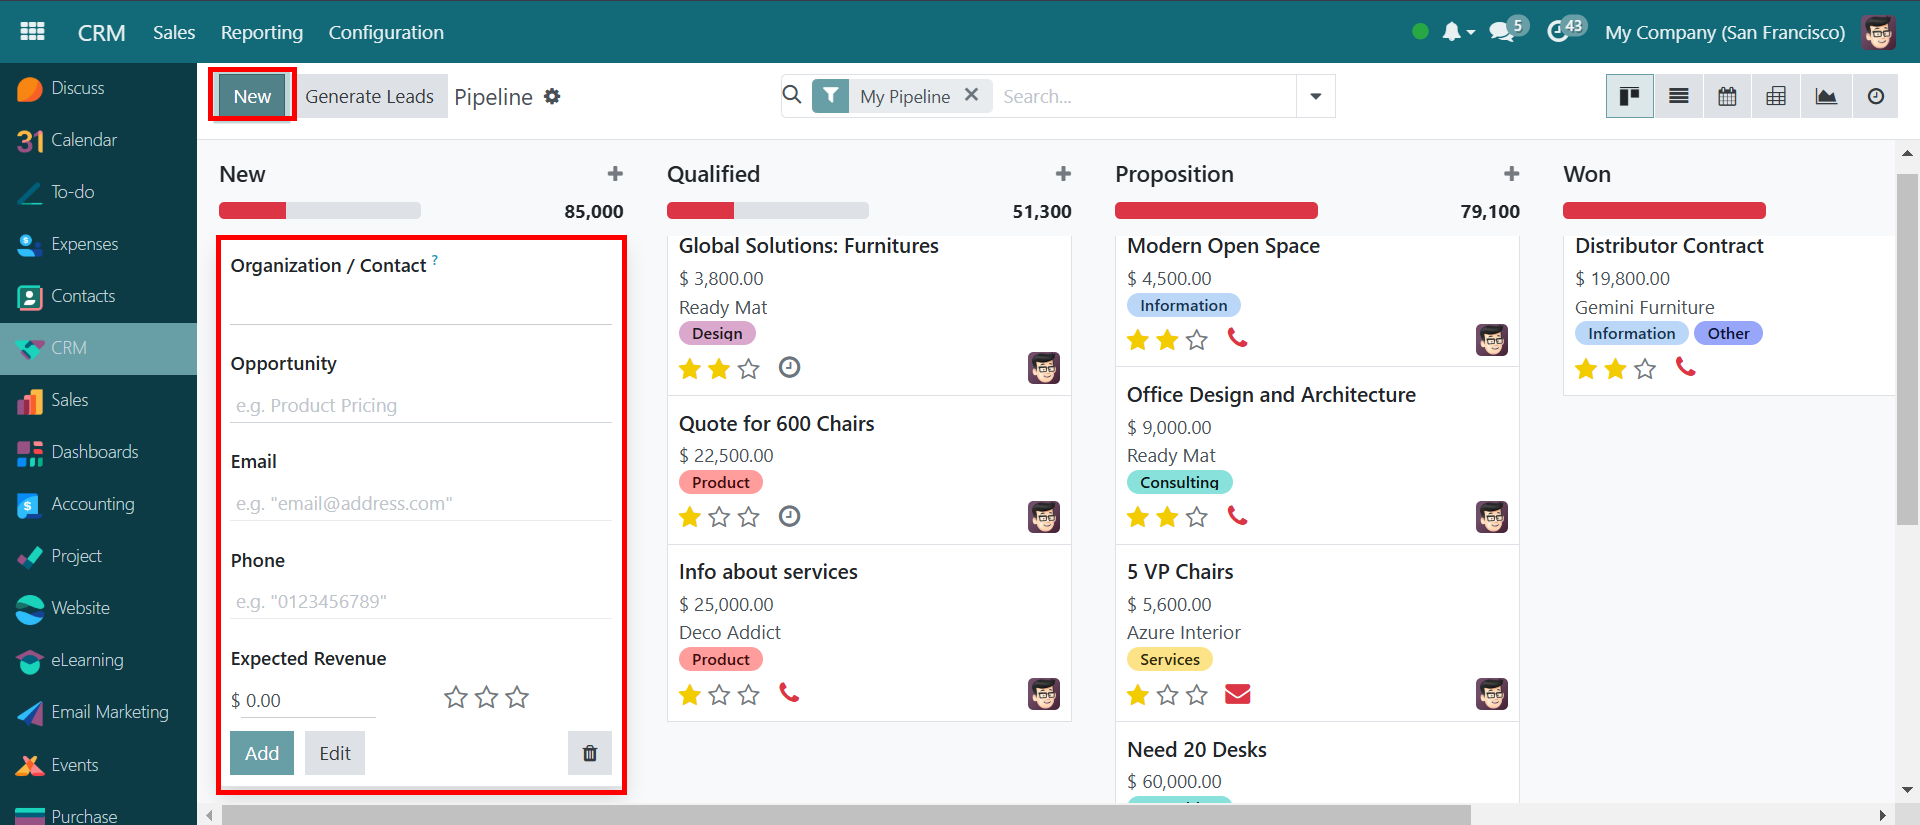
In the top left corner, click the
Newbutton (highlighted in green) to start a new entry. - Fill in the Required Information:
Organization / Contact: Enter the name of the organization or individual.
Opportunity: Provide a brief description of the opportunity (e.g., "Product Pricing").
Email: Input the email address of the contact person.
Phone: Provide the phone number for easy communication.
Expected Revenue: Enter the estimated revenue for this opportunity.
Click Add to Save the Entry:
-
After filling in all necessary details, click the "Add" button to save your new lead or opportunity. Edit if Needed:
-
Once added, the opportunity will appear in the appropriate section (e.g., New, Qualified, Proposition, or Won) based on its status in the sales pipeline.
Viewing a Newly Added Entry in the Sales Pipeline#
When you add a new entry to the sales pipeline and click on it, the system opens its detailed view. Here's what happens:
Pipeline Entry Details Page Opens:#
The CRM system navigates to the details of the newly added pipeline entry. Pipeline Information Displayed:
Company Name: The business associated with this opportunity (e.g., Hubtech Enterprises).
Expected Revenue: The potential revenue from this opportunity (e.g., $5,000).
Probability: The estimated success rate of closing the deal (e.g., 33.14%).
Customer Details:
Name: The client's business name (e.g., HUBTECH).
Email: The customer's contact email.
Phone Number: The provided contact number.
Sales Information:
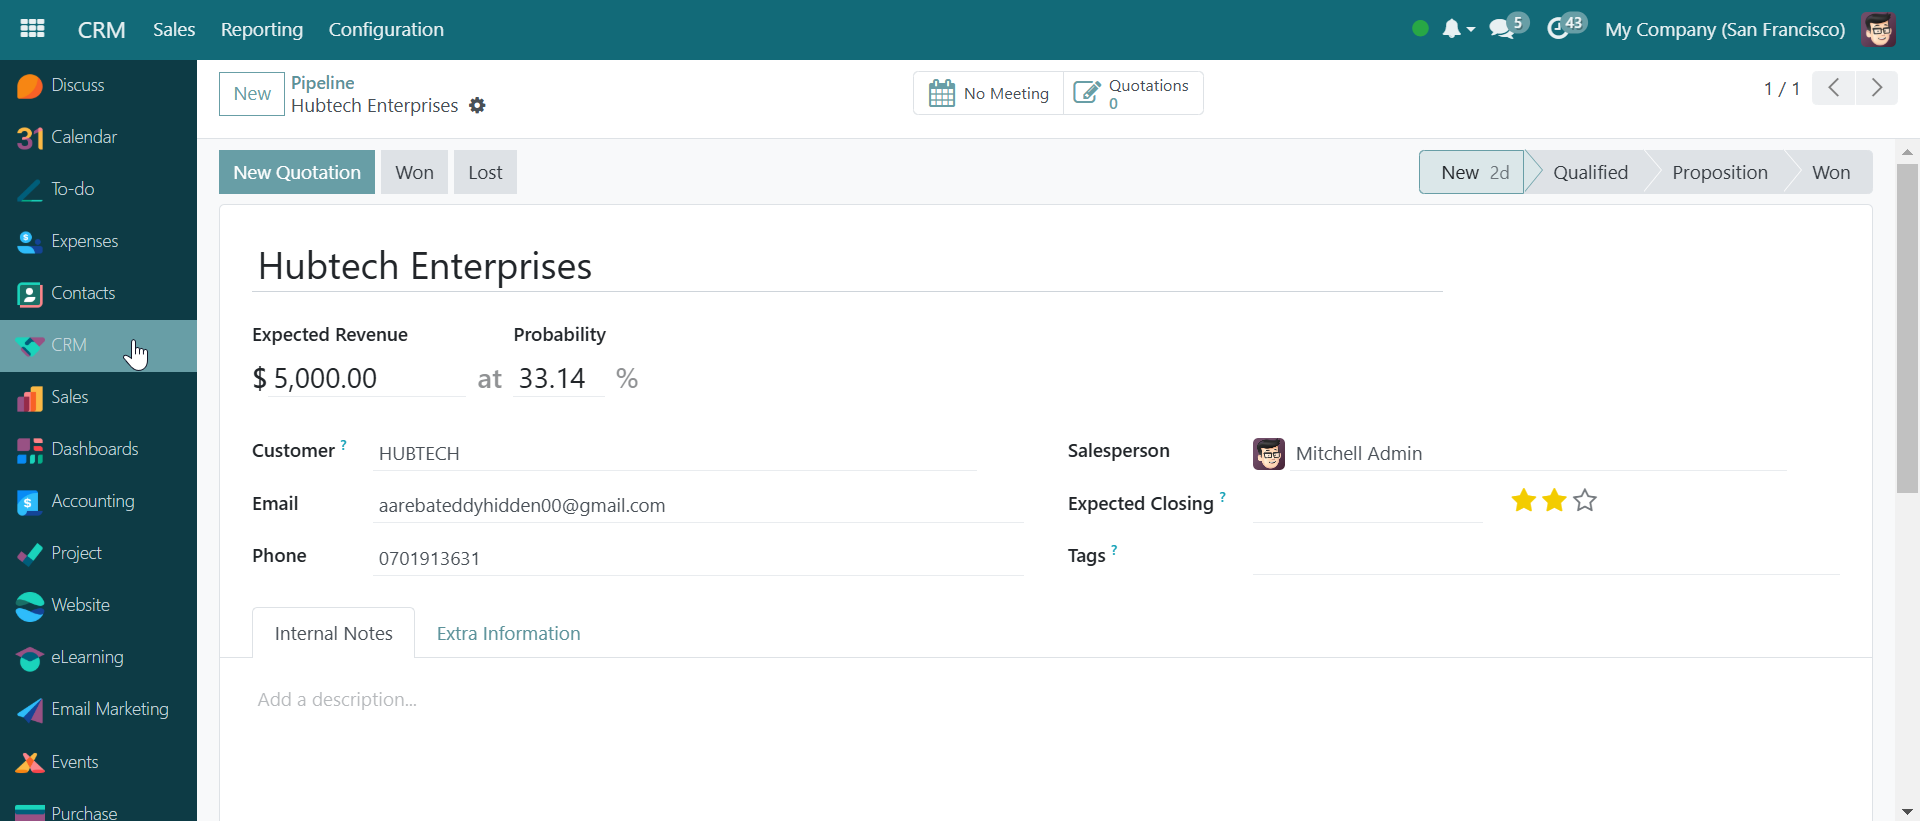
Salesperson Assigned: The representative managing this opportunity (e.g., Mitchell Admin).
Expected Closing Date: (Empty in this case but can be set).
Pipeline Stage: The deal's progress through the sales funnel (New → Qualified → Proposition → Won).
Tags & Rating: A rating system to evaluate the opportunity's quality. Available Actions:
New Quotation Button: Generate a quotation for the opportunity.
Mark as Won or Lost: Update the status based on the deal's progress.
Internal Notes & Extra Information: Add comments or attach relevant details.
How to Generate Leads in the CRM System#
Generating leads in the CRM system allows you to identify potential customers and track them efficiently. Follow these steps to generate leads:
-
Navigate to the CRM Module:
-
On the left sidebar, click on "CRM" to access the lead management system. Click on the "Generate Leads" Button:
-
At the top of the CRM interface, locate and click the "Generate Leads" button. Specify Lead Details:
-
Number of Leads: Enter the number of companies or leads you want to generate.
-
Country Selection: Choose the country (e.g., United States).
-
States (Optional): Select specific states if needed.
-
Industries (Optional): Specify an industry to filter leads.
-
Filter on Size: If applicable, filter leads by company size.
-
Sales Team: Assign a sales team for these leads.
-
Salesperson: Assign a specific salesperson (e.g., Mitchell Admin).
Default Tags: Add relevant tags for easy classification.
- Click "Generate Leads":
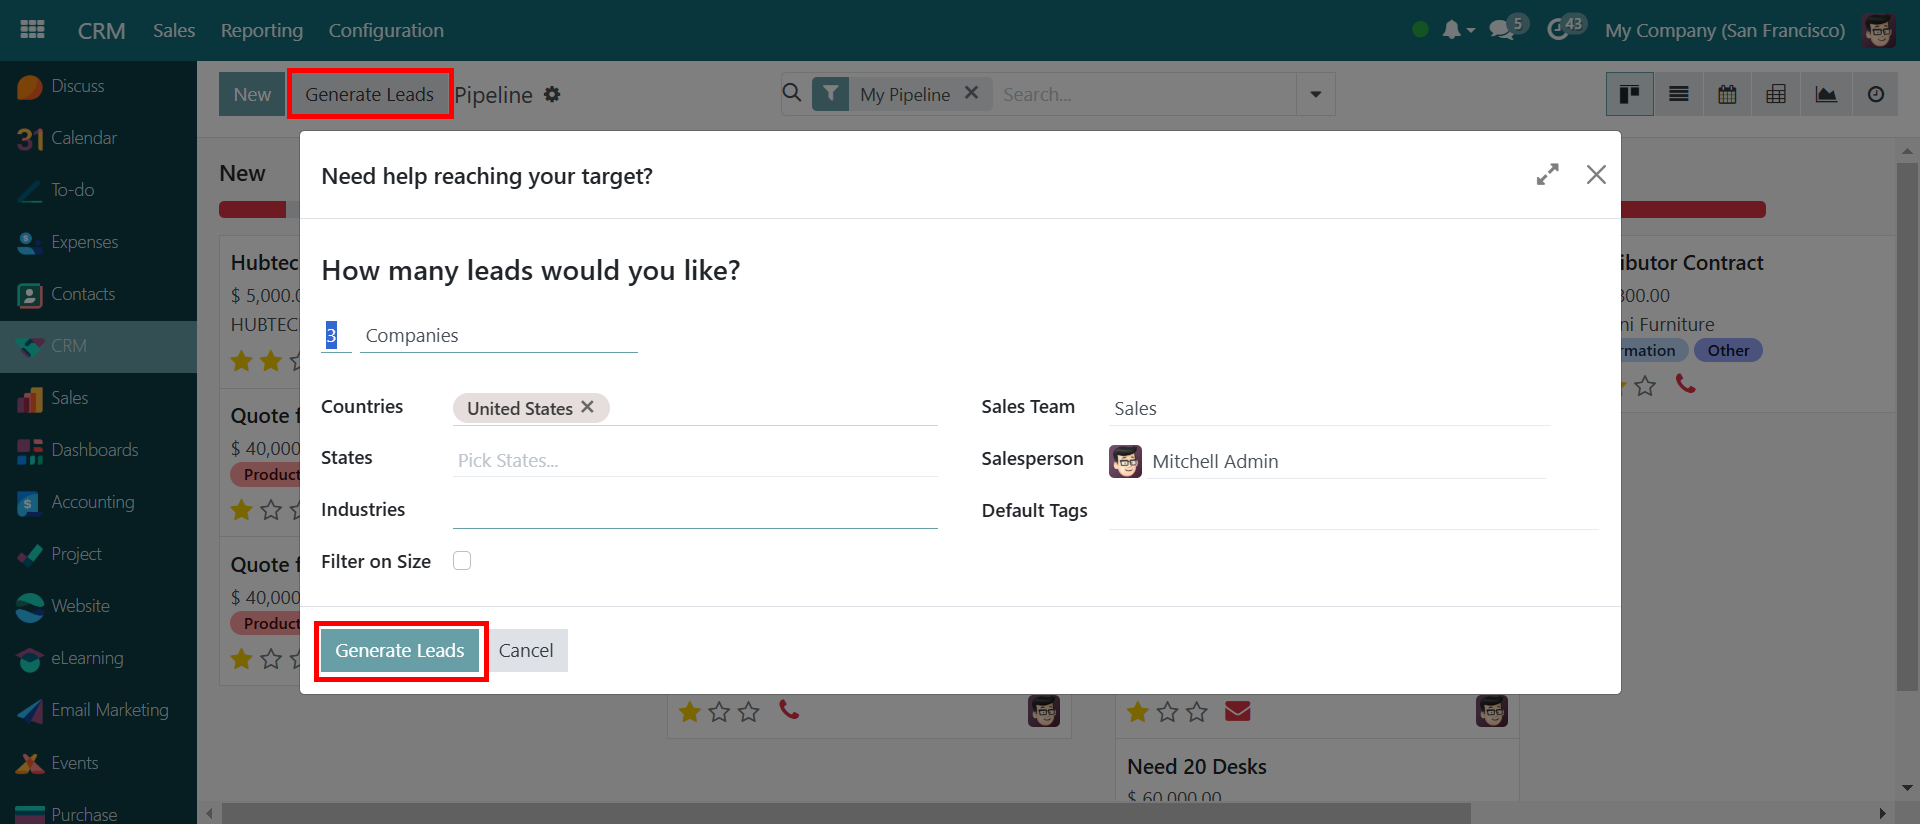
Once all the details are filled, click the "Generate Leads" button to create the leads. Review Generated Leads:
The new leads will now appear in the CRM system under the appropriate category for further follow-up and nurturing. This process ensures that sales teams have a structured approach to finding and managing potential clients efficiently.