Assets Management – Horilla HR System#
The Assets module in the Horilla HR System is designed to help organizations efficiently manage, track, and allocate their physical and digital assets.
This section enables users to view available assets, track asset history, process allocation requests, and manage asset batches. Below is a breakdown of each menu item and its functionality:
1. Dashboard#
The Dashboard provides a quick snapshot of asset-related data in the system. It includes:
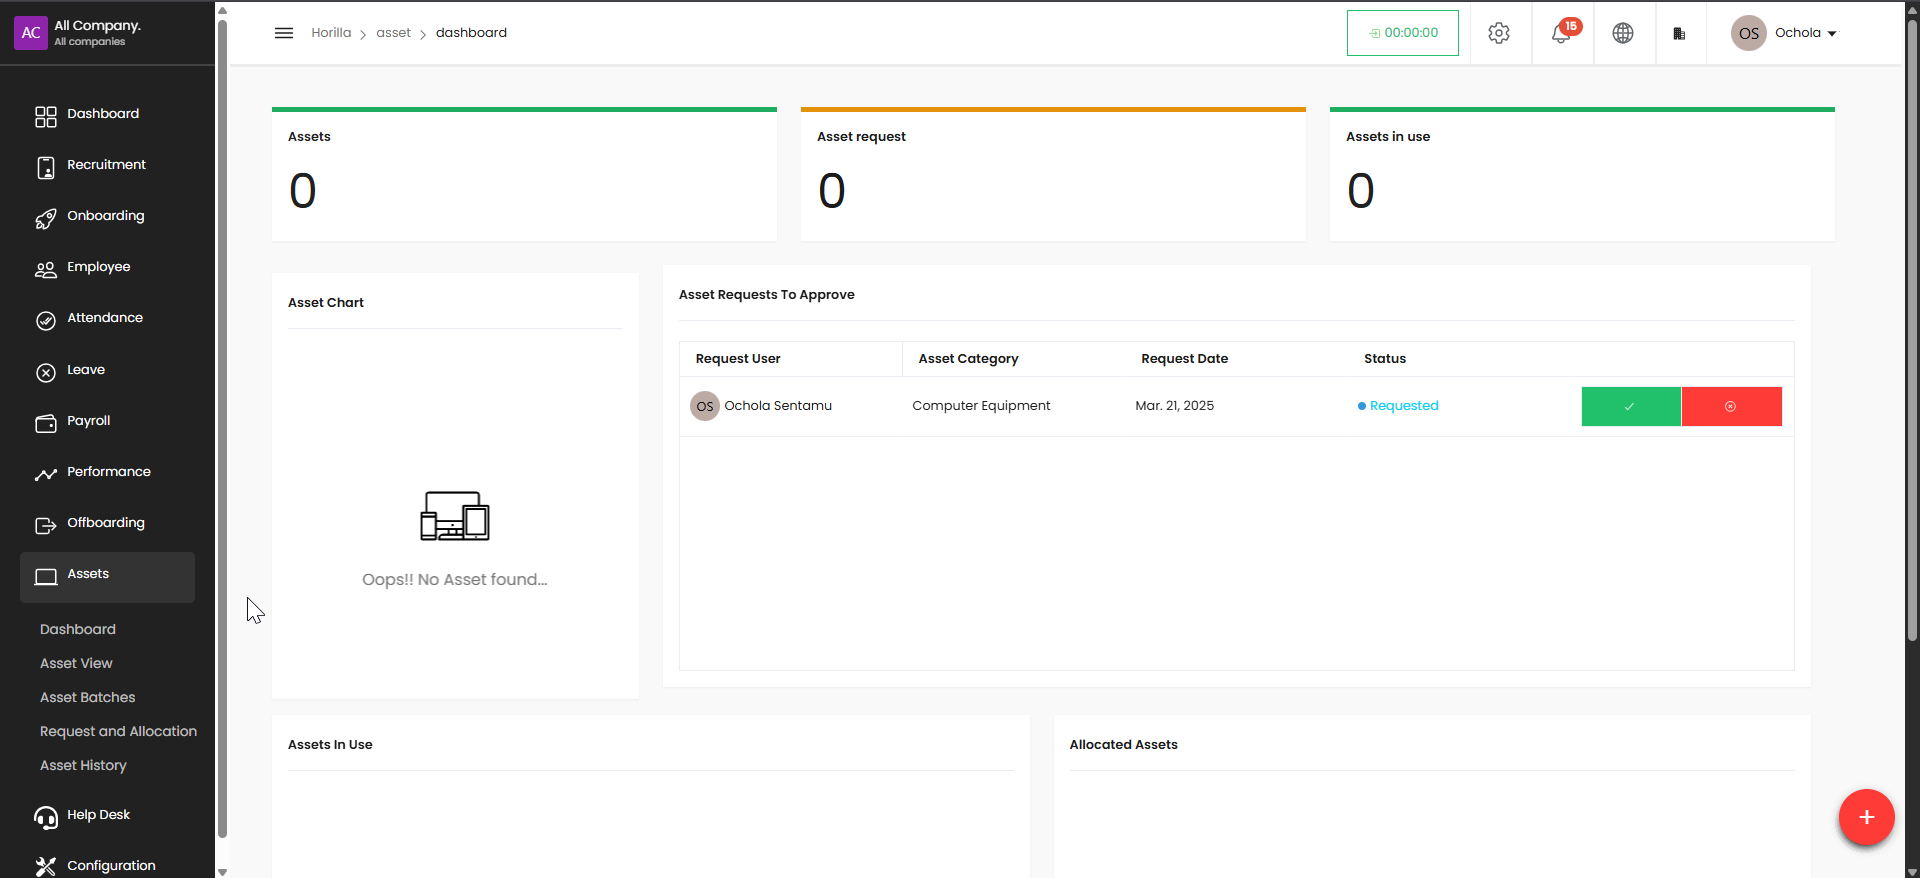
Assets: Total number of assets recorded.
Asset Requests: Number of pending requests submitted by users.
Assets in Use: Assets currently allocated to users or departments.
Asset Chart: Visual representation (e.g., bar or pie chart) of asset distribution—shows once data is available.
Asset Requests to Approve: A list of incoming asset requests, with details like the requester, category, request date, and status, along with approve/reject buttons.
Assets in Use and Allocated Assets: Sections summarizing active asset allocations
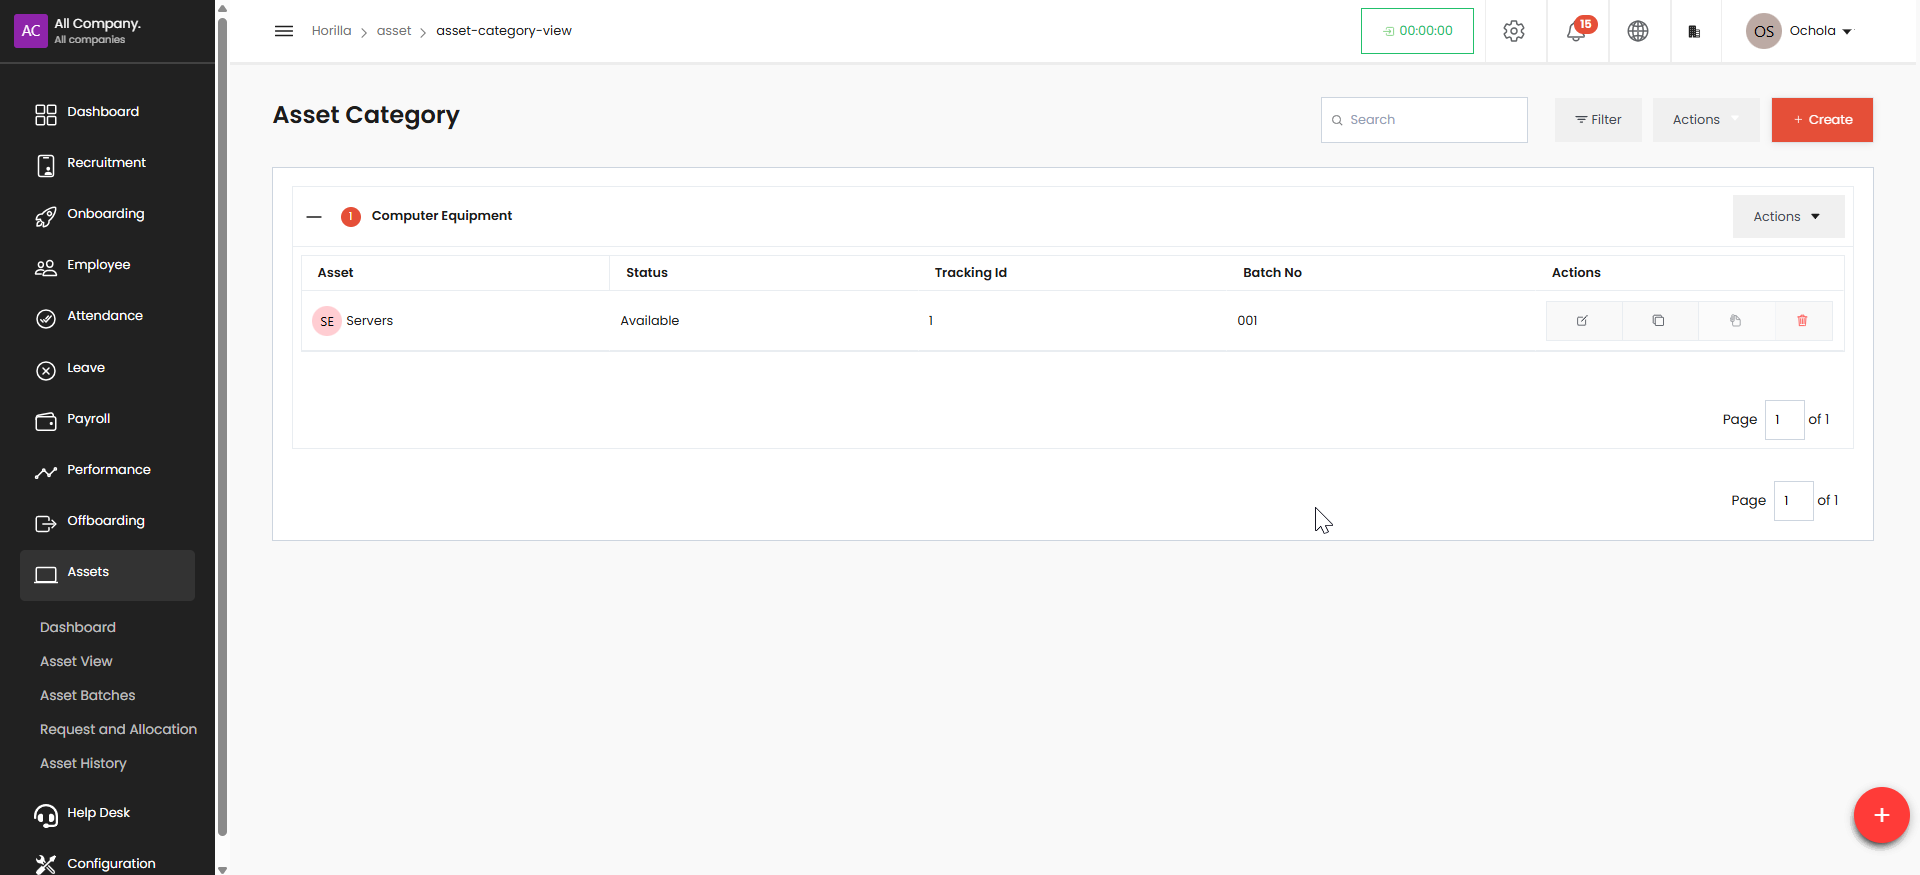
2. Asset View#
This section lists all the individual assets that are currently in the system. From the main menu on the left sidebar, click on "Assets View"
You'll be directed to the Asset Category view, which displays existing asset categories
Creating an Asset Category#
Click the red "+ Create" button in the top-right corner
A popup form titled "Asset Category Creation" will appear with fields to complete:
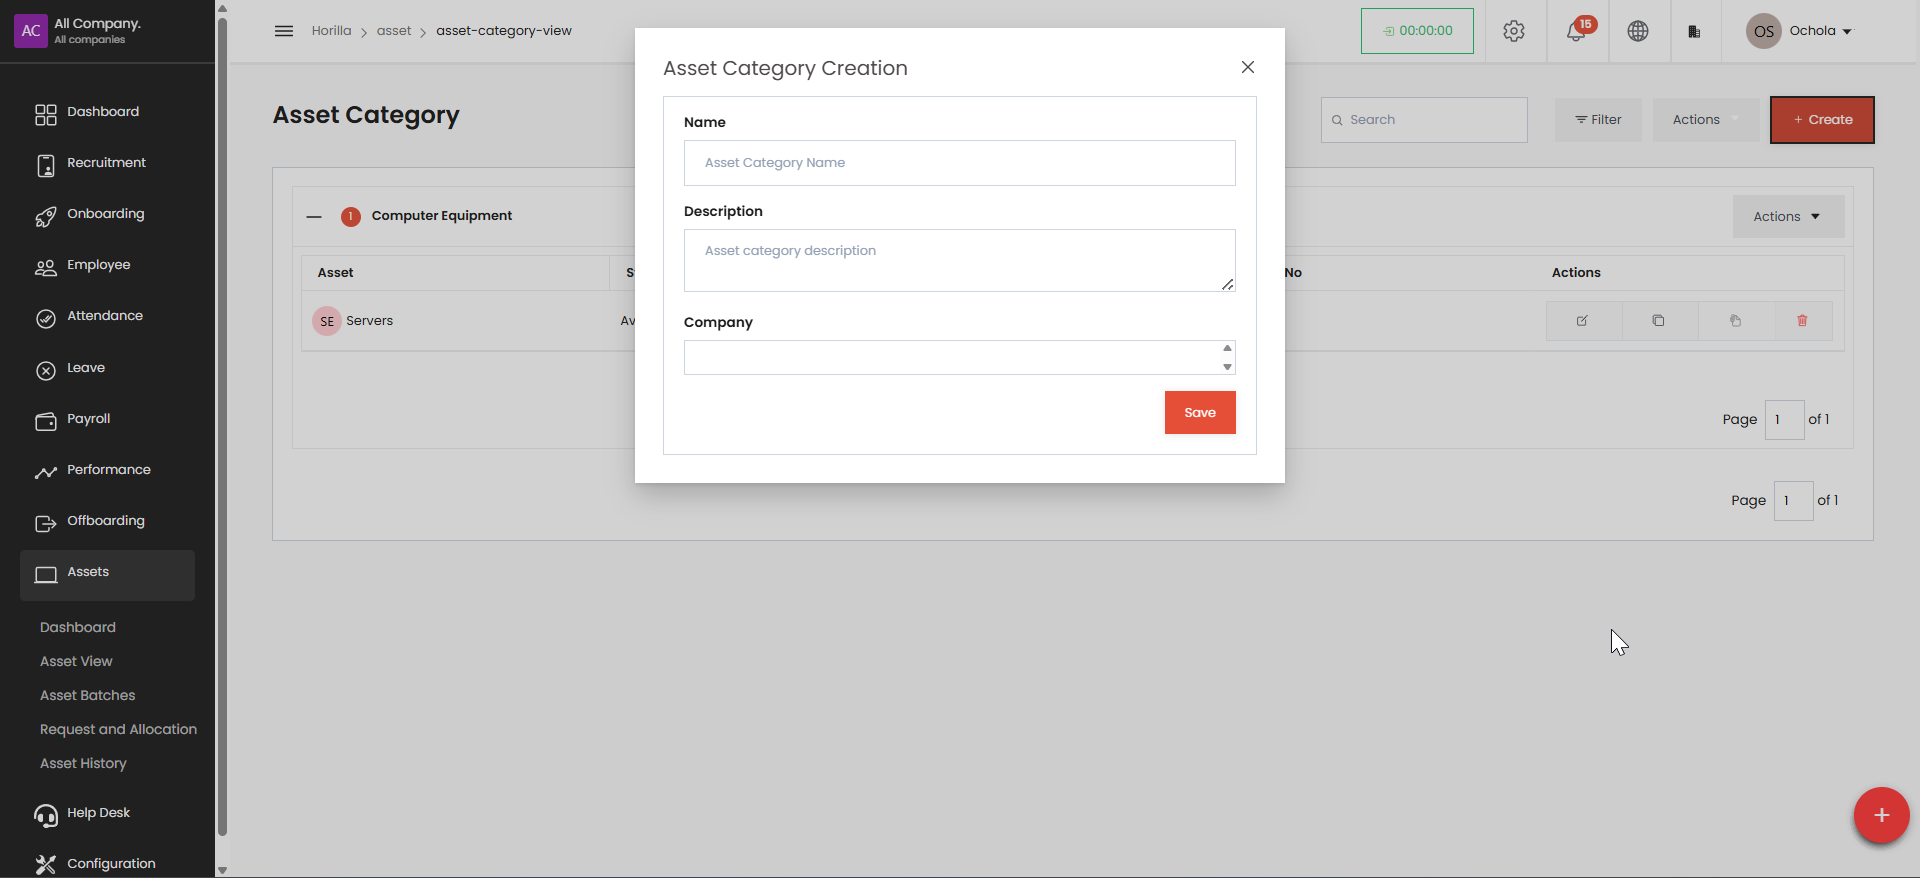
Name: Enter a descriptive category name
Description: Provide details about the category
Company: Select from the dropdown menu
Click the "Save" button to create your asset category
Creating an Asset#
After creating a category, you'll see it listed in the Asset Category view
To add an asset to a category:
Click the "Actions" dropdown menu to the right of the category
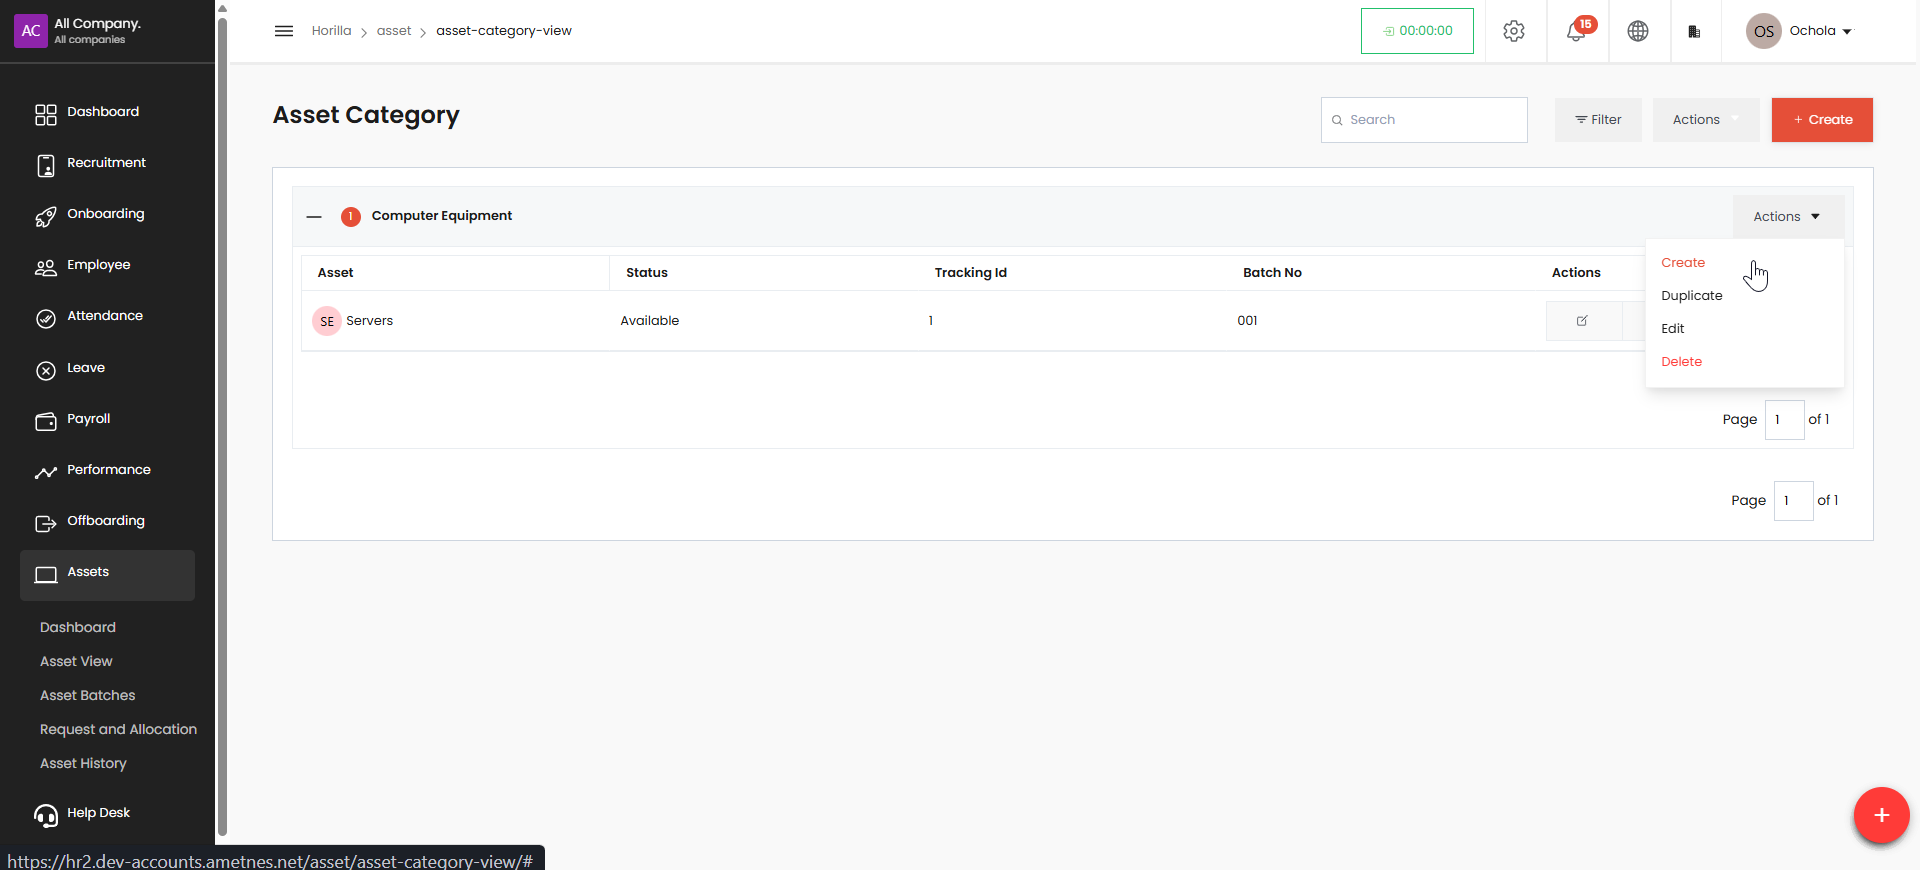
Select "Create" from the dropdown options
Fill in the "Asset Creation" form:
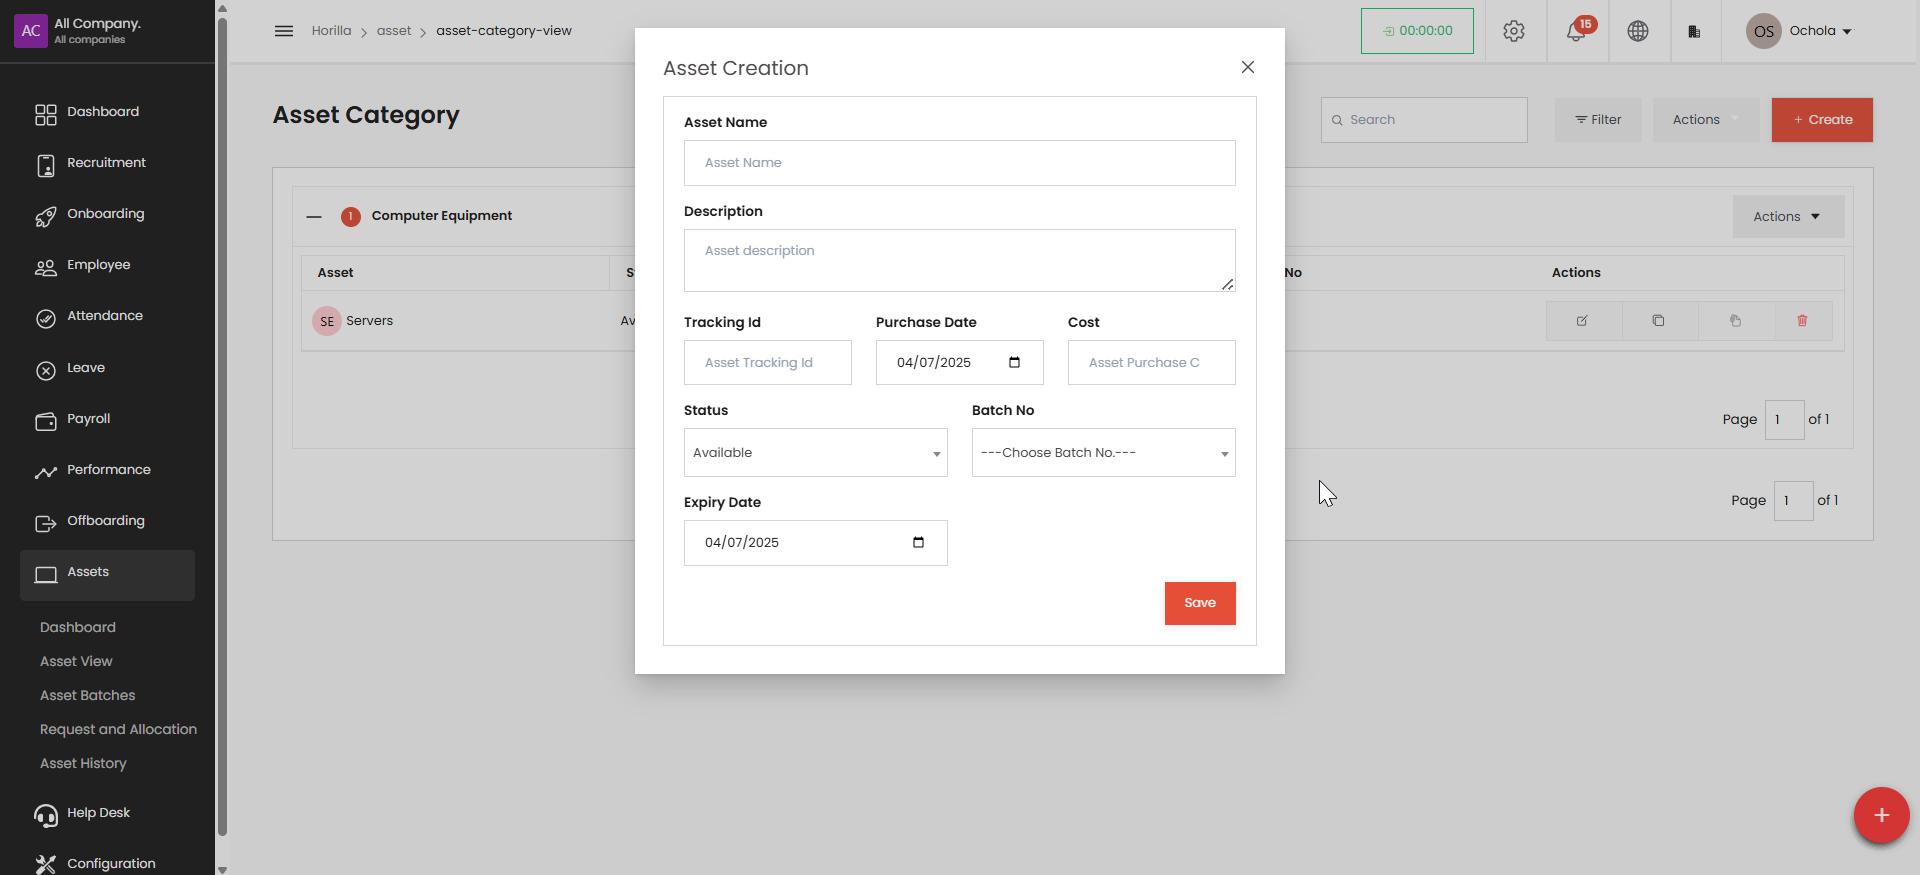
Asset Name: Enter the name of the asset
Description: Provide details about the asset
Tracking ID: Assign a unique identifier
Purchase Date: Select from the calendar
Cost: Enter the purchase price
Status: Select from options (e.g., "Available")
Batch No: Choose from existing batch numbers
Expiry Date: Select the warranty or expected end-of-life date
Click "Save" to add the asset to your inventory
Managing Assets#
Once created, assets will be listed under their respective categories, displaying key information such as status, tracking ID, and batch number.
You can edit, duplicate, or delete assets using the Actions menu for each entry.RetryClaude can make mistakes. Please double-check responses. 3.7 Sonnet
3. Asset Batches#
The Asset Batches page allows users to manage grouped entries of assets that were acquired or produced together.
Batch Number: Displays the unique identifier for each batch.
Description: Contains details about the batch such as production date, quantity, location, and serial range.
Assets: Shows how many assets are linked to the batch.
Actions: Includes options to edit (✏️) or delete (🗑️) a batch.
Creating a New Asset Batch#
To add a new asset batch:
Click the red + Create button in the top-right corner.
A Create Asset Batch form will appear.
Fill in the required batch details (e.g., batch number, description, and quantity).
Submit the form to add the batch to the system.
This feature helps in organizing assets that belong to the same procurement or production run, making tracking and reporting more efficient.
4. Request and Allocation#
Employees or departments can request assets through this section. It also facilitates the allocation of assets by administrators.
Asset Request Process
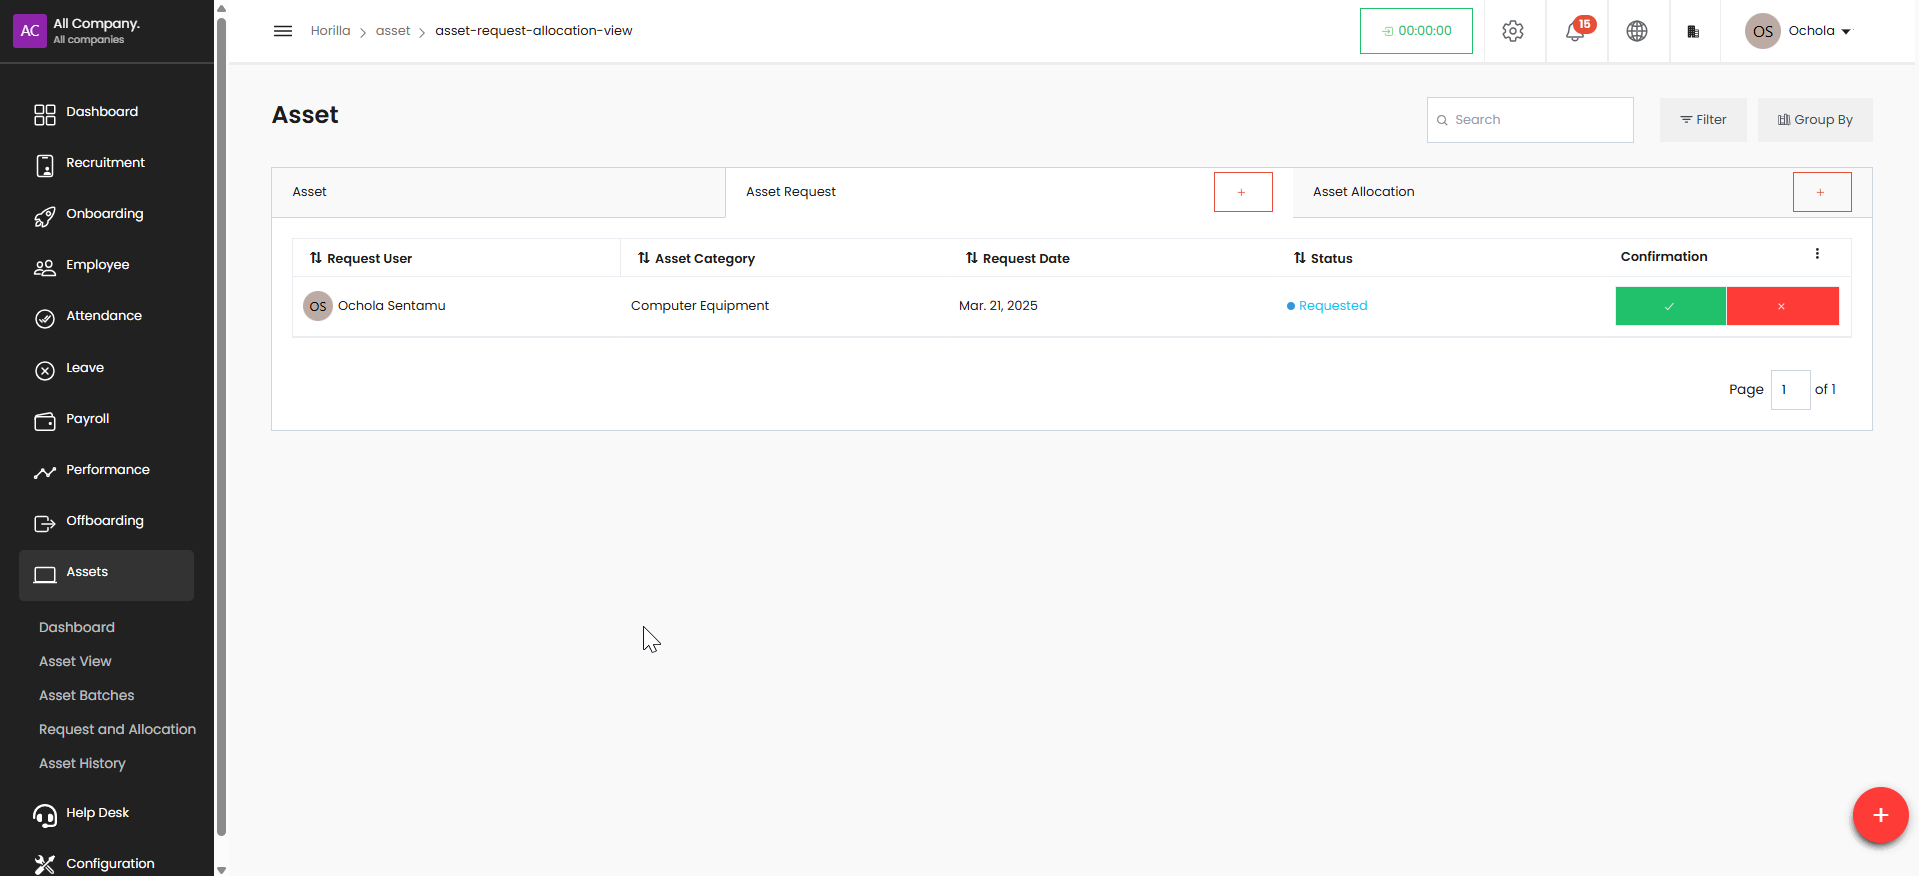
Viewing Current Asset Requests#
Navigate to the Assets section using the sidebar menu
Select "Request and Allocation" or view the main Asset dashboard
The system displays pending requests with details including:
Request User
Asset Category
Request Date
Status
Confirmation options
Creating a New Asset Request#
Click the "+" button next to "Asset Request"
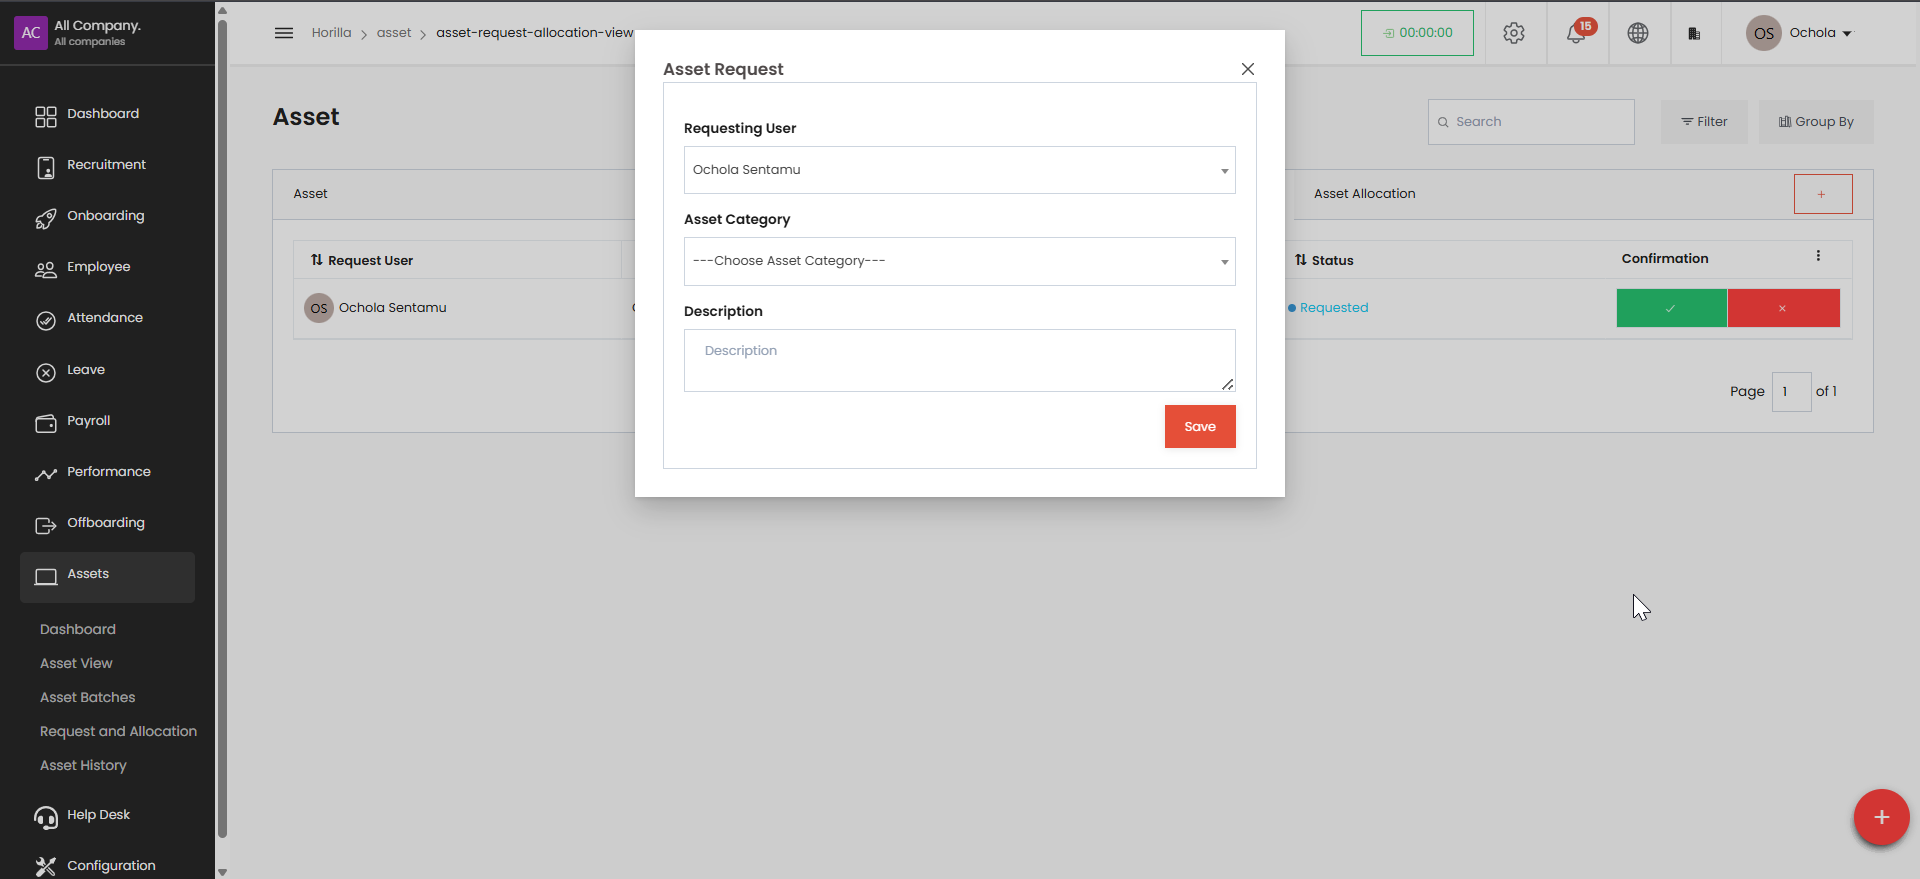
In the Asset Request form:
The Requesting User field will be pre-populated with your name
Select an Asset Category from the dropdown menu
Enter a detailed description of the requested asset
Click "Save" to submit your request
Request Status Tracking#
All requests display with a status indicator (e.g., "Requested")
Confirmation actions appear as green/red buttons for approvers
Request history can be viewed in the Asset History section
Asset Allocation Process#
Allocating an Asset
Click the "+" button next to "Asset Allocation"
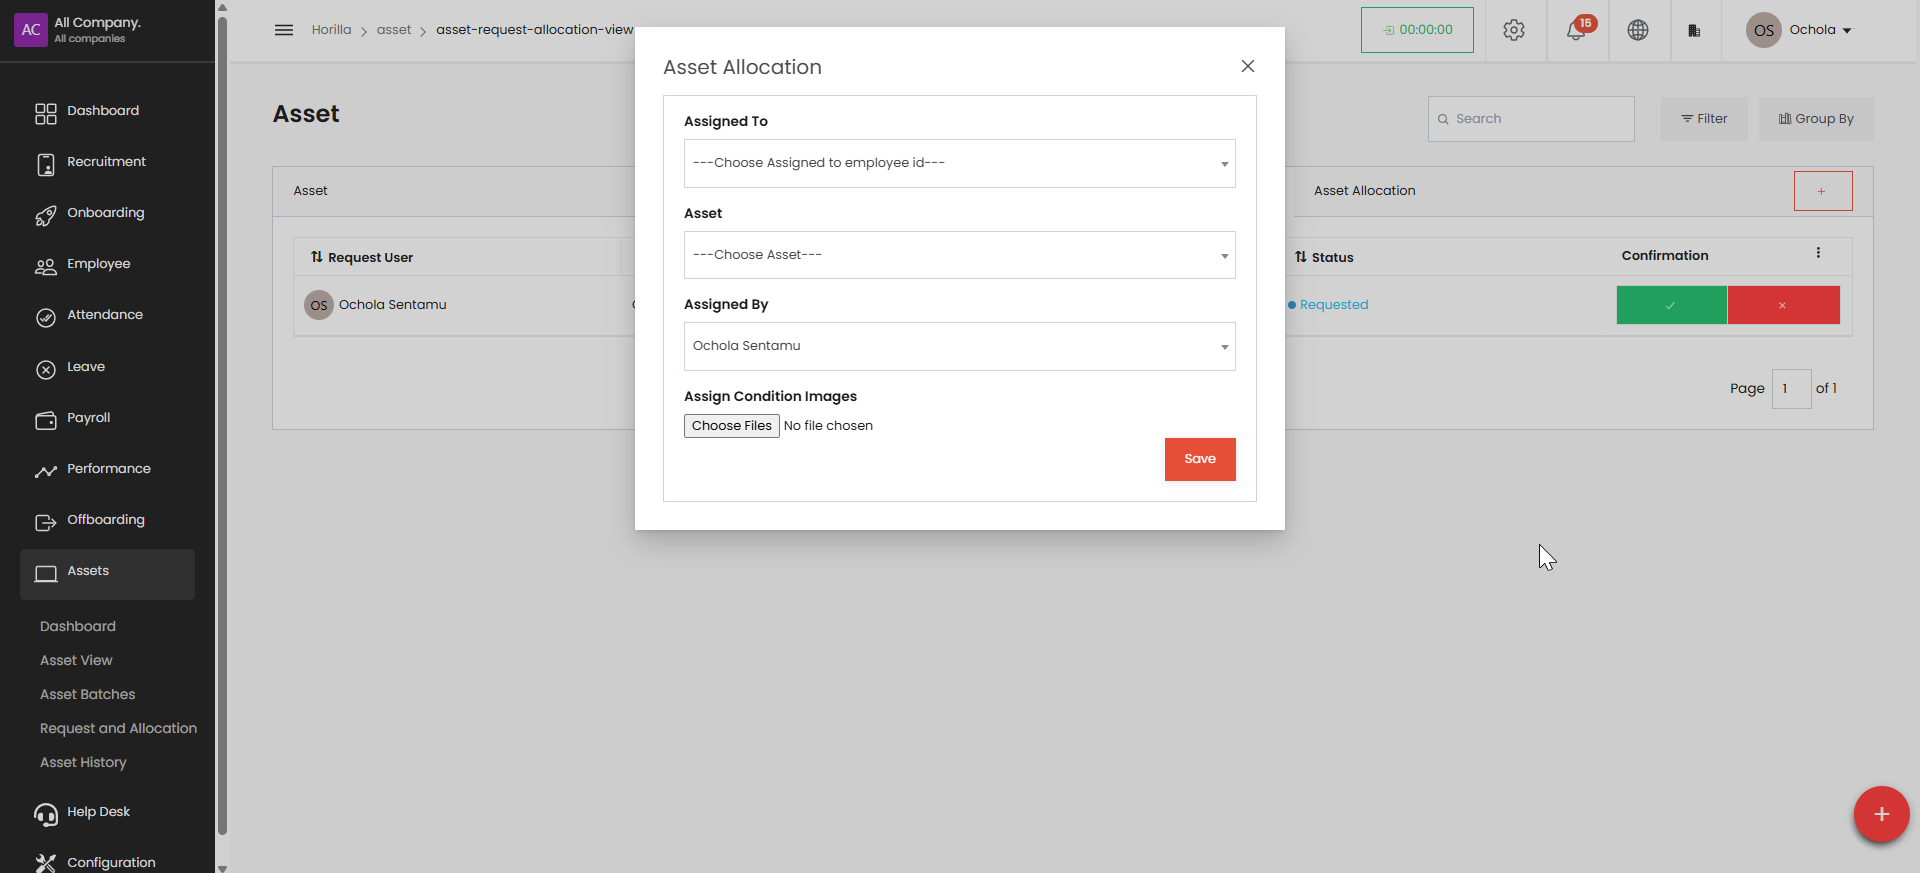
Complete the allocation form:
Select the employee to assign the asset to
Choose the specific asset from inventory
Your name will appear as the person assigning the asset
Upload condition images if needed (optional)
Click "Save" to complete the allocation
Managing Allocations#
All asset allocations can be viewed in the main Asset screen
Use the search, filter, and group functions to organize the view
Access detailed allocation history through the Asset History section
5. Asset History#
The Asset History page displays a detailed log of each asset's lifecycle, including:
Asset Allocation and return records
Use this feature to ensure asset traceability and to audit asset usage over time.