Accounting Module - Customers Menu Documentation#
Overview#
The Customers menu in the Accounting module provides comprehensive tools for managing customer relationships, transactions, and financial records. This documentation covers each component of the Customers menu and its functionality.
Menu Structure#
The Customers menu contains the following key sections:
1. Customer Management#
- Customer Records: Create, edit, and maintain customer information
- Customer Database: Central repository for all customer data
- Customer Profiles: Detailed view of individual customer accounts
2. Invoice Management#
- Customer Invoices: Generate and manage customer billing
- New Invoice: Create new invoices for customers
- Invoice Validation: Review and approve pending invoices
- Unpaid Invoices: Track outstanding customer payments
- Late Invoices: Monitor overdue customer accounts
3. Payment Processing#
- Payment Tracking: Monitor customer payment status
- Payment History: View complete payment records
- Payment Terms: Configure customer-specific payment conditions
4. Credit Management#
- Credit Notes: Issue credits and refunds to customers
- Credit Limits: Set and monitor customer credit boundaries
- Credit Terms: Define payment and credit policies
What We'll Cover#
In the following sections, we will explore each menu item in detail:
✅ Customer Records Management#
- Creating new customer profiles
- Editing existing customer information
- Managing customer contact details
- Setting up customer preferences
Customers#
Overview#
The Customers section manages all customer information, contact details, and relationship data. This is the central database for all customer-related activities.
Viewing Customers#
Customer List Dashboard#
Access by clicking Customers to view:
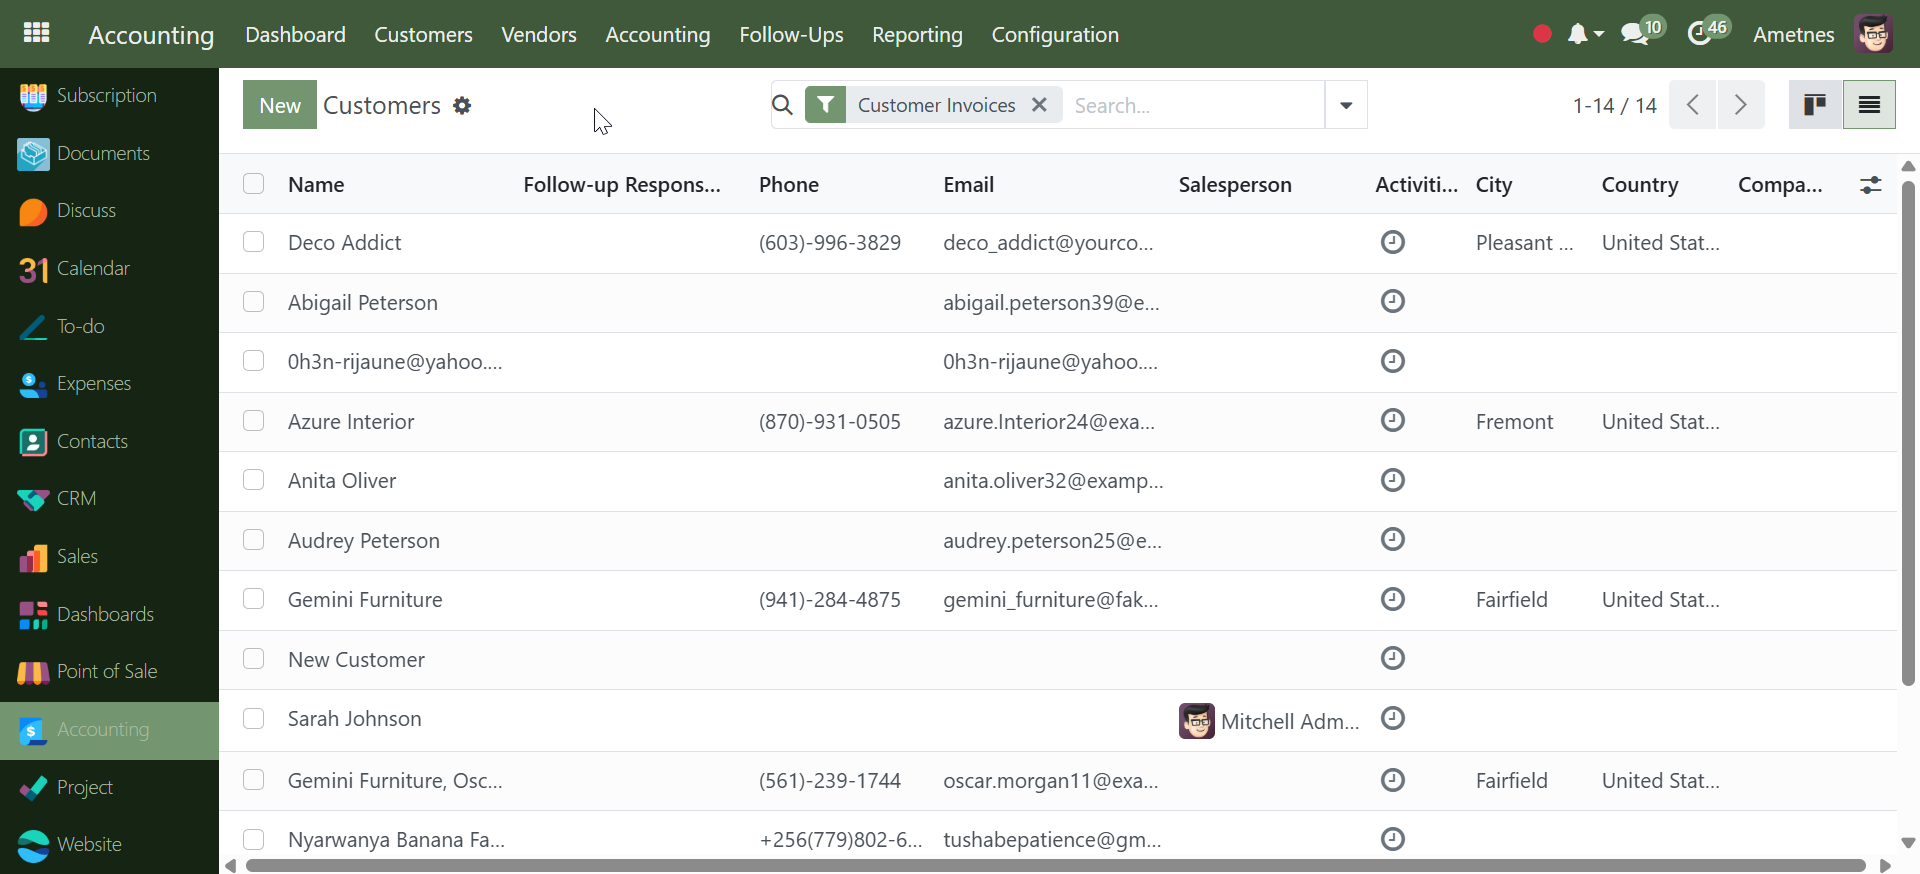
Customer Columns: - Name: Customer name or company name
-
Follow-up Responsible: Assigned account manager
-
Phone: Primary contact number
-
Email: Primary email address
-
Salesperson: Assigned sales representative
-
Activities: Recent activity indicators
-
City: Customer location
-
Country: Customer country
-
Company: Associated company (if applicable)
Creating New Customer#
Step 1: Start New Customer#
- Click Customers
- Click New button to create customer record
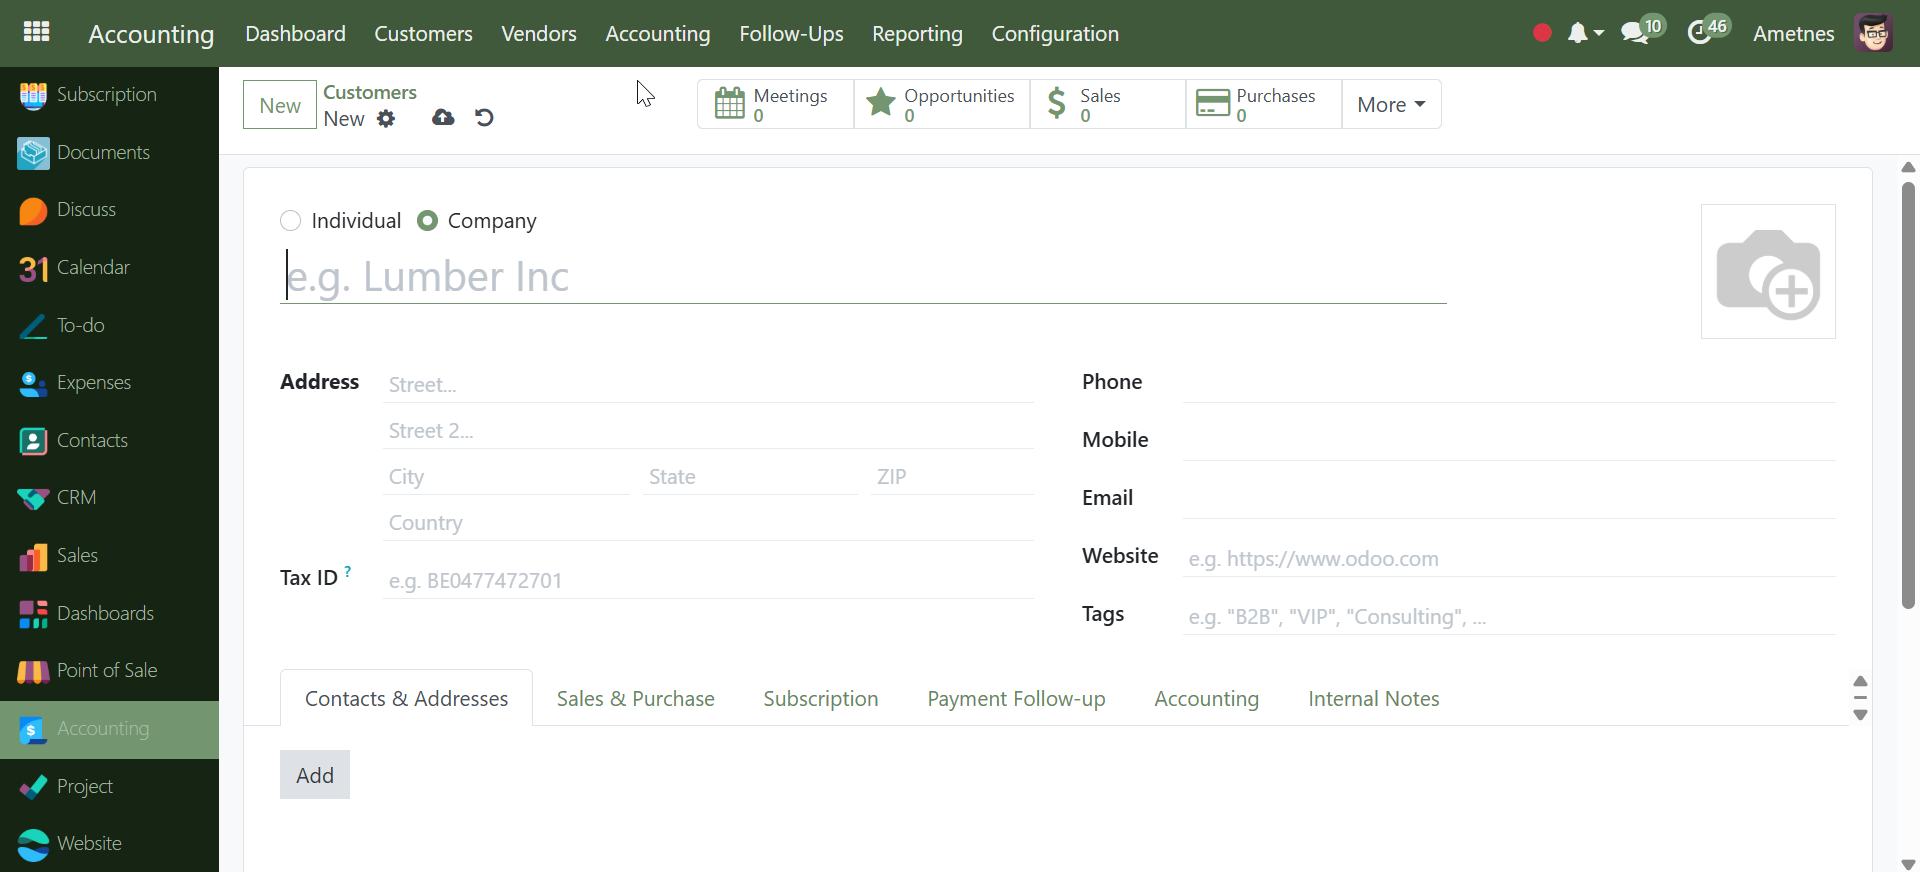
Step 2: Choose Customer Type#
- Individual: Personal customer
- Company: Business customer
Step 3: Fill Customer Details#
Basic Information: - Name: Customer full name (e.g., "Brandom Freeman")
-
Company Name: Business name (if Company type selected)
-
Job Position: Customer's role (e.g., "Sales Director")
-
Title: Professional title (e.g., "Mister")
Contact Information: - Phone: Primary phone number
-
Mobile: Mobile phone number
-
Email: Primary email address
-
Website: Company website (e.g., "https://www.odoo.com")
Address Details: - Street: Primary address line
-
Street 2: Secondary address line
-
City: Customer city
-
State: State or province
-
ZIP: Postal code
-
Country: Customer country
Business Information: - Tax ID: Tax identification number (e.g., "BE0477472701") - Tags: Customer categories (e.g., "B2B", "VIP", "Consulting")
Step 4: Additional Tabs#
The customer form includes several tabs for detailed management:
- Contacts & Addresses: Multiple contact persons and delivery addresses
- Sales & Purchase: Sales terms, credit limits, payment conditions
- Subscription: Recurring service agreements
- Payment Follow-up: Payment history and collection settings
- Accounting: Account settings and fiscal information
- Internal Notes: Private notes for internal team use
Step 5: Customer Stats#
The top bar shows quick stats: - Meetings: Scheduled appointments (0)
-
Opportunities: Sales opportunities (0)
-
Sales: Sales orders count (0)
-
Purchases: Purchase history (0)
Customer Management Features#
- Activity Tracking: Monitor customer interactions
- Search & Filter: Quick customer lookup with filters
- Bulk Operations: Handle multiple customers simultaneously
- Integration: Links to invoices, payments, and sales
- Contact Management: Multiple contacts per customer
- Address Management: Multiple delivery/billing addresses
Customer Workflow Summary#
Customers → New → Select Type → Fill Details → Add Contacts → Save
Complete customer database management for relationships and transactions.
✅ Invoice Operations#
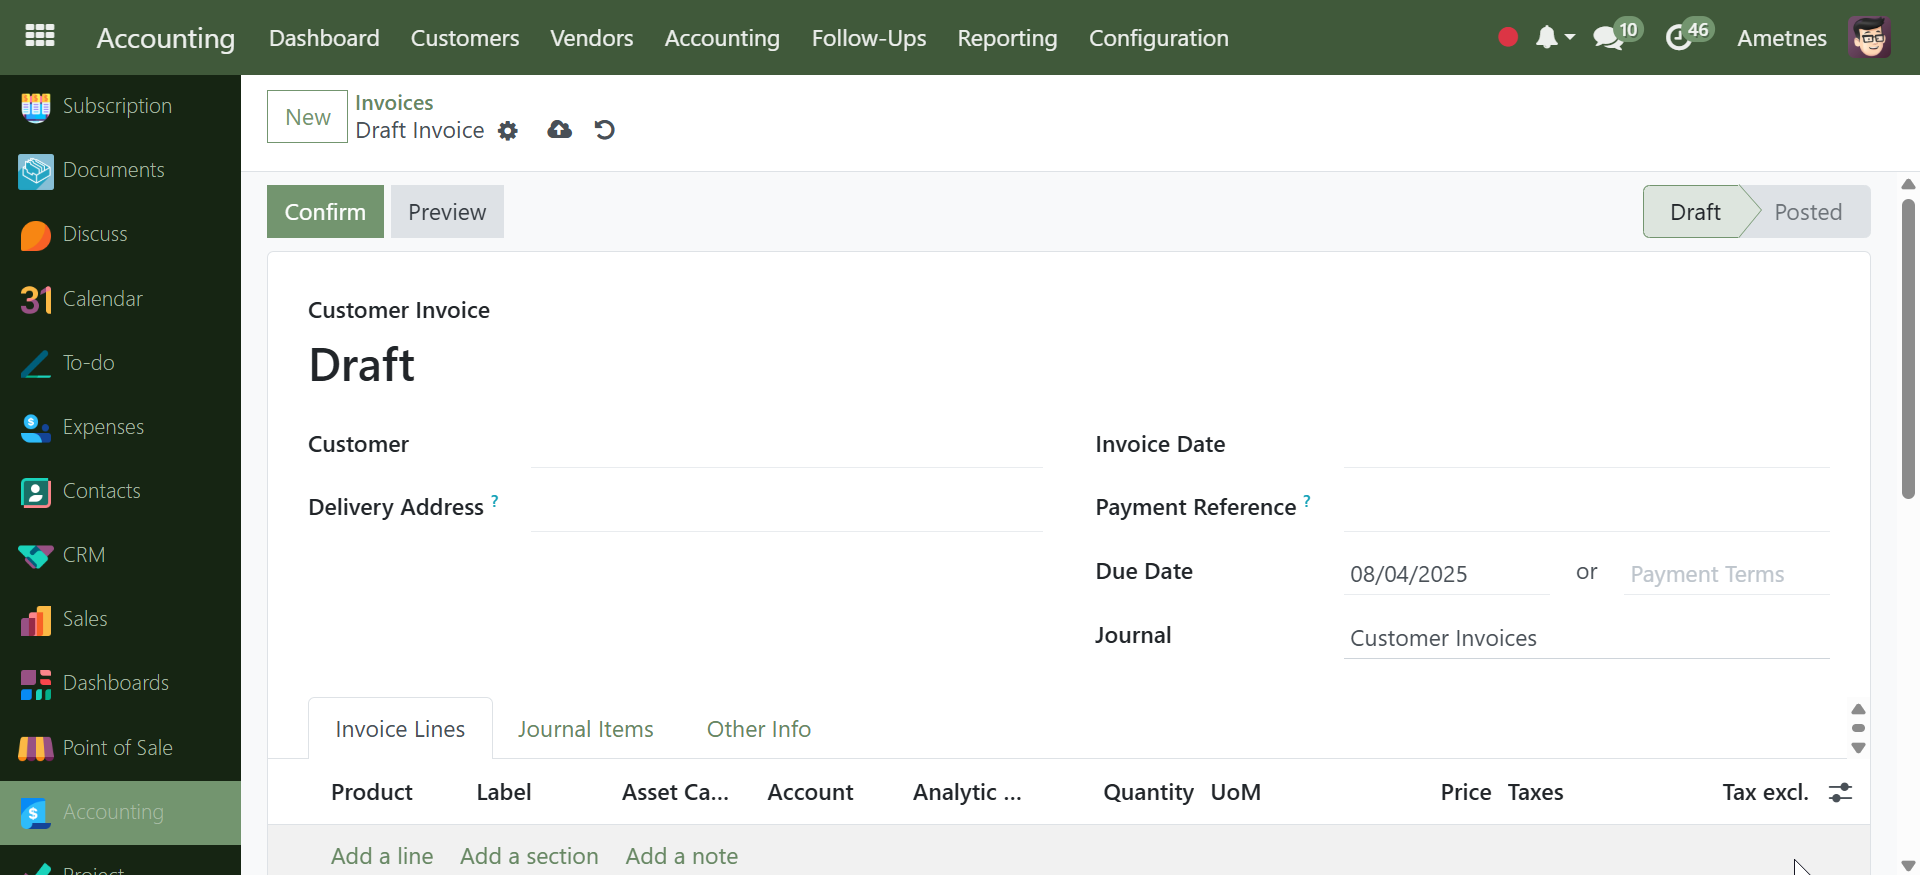
Creating a New Invoice#
Step 1: Start New Invoice#
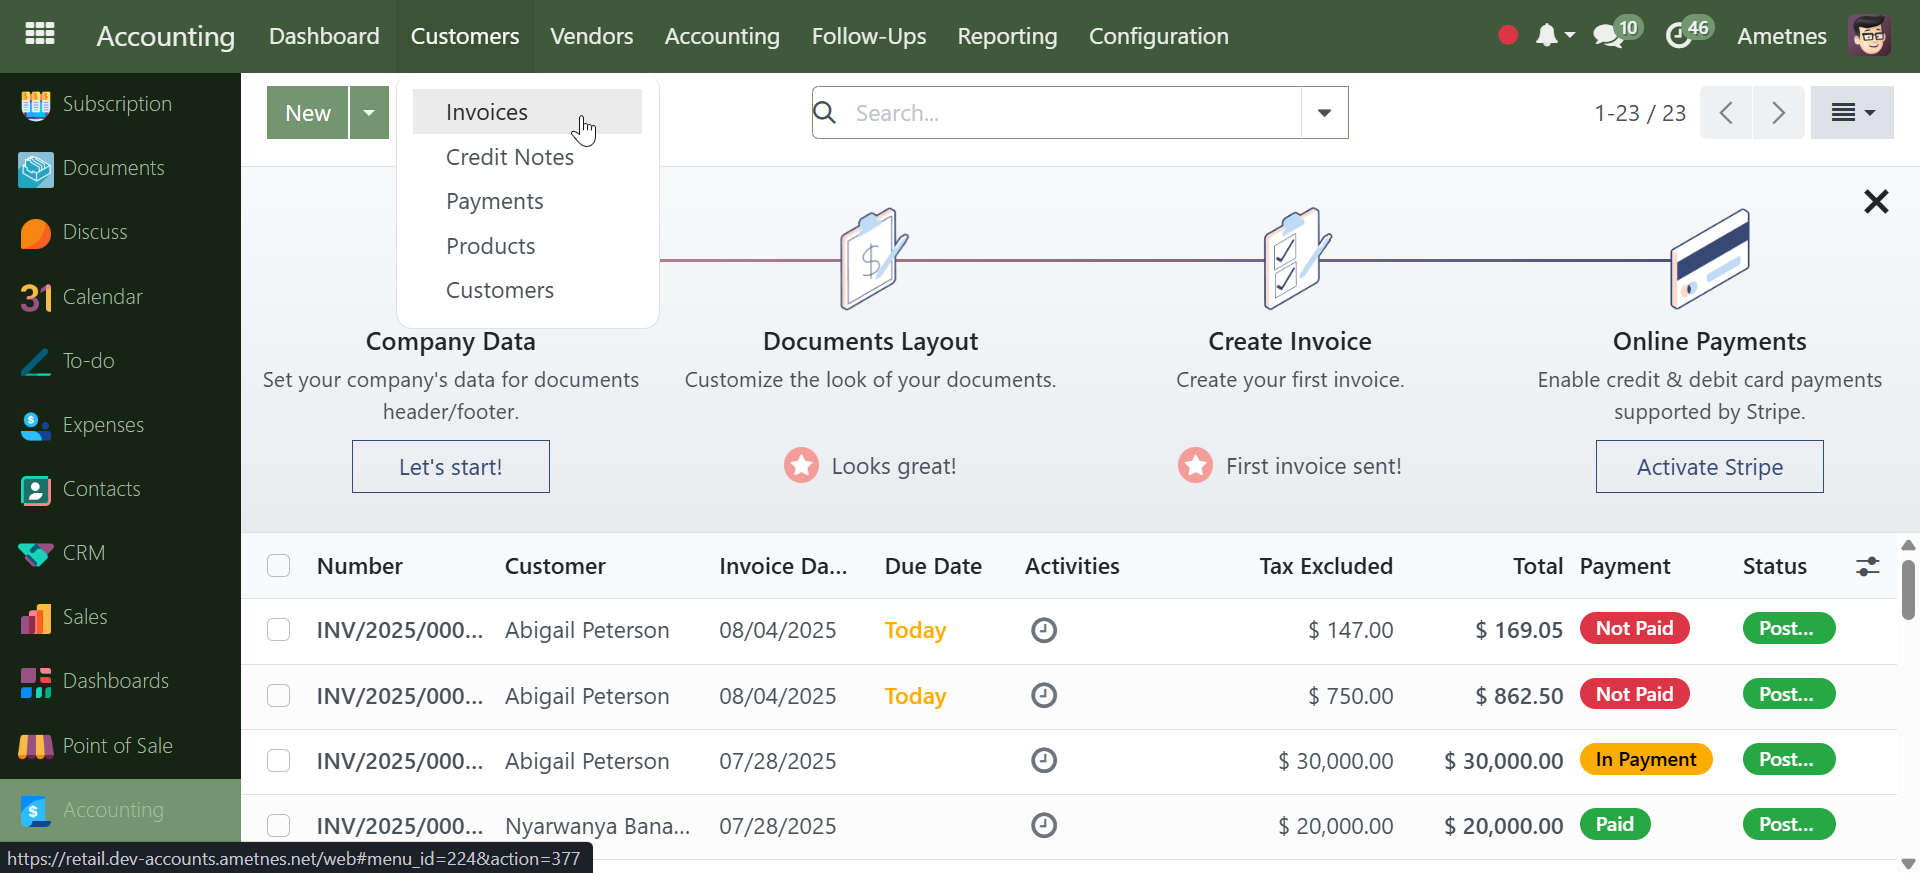
- Click Invoices from the menu
- Click New button to create a new invoice
Step 2: Fill Invoice Details#
- Add Customer: Select customer from dropdown
- Add Products: Add invoice line items with products/services
- Set Invoice Date: Choose the billing date
- Set Due Date: Payment deadline (auto-calculated or manual)
- Add other details: Delivery address, payment reference as needed
Step 3: Confirm Invoice#
- Review all details in the draft
- Click Confirm to convert draft to posted invoice
- Invoice status changes from "Draft" to "Posted"
After Confirmation#
Step 4: Send & Print#
Click Send & Print button to:
- Send via Email: Deliver invoice directly to customer's email
- Print/Download: Generate PDF document for printing or saving
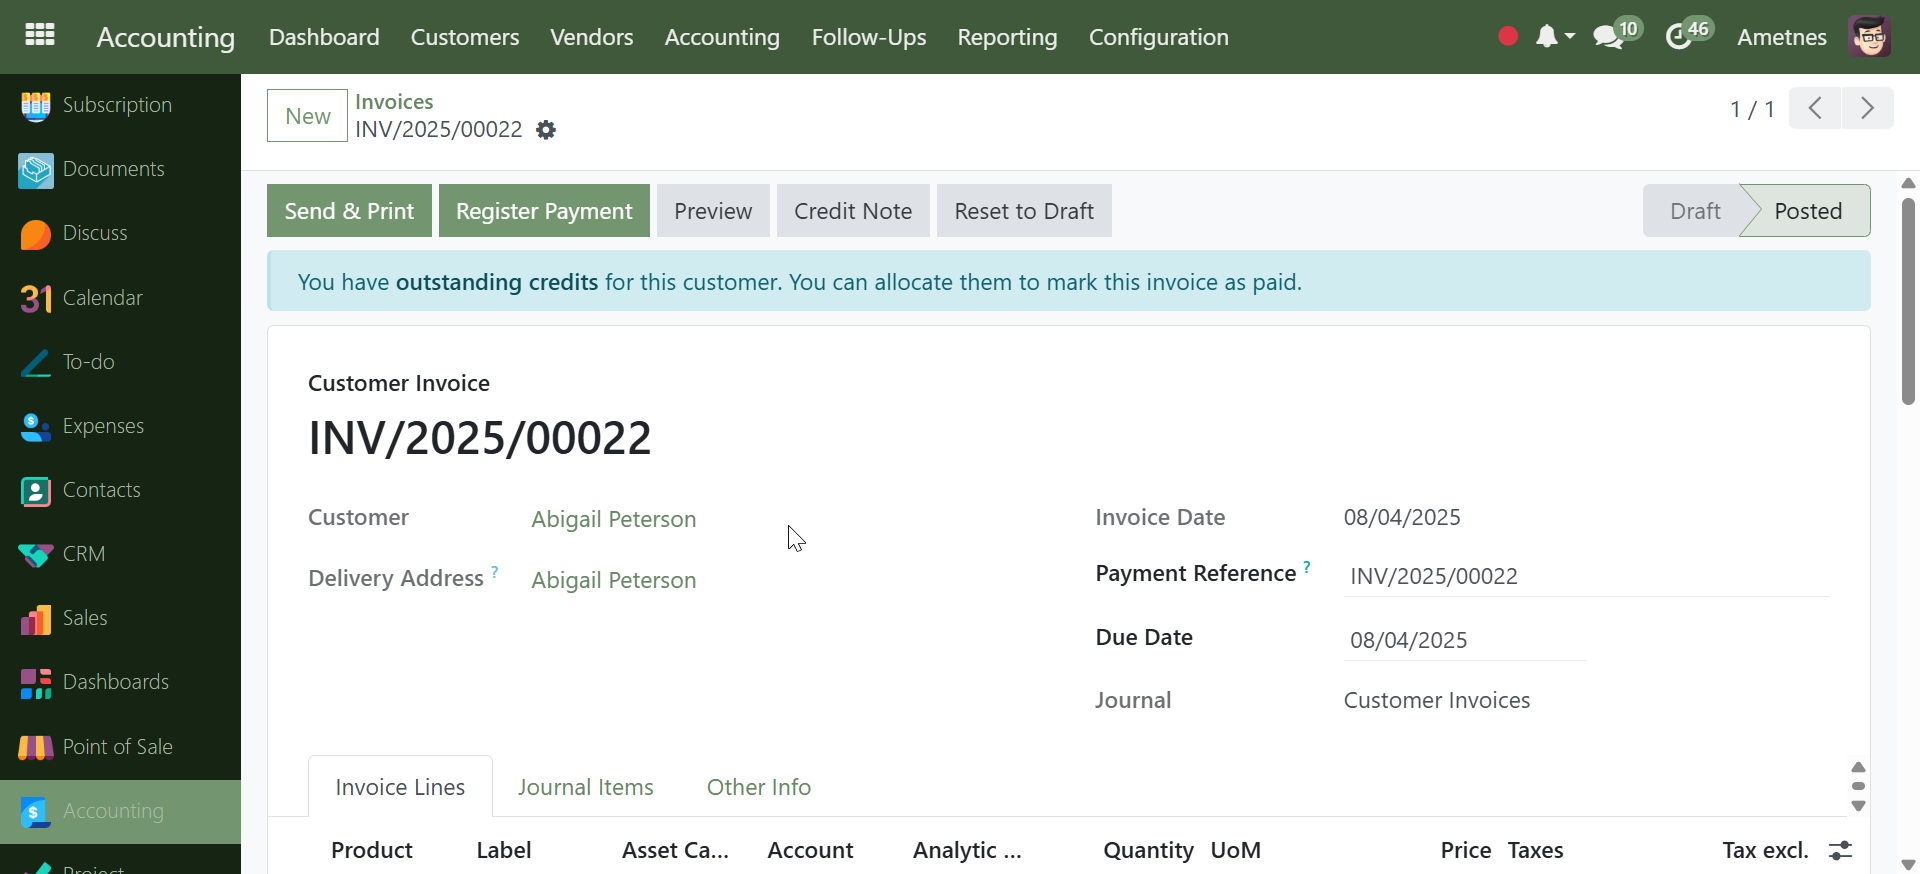
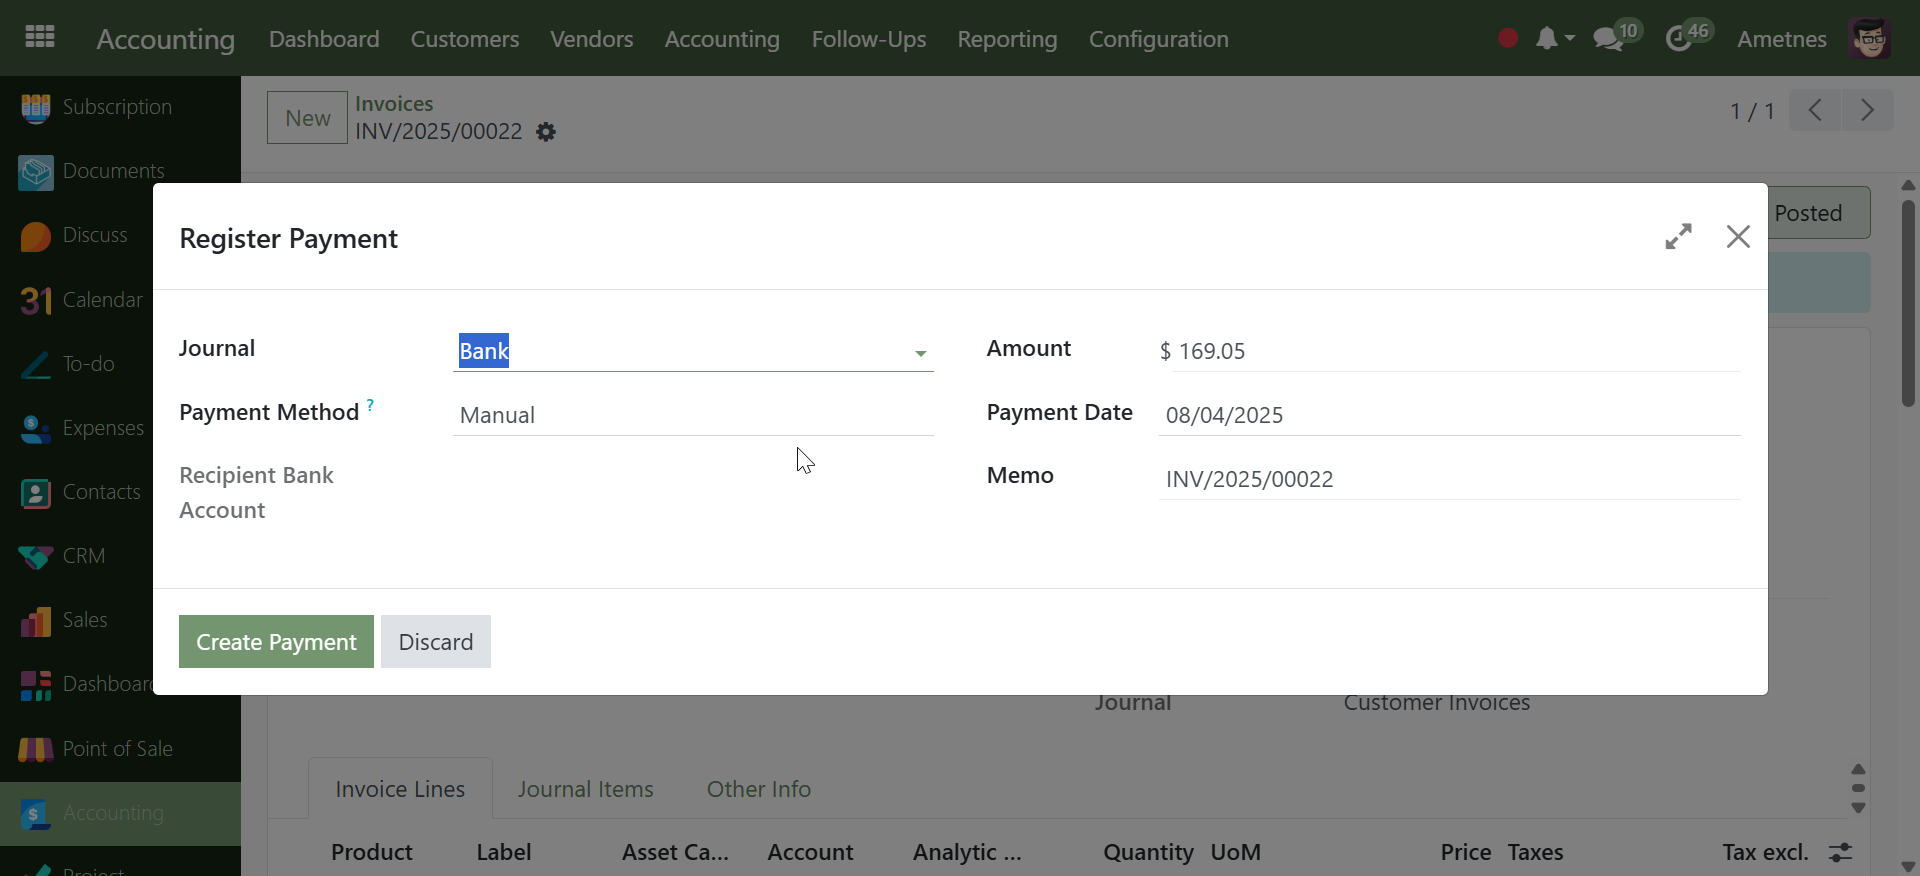
Step 5: Register Payment#
- Click Register Payment button when customer pays
- Record payment amount and method
- Invoice status updates to "In Payment" or "Paid"
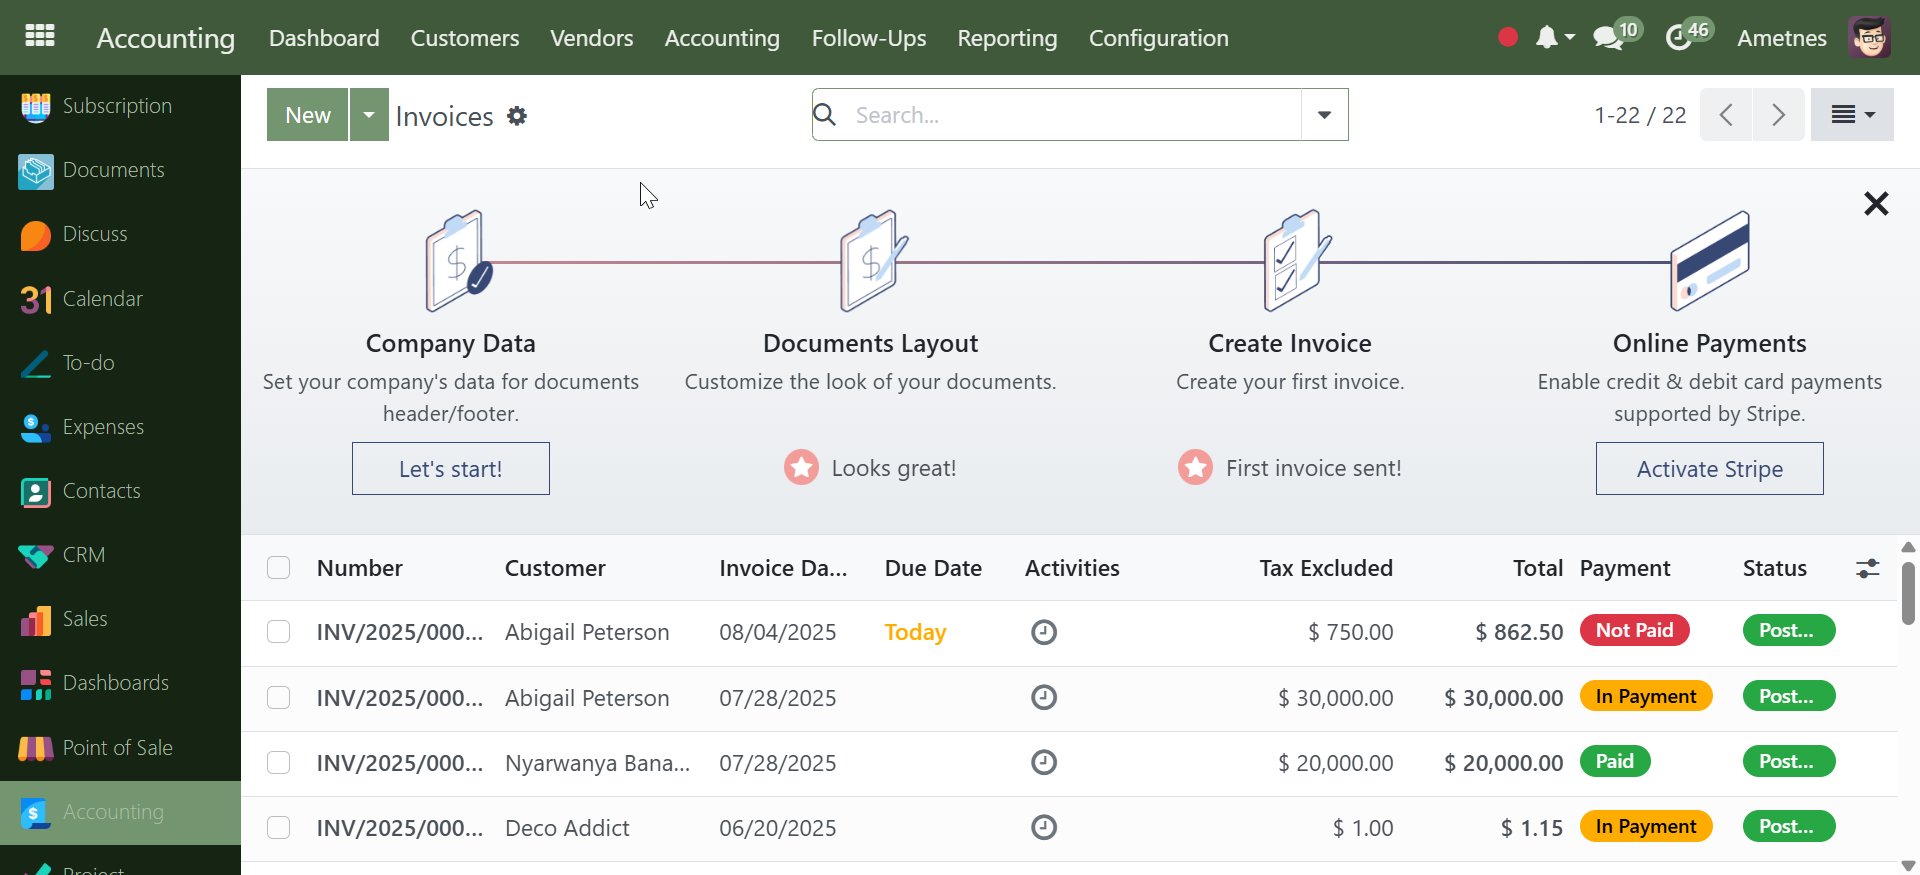
Invoice Statuses#
- Draft: Being created/edited
- Posted: Confirmed and ready to send
- In Payment: Partial payment received
- Paid: Fully settled
Additional Actions#
- Preview: View invoice before sending
- Credit Note: Issue refunds or adjustments
- Reset to Draft: Return to editable state (if needed)
Quick Workflow Summary#
Invoices → New → Add Customer & Products → Set Dates → Confirm → Send & Print → Register Payment
Follow this sequence for efficient invoice processing from creation to payment.
✅ Payment Processing#
- Recording customer payments
- Setting up payment terms
- Managing payment methods
- Tracking payment history
Customer Payments#
Overview#
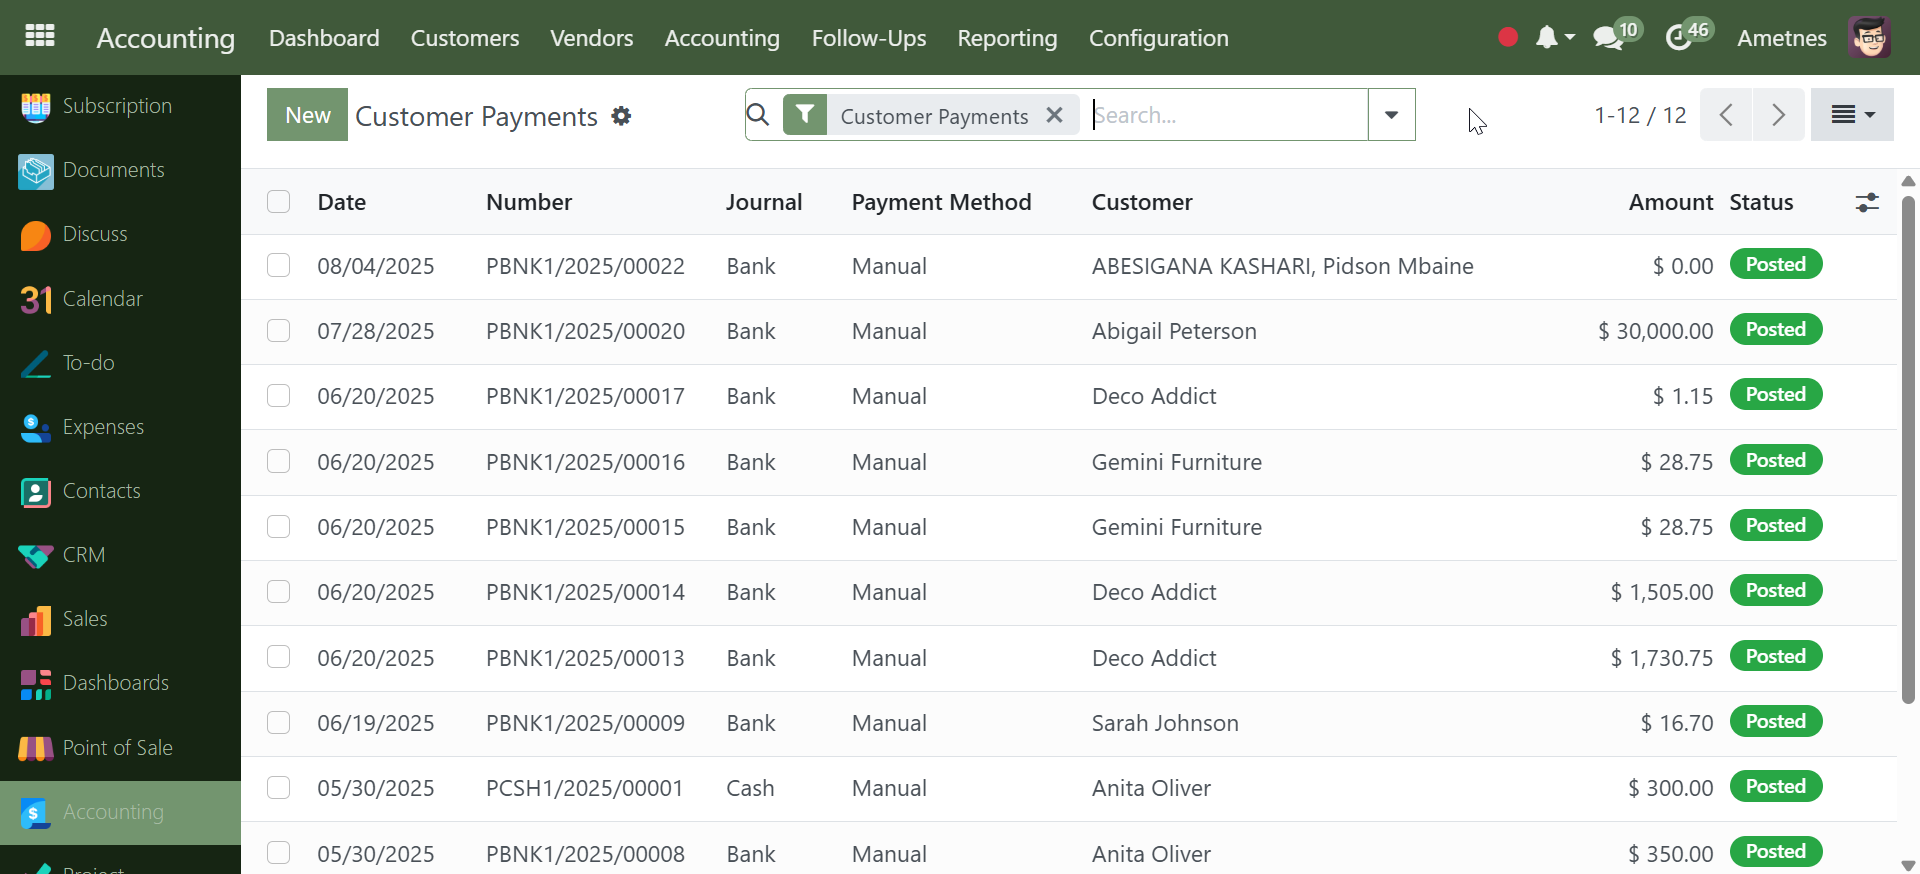
The Customer Payments section tracks and manages all payments received from customers.
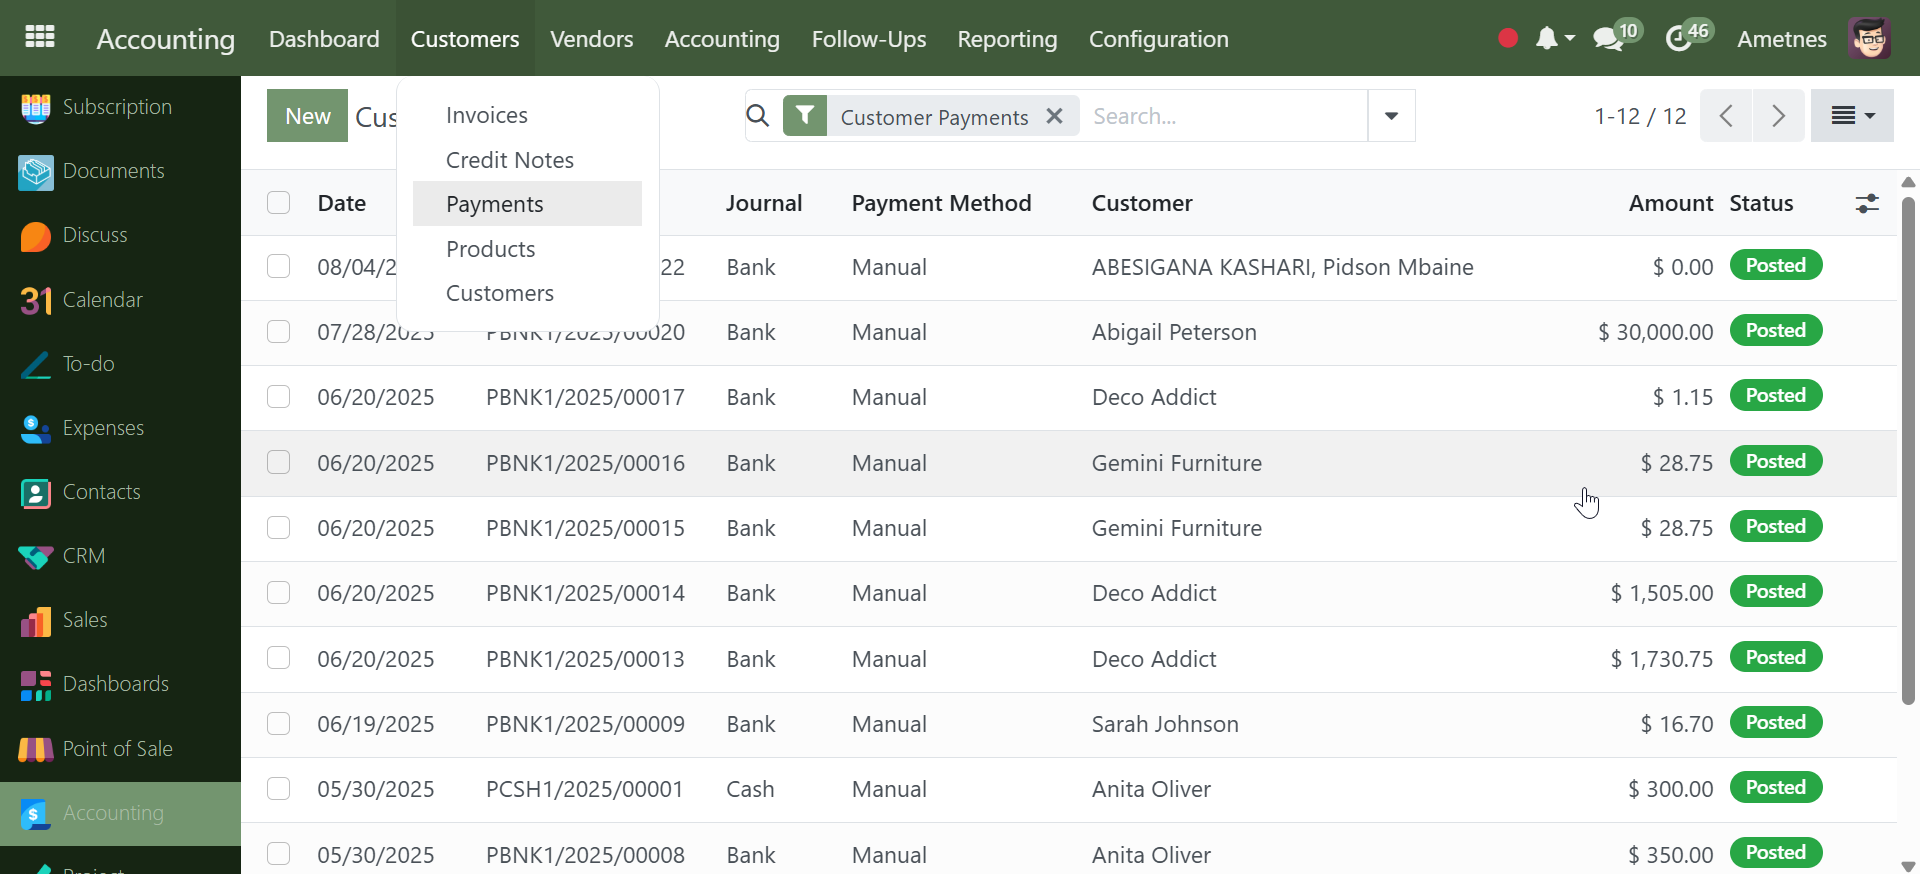
Viewing Customer Payments#
Payment List Dashboard#
Access by clicking Customer Payments to view:
Payment Columns: - Date: Payment received date
-
Number: Payment reference (e.g., PBNK1/2025/00020)
-
Journal: Account journal (Bank, Cash)
-
Payment Method: Manual, Electronic, etc.
-
Customer: Customer who made payment
-
Amount: Payment amount received
-
Status: Posted (confirmed payments)
Creating New Payment#
Step 1: Start New Payment#
- Click Customer Payments
- Click New button to create payment entry
Step 2: Fill Payment Details#
Required Fields: - Payment Type: Select "Receive" (for customer payments)
-
Customer: Choose customer from dropdown
-
Amount: Enter payment amount received
-
Date: Payment received date
-
Journal: Select Bank or Cash journal
-
Payment Method: Choose Manual or other method
-
Company Bank Account: Select receiving account
Optional Fields:
-
Internal Transfer: Check if transferring between accounts
-
Memo: Add payment notes or reference
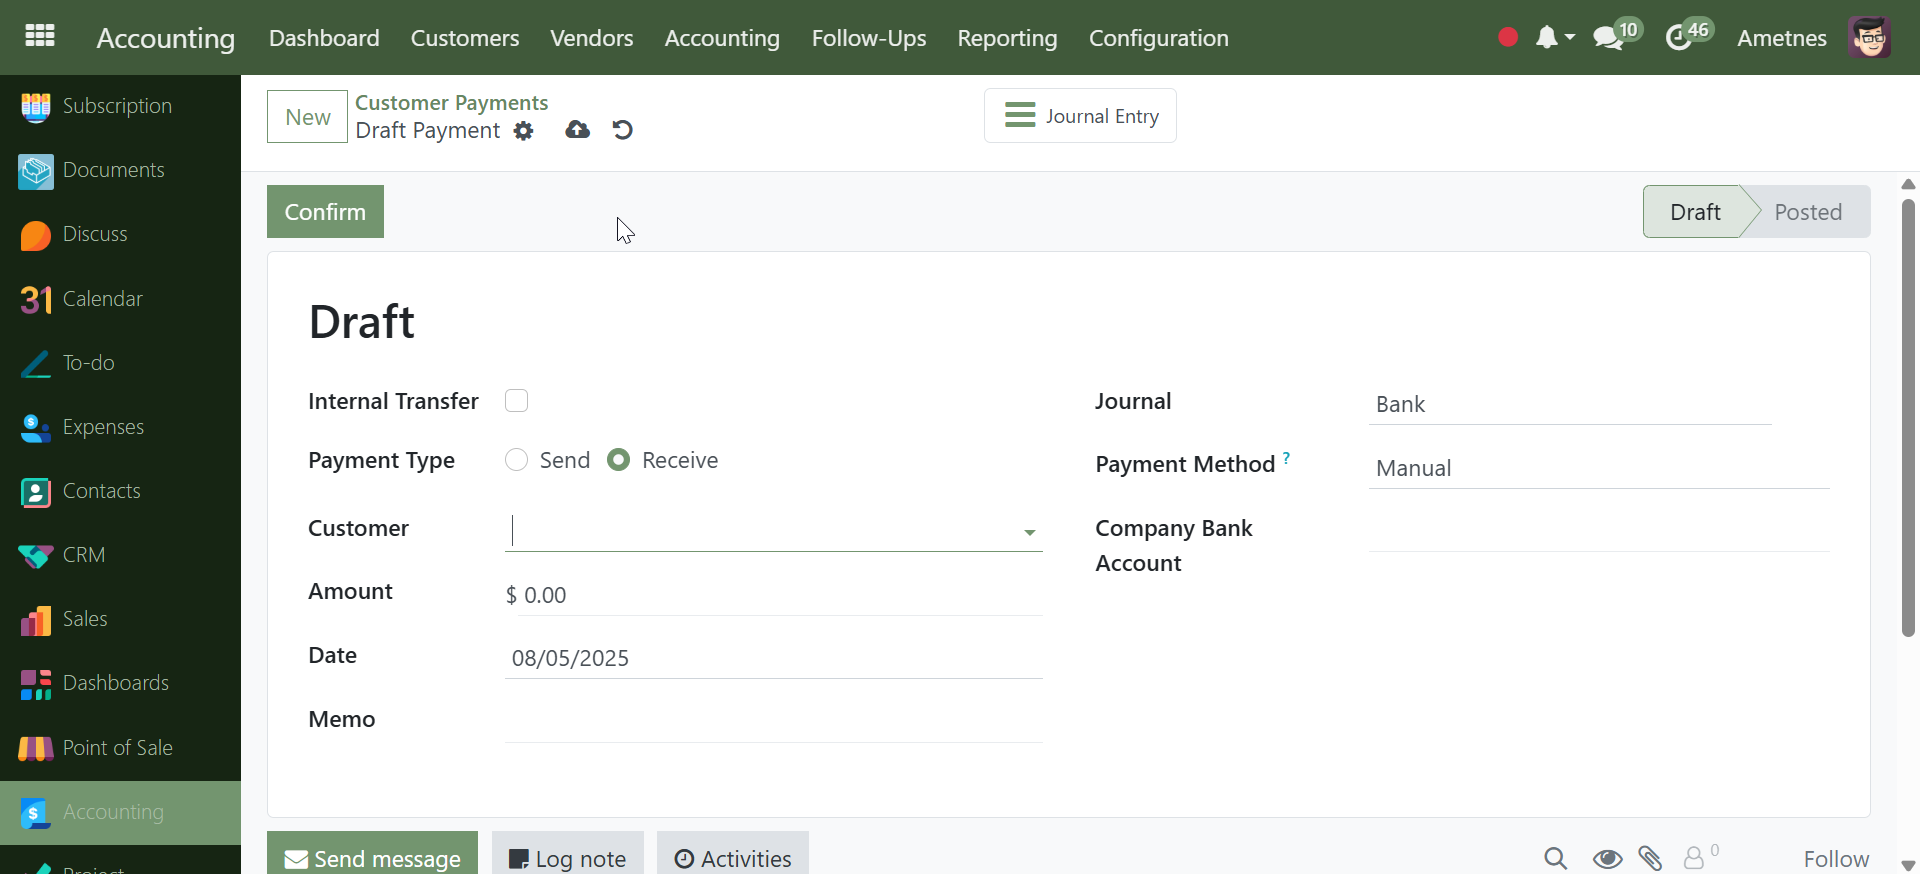
Step 3: Confirm Payment#
- Review all payment details
- Click Confirm to post the payment
- Payment status changes from "Draft" to "Posted"
Payment Features#
- Automatic Numbering: System generates payment references
- Journal Integration: Links to bank and cash accounts
- Customer Matching: Associates payments with customer accounts
- Activity Tracking: Logs all payment activities
Payment Workflow Summary#
Customer Payments → New → Select Customer → Enter Amount & Details → Confirm
Complete payment processing from receipt to posting in the accounting system.
✅ Credit Notes & Adjustments#
- Issuing credit notes
- Processing refunds
- Managing credit limits
- Handling disputes and adjustments
Credit Notes#
Overview#
Credit Notes are used to issue refunds, corrections, or adjustments to customer accounts. They reduce the amount owed by customers.
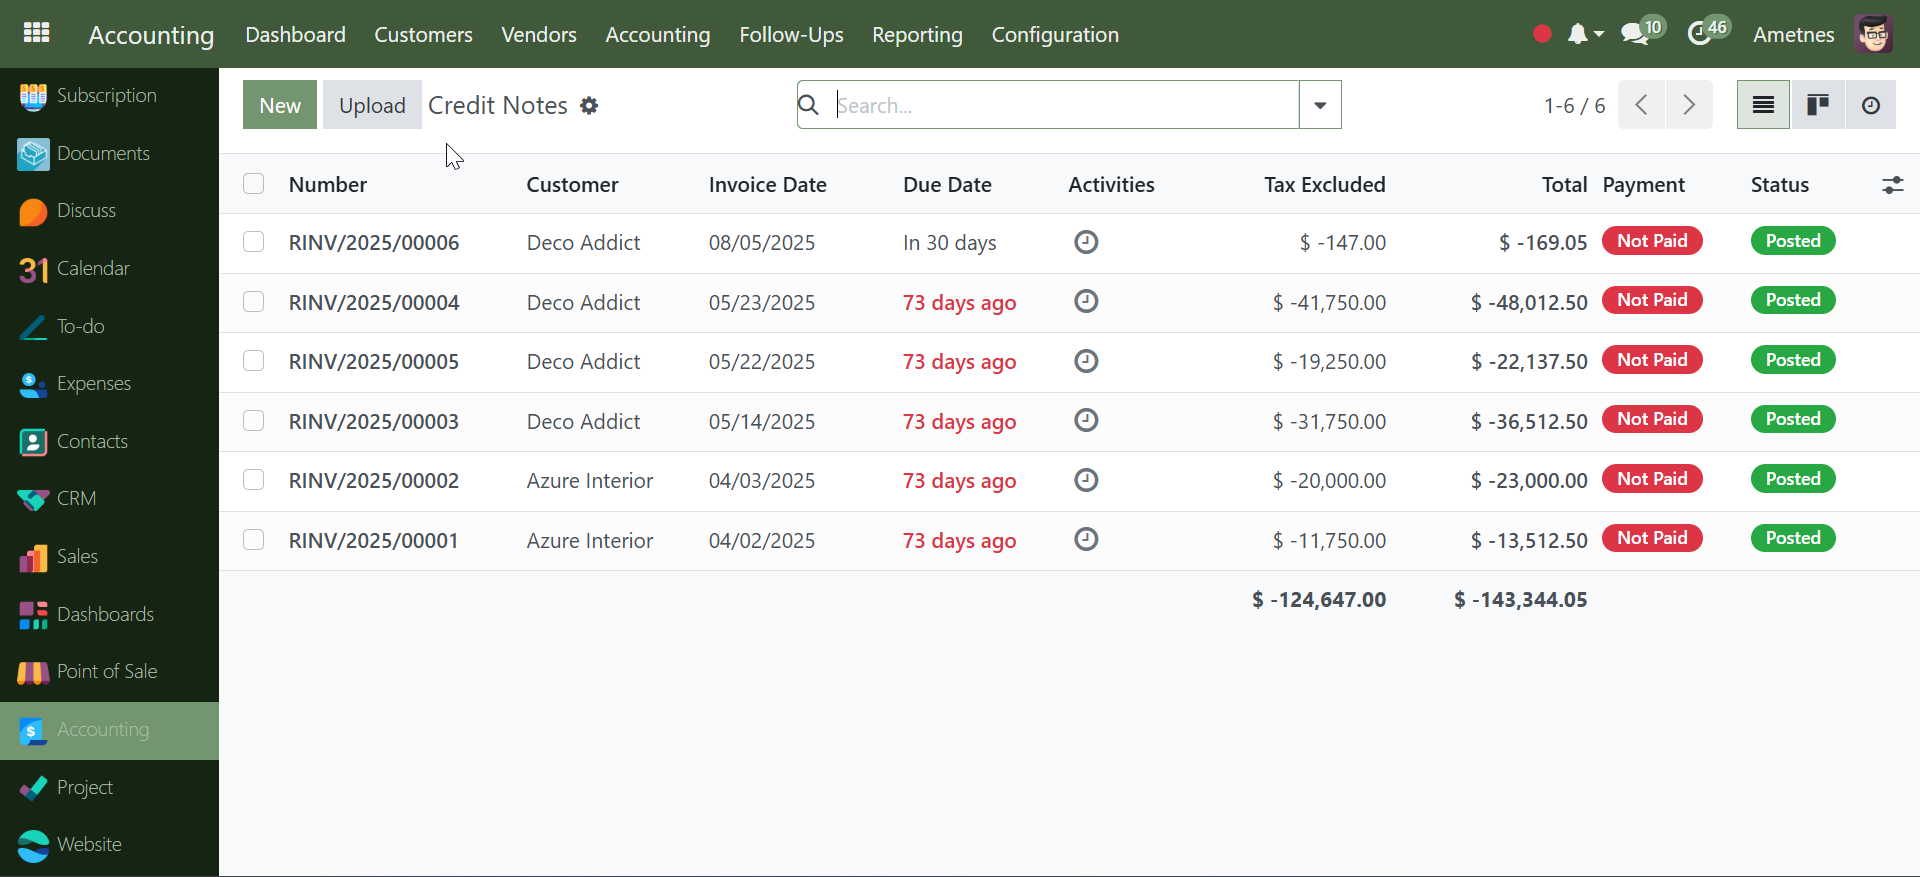
Viewing Credit Notes#
Credit Notes List Dashboard#
Access by clicking Credit Notes to view:
Credit Note Columns: - Number: Credit note reference (e.g., RINV/2025/00004)
-
Customer: Customer receiving the credit
-
Invoice Date: Date credit note was issued
-
Due Date: Shows overdue status (e.g., "73 days ago")
-
Activities: Action logs and communications
-
Tax Excluded: Credit amount before tax
-
Total: Final credit amount including taxes
-
Payment: Payment status
-
Status: Not Paid (outstanding credits) / Posted (confirmed)
Creating New Credit Note#
Step 1: Start New Credit Note#
- Click Credit Notes
- Click New button to create credit note
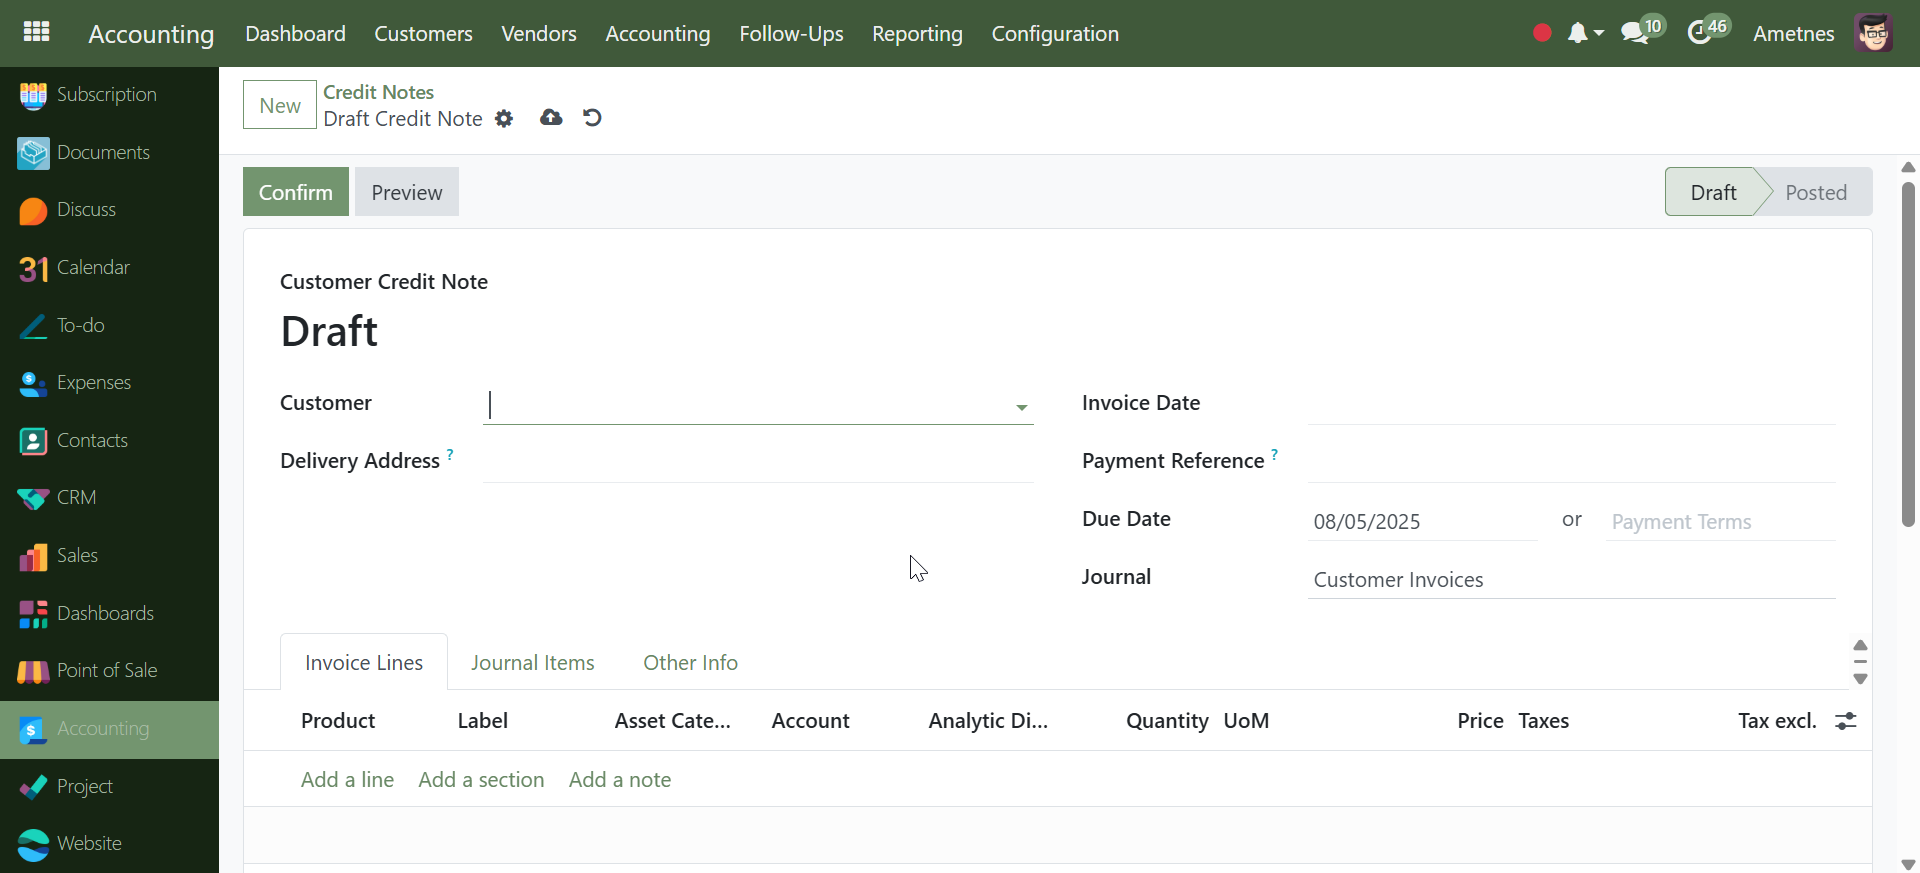
Step 2: Fill Credit Note Details#
Required Fields: - Customer: Select customer from dropdown
-
Invoice Date: Credit note issue date
-
Due Date: Auto-calculated or manual entry
-
Journal: Assigned to Customer Invoices
Optional Fields: - Delivery Address: Customer delivery location
-
Payment Reference: Internal reference number
-
Payment Terms: Credit terms (e.g., 30 Days)
Step 3: Add Credit Lines#
In the Invoice Lines tab: - Product: Select product being credited
-
Label: Description of credit reason
-
Asset Category: Product classification
-
Account: General ledger account
-
Analytic Account: Cost center tracking
-
Quantity: Units being credited
-
UoM: Unit of measure
-
Price: Credit amount per unit
-
Taxes: Applied tax rates
-
Tax Excluded: Line total before tax
Step 4: Confirm Credit Note#
- Review all credit details
- Click Confirm to post the credit note
- Status changes from "Draft" to "Posted"
After Confirmation#
Available Actions:#
- Send & Print: Email credit note to customer and generate PDF
- Register Payment: Apply credit to outstanding invoices
- Preview: View final credit note format
- Reset to Draft: Return to editable state (if needed)
Credit Allocation#
- Outstanding Debits: System shows if customer has outstanding invoices
- Automatic Allocation: Credits can be automatically applied to mark invoices as paid
- Manual Allocation: Manually assign credits to specific invoices
Credit Note Features#
- Negative Amounts: Credits show as negative values
- Automatic Numbering: System generates RINV references
- Tax Calculations: Automatic tax adjustments
- Customer Balance: Updates customer account balance
- Aging Tracking: Monitors overdue credit applications
Credit Note Workflow Summary#
Credit Notes → New → Select Customer → Add Credit Lines → Confirm → Send & Print → Register Payment
Complete credit note processing for refunds, returns, and account adjustments.
✅ Reporting & Analytics#
- Customer aging reports
- Payment analytics
- Invoice status reports
- Customer performance metrics
✅ Integration Features#
- Bank account connectivity
- Tax calculations
- Chart of accounts integration
- Automated workflows
Getting Started#
Before diving into specific features, ensure you have: - Proper user permissions for customer management - Basic understanding of your chart of accounts - Customer information ready for input - Payment terms and policies defined
Navigation Tips#
- Use the search functionality to quickly locate specific customers
- Utilize filters to view specific invoice statuses
- Access the favorites feature for frequently used functions
- Monitor the dashboard indicators for pending tasks
This documentation will guide you through each aspect of the Customers menu, providing step-by-step instructions and best practices for optimal customer management within your accounting system.